


Version 1.00
VERY IMPORTANT
It is highly recommended that this manual is read thoroughly and that the default data supplied with Dynasoft TelecomBilling.Net is used to accustom oneself with the portal. This will make porting new data to your Telecom CDR SMDR billing software system a lot easier.
Fully test all billing scenarios before final invoices are sent out to customers. This includes any change in your data that was the result of modifications Dynasoft might have done following a request for support. Finally, ensure that regular off-server backups are done of all your data.
Please do not send us any sensitive information contained in your files such as customer credit card details, smtp details,…
We recommend reading the portal’s user Guide and Read me page first before reading this manual.
1. Upgrading your portal to newer versions
The system automatically upgrades itself whenever you log in and the system detects a newer version. If it does so, logging in might take a bit longer than normal. Please wait for the Dashboard to load if you see the spinner box takes longer than normal to unload.
2. Getting Started
To sign-up to our service, visit the following page: https://www.telecombilling.net/signup/
Fill in the usual details and submit the form. You will receive in your mailbox an activation link. Visit the log-in page to start using your account: https://www.telecombilling.net/users/login/.
You will be asked to confirm your acceptance of the portal’s Terms and Conditions.
3. How to Use the Portal
3.1. Log in
This manual deals with Dynasoft TelecomBilling.Net and its support for MySQL and MsSQL (coming soon).
A user log-in can fail for the following reasons:
- User login details are incorrect
- User has not been activated
- User is blocked by the administrator
- User was disconnected by administrator but the user should be able to log back in
3.2. Landing Page
Access: After logging into your portal
The seven main menu items in the portal and their individual sub-items are the following ones:
- Home:
- Dashboard: perform regular tasks and access an extensive set of financial and business data
- Customers, distributors and suppliers: Manage all business contacts from these three pages
- Billing: This is where all billing tasks are performed
- Data:
- CDR data: View and manage all rated CDR data
- Price lists: Add, import and delete all price lists from this page
- Price list details: Access the content of the price lists for all your services
- Transactions: Access all of your contacts’ transactions
- Invoices: Access all of your contacts’ invoices
- Assets:
- DDIs: Management of all the DDIs that can be allocated to the customers
- SIMs: Management of all the SIMs that can be allocated to the customers
- Inventory: Management of all the stocks items within your organisation
- Packages: Voice/data bundles that can be allocated to customers
- Subscriptions: Recurrent charges, products and services that can be allocated to customers.
- Tools:
- Messaging: Configure the portal to send all your customer’s invoices automatically to them once these have been created
- Import data: Import all the data the system needs using an easy-to-use import utility
- Exported data: This shows all the data that was exported as you use the portal (billing files, exported price lists,…)
- Retrieval of CDR files via FTP: Automatic or manual retrieval of CDR files and unzipping of all files if required
- Financial reports: Three hundred reports giving full and precise control over all your business’s activity
- Web Access: Go to the administrator area of your contacts’ portal
- Settings:
- Configuration: This is where all the configuration elements of your portal are set, such as the times when peak and weekend rates start, payment methods, VAT, currency used, portal language, call types, options for your distributors and your customer’s invoices and subscriptions that have to be billed for your customers.
- Voice Settings: Define the call types used when rating voice calls and more
- Service Settings: Define the service types used when rating recurrent WLR-type services and more
- CDR Formats: Define the types and formats of the CDR data used
- Billing files: Configure the European payment standard ‘SEPA’
- FTP: Define the FTP servers the system needs to access in order to download the CDR files
- Web Access: Define the settings for the contacts’ Web Access
- Payment services: Settings for your online payment accounts (GlobalPay, Paypal, Skrill, SagePay, Stripe and Authorize.net) (coming soon).
- Accounting: Settings for Sage Accounts or Xero (Accounting add-on only)
- System:
- User accounts: Add, modify or delete the users that are authorised to access the portal and define their access rights
- Maintenance: Reset certain aspects of the portal: the locking of records, rebuild the service numbers (SNs) and finally the association between the customers’ subscriptions and their SNs. These resets can also be done via the configuration page, under points ‘7.A.3’, ‘7.A.4’ and ‘7.A.6’ respectively
- Logs: This page details any messages or errors found by the system that usually need to be addressed so the system runs smoothly
- Help:
- Manual: Access this manual directly via your main interface
- Guide: Access to the online guide of the portal
- Support: Access your support resource, email form and Web chat
- About…: Copyright information about Dynasoft TelecomBilling.Net, link to our Website to purchase the product and link to the latest news about your portal.
In the status bar under the menus, one can keep track of the status of the tasks of the Tools menu if these have been activated. A green LED means the task is underway. A red one means it is idle.
When entering your own data into TelecomBilling.Net, start by first entering your price lists (see chapter 3.5.1), then your CDR formats (see chapter 3.4.2.3) and finally your customers (see chapter 3.4.2.1).
3.3. Settings
3.3.1. Portal configuration
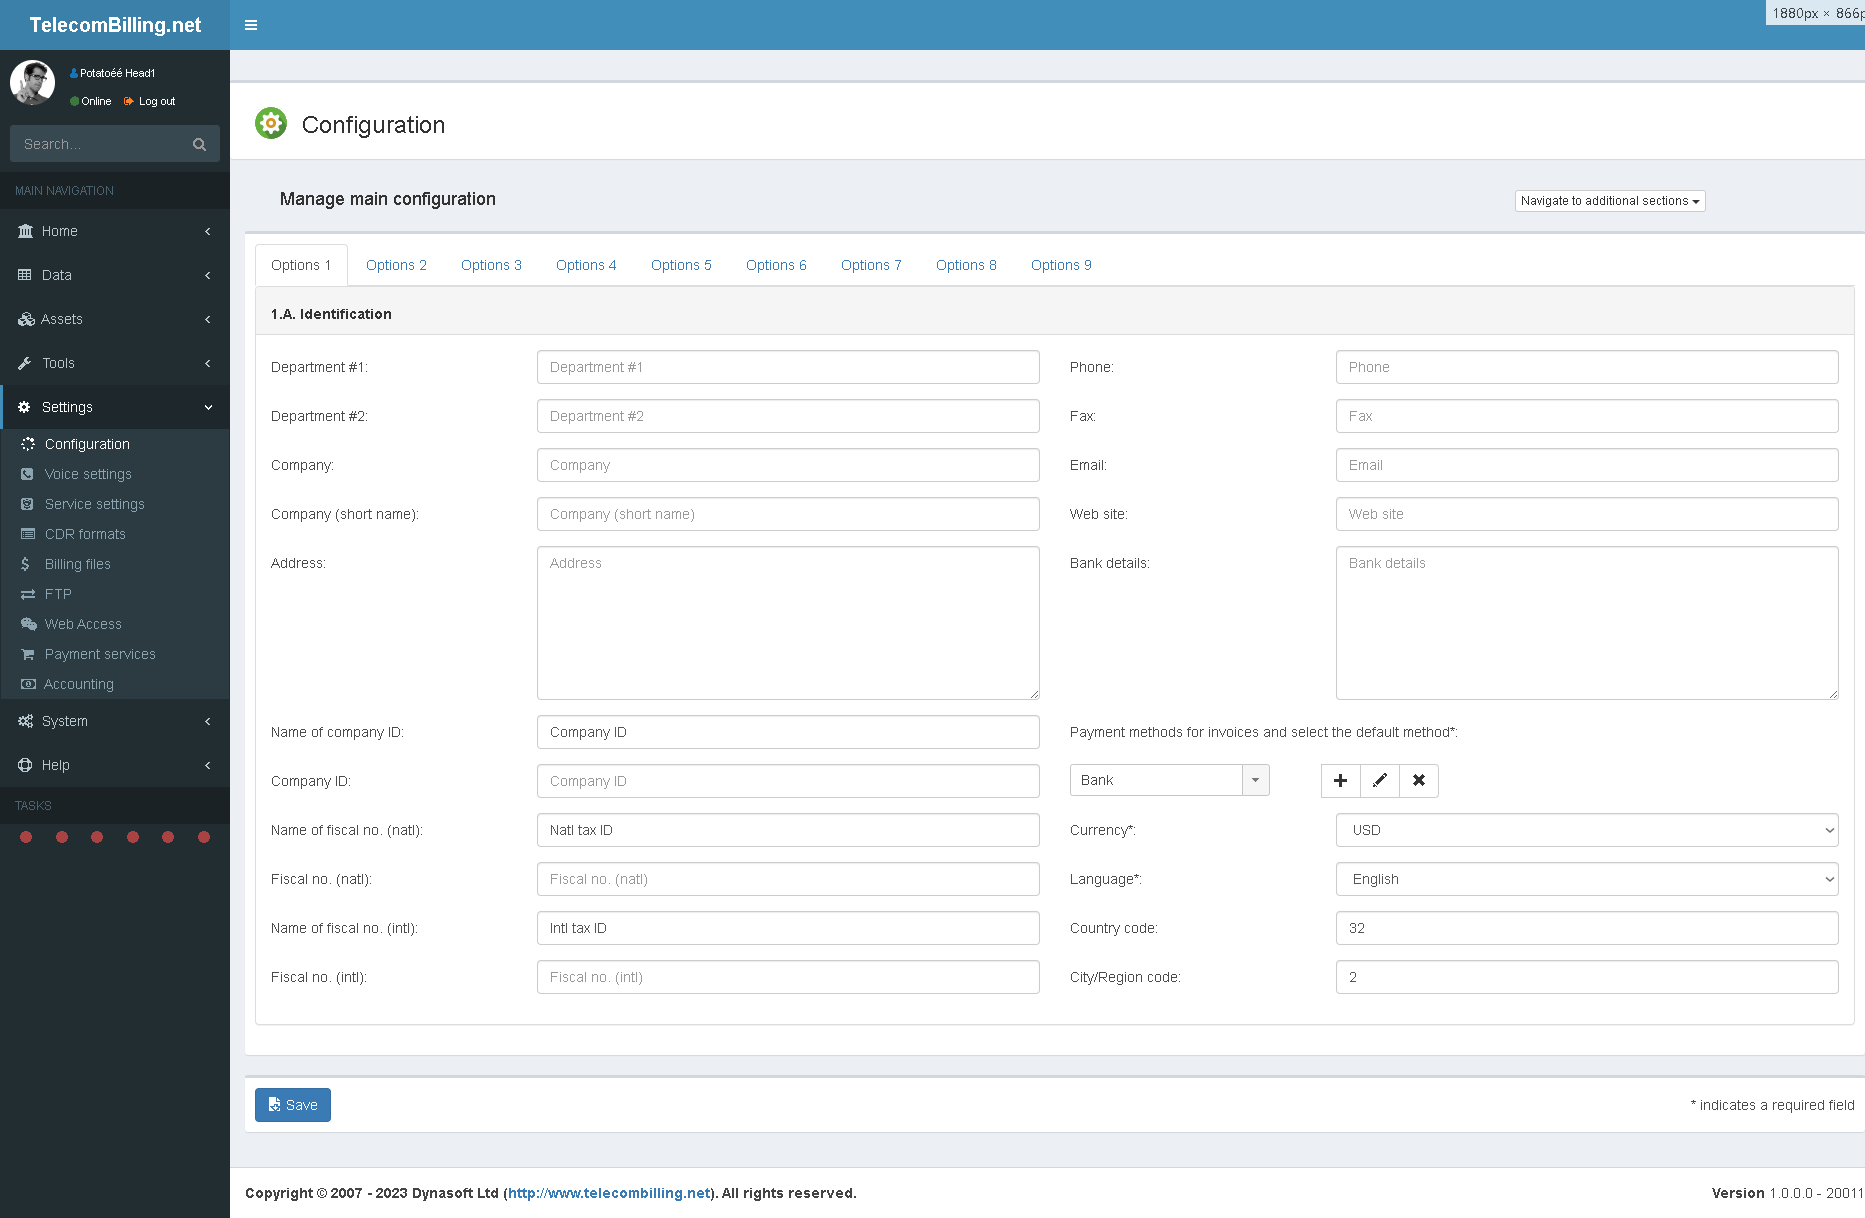
Access: Land page > Settings > Configuration > First tab
Main Configuration
Many of the parameters in the configuration page also exist in the contacts’ pages. If nothing is modified there, then the portal will use the global settings defined in the configuration. Settings in the contacts’ pages that override those of the configuration are marked with two stars (**).
1. Identification
Identify your company’s details. Specify how fiscal or company ids are called in your country where requested. Add, remove and select what are your payment methods for the customers. If no payment method is specified for each customer, the default method identified here will appear on the customer invoice. The currency you work with. This will be used throughout the system and will appear on the invoices if it was not overridden inside a contact page. Your preferred language for your Telecom CDR SMDR billing software system.
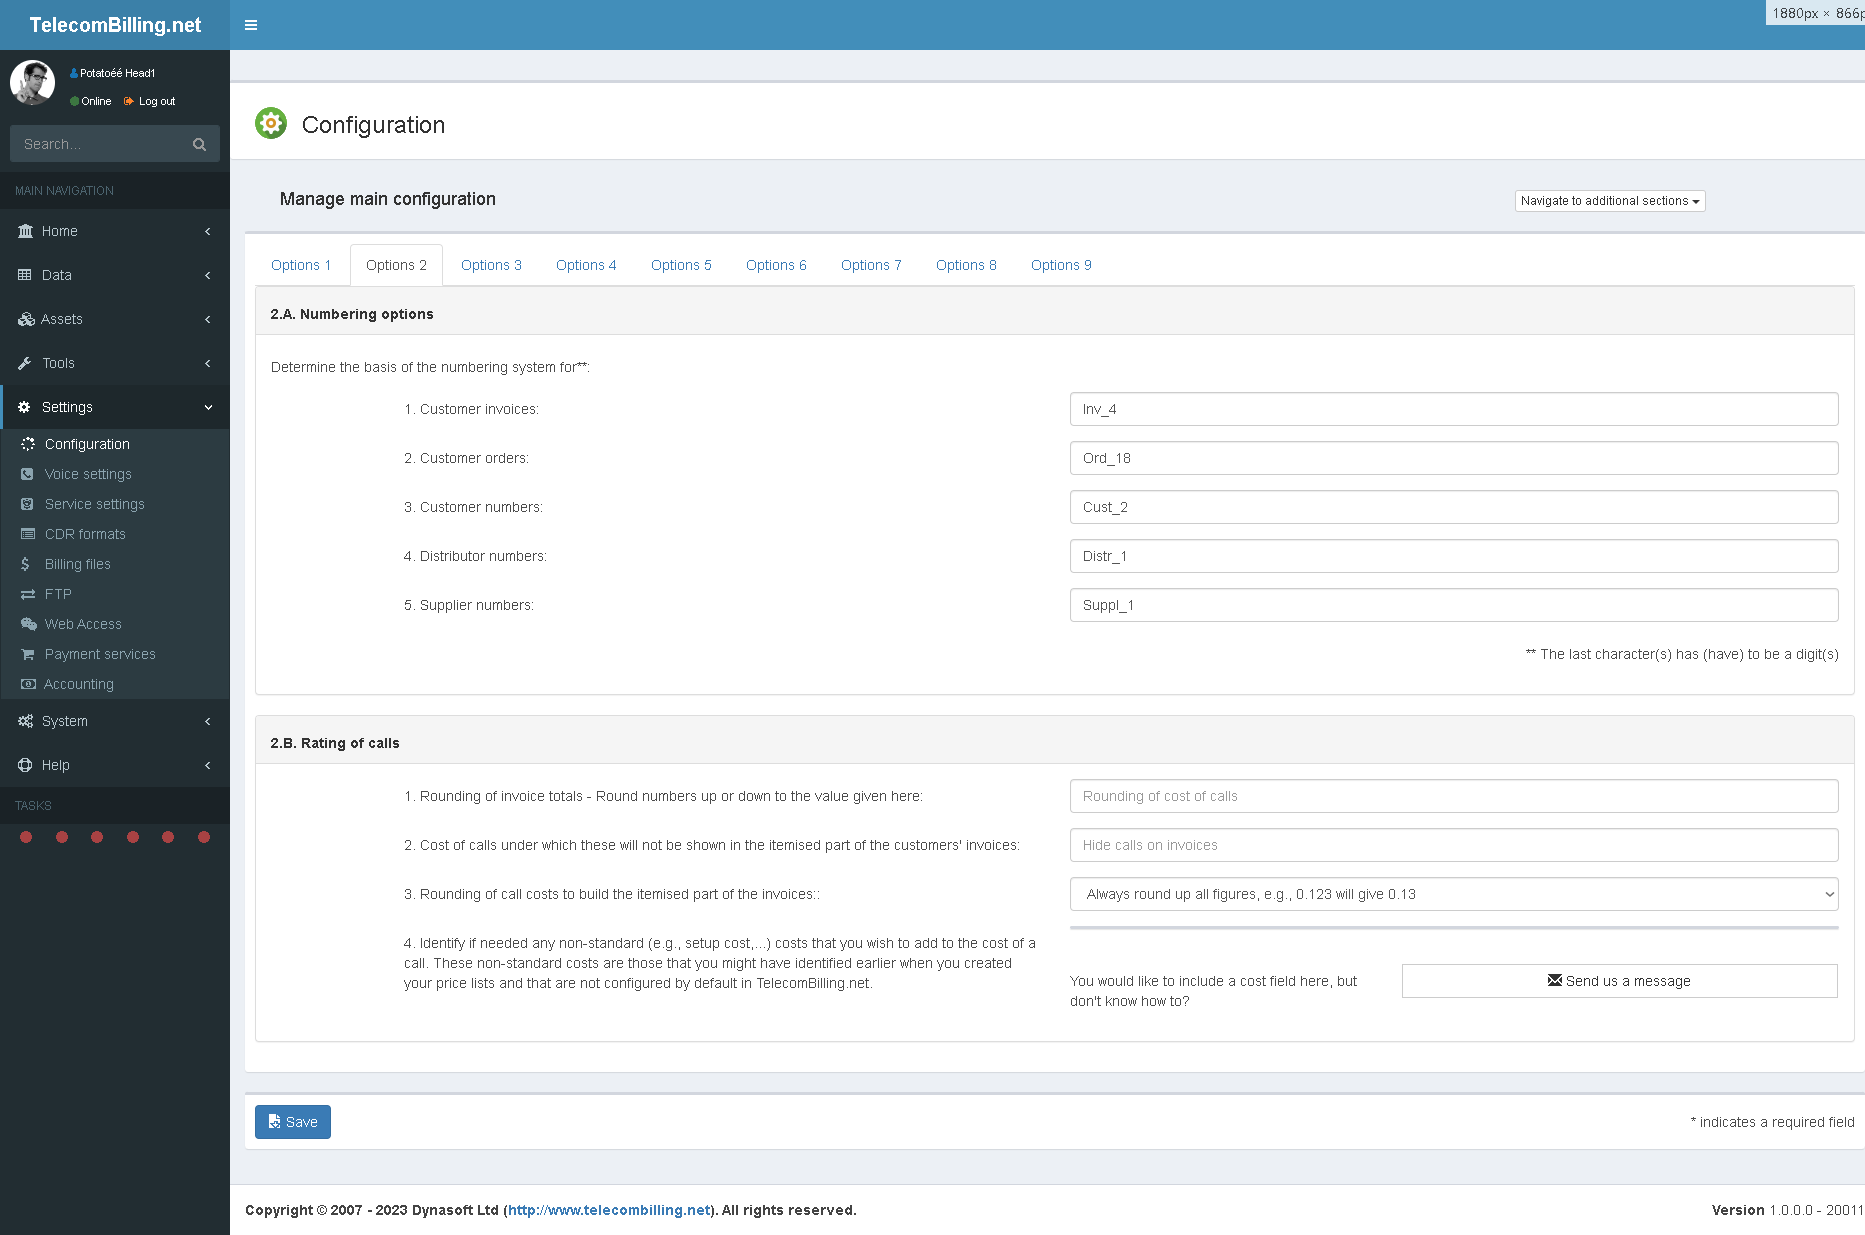
Access: Landing page > Settings > Configuration > 2-9 tabs
2. A. Numbering options
- Here, write in the numbering system that will used to keep track of invoice numbers. They will increment automatically as long as you specify a digit as the last character at least. By default the system uses ‘INV_0’, but any other system can be specified.
- Write in the numbering system that will used to keep track of order numbers.
- Write in the numbering system that will used to keep track of customer numbers.
- Write in the numbering system that will used to keep track of distributor numbers.
- Write in the numbering system that will used to keep track of supplier numbers.
2.B. Rating of calls
- This option makes it possible to round the total of a customer invoice. Write a number to which the portal will round an invoice total. For example, if an invoice comes to 345.23 and one has written a value for the number of 0.30, then the new total will 345.30.
- To avoid creating pages and pages of invoice itemisation with too many calls with too small a value, specify a minimum value below which they will be ignored. This will not affect invoice totals.
- How decimal monetary values are rounded up or down or as a 4 decimal number.
- When importing price lists as per chapter 3.5.1, you may create your own cost items above and beyond those that TelecomBilling.Net offers by default. For voice services only, simply click on the cost items you created here to include them in all calculations of your customers’ invoices. You may send us an email if you fail to see how a particular field you added in might fit within the computation of your customer’s call costs: support@dynasoft.net.
3.A. Information types
- Specify the types of customers that exist. Each customer needs to be associated with a type when they are created.
- Enter the various types of credit cards available where you are.
- Write the different types of suppliers that exist. These are shown in the suppliers’ account page.
- Write the different types of transactions that exist. These are shown in the customers’ finance page.
- Dynasoft TelecomBilling.Net uses three levels or types of distributors. Each distributor has to belong to a certain level. These are identified here.
3.B. Product categories
The portal uses product categories to organise the various products and services sold to customers (voice services, recurrent services, packages, subscriptions,…). With these text boxes and where they are used (the packages and subscriptions pages), it is possible to organise everything that is sold to your customers the way you want with the names you want. The portal then uses these names to display totals for each category in the customers’ invoices. For example, by default the portal calls packages ‘Packages’. This is the name that will appear in the invoices to group together all the packages. With the boxes given here, you may use any other name. The main sections in an invoice’s summary are grouped together based on this product category by default.
4.A. Files to include in invoices
The portal is compatible with JPG, 256-colour BMP, monochrome BMP, 16-colour BMP, 24-bit BMP and GIF image formats.
- The logo to be displayed on the customers’ invoices. Logo sizes in mm (W*H) are as follows:
a. Classic: 466 * 550
b. Contemporary: 571 * 169
c. Elegant: 1016 * 381
d. Professional: 423 * 349
e. Streamlined: 423 * 307
f. Modern: 423 * 291
g. AvantGarde: 1037 * 190
h. Standard: 910 * 296
i. Elite: 825 * 360
j. Traditional: 825 * 296
k. Vanguard: 825 * 360
l. Mainstream: 825 * 360 - You may identify a picture file for your customers’ payment slips. This file will appear on your customer’s invoices along with basic information about the invoice such as the due date, payment method,…
- It is possible to show on the customers’ invoices a covering page with a picture that uses all the space of the page. This can be used to show announcements or adverts. Specify the path and name to the picture file here. The picture will use the entire space of an A4 sheet of paper, so dimensions can be, say 2 cm shorter length-wise and width-wise than an A4 sheet.
- A picture can be shown on the customer invoices. Specify the path to it here. Dimensions in mm (L*H): 47 * 18. The image appears at the bottom right of the summary part, normally on the second page.
4.B. System options
- Identify the employees or commercial representatives that exist in your organisation.
- Write and save the different separators that are normally used in price lists, CDRs, etc.…
- Upload a dedicated language file to use to set all captions of your portal (requires logging back in to view changes). You can download the base file which is essentially the file with the current captions you can see in the portal.
- Import default UK WLR and voice codes. This option will import a file with codes that will enable you to get started with WLR and voice codes. You will be able to modify the codes later via the ‘Import data’ under the ‘Tools’ menu.
5.A. Design of the invoices
Select the colour scheme to use for the lines and borders on your invoices along with the template to be used. You may view the template by clicking on the jpg files. Specify the type of font to use on the invoices. It is also possible to define the template to use for each customer by going to each customer account. Click the following link to download examples of invoices.
Templates are Crystal Reports files. Please enquire with us if you require access to the source files for modification. See chapter 3.14, point ‘A’ for more information.
Some of the boxes on templates are HTML-compatible. These are:
- Two custom-text box set under point ‘6.A.12’ of the configuration page
- One custom-text footer set under point ‘6.A.12’ of the configuration page
- One custom-text box set under point ‘3.A.1′ of the customers’ account pages
- Your company’s bank details
5.B. Display of the data in the invoices
An invoice is separated into two parts: the summary part and the itemised part. The options under this point are there to define how invoices will be built by default: namely, the document type (invoice or billing note), if the client’s statistics and graphs section should be indicated, if the payment slip should appear on customer bills, the cost centre summary section, if each section of the detailed part should appear in a separate file, the summary of costs that show the past and current amounts due , the summary of costs per line or SN, and finally the package summary.
Identify how the summary of the calls in the bills will be consolidated, what part will be shown: the summary section, the itemised one, or both. Determine the file format of the invoices when the billing is done (see chapter 3.4.3): PDF, HTML, Excel, Word, CSV delimited by a tab or semicolon, …
Select the radio button that will set whether to show the money paid by customers (e.g., top-ups, prepayments…) in the summary parts or the money that corresponds to the use of goods and services available to and used by them. For the latter, the drop-down menus next determine how the summary and detailed sections that show the use of voice/data, recurring services and other items should be sorted. The main sections in an invoice’s summary are grouped together based on the product category by default. The sorting here is for sorting within each section in an invoice’s summary part.
The same settings under point ‘5.B.’ also appear in all the customers’ accounts and can be overridden there. If the portal does not find these settings under each customer account, the default values set here will be used. Additional settings relevant to invoices are given under point ‘8.A’.
6.A. General options
- Billing cycle used in the portal: the portal uses this when it works out the alerts for the customers’ voice and data packages.
- TelecomBilling.Net uses the user’s today date on the invoices. However a different date can be used. Enter this date here. This date is typically there if an invoice for a particular customer has to be redone. If this is the case, another option in a customer’s account needs to be used in conjunction with this date field: option ‘g’ in the various options ‘4.B’ of a customer’s account.
- Specify how invoices are called in your configuration. Depending on your legal requirements, this can be typically ‘Tax invoice’, ‘Invoice’, ‘Bill’,…This name will be used as the main heading on invoices.
- Same as point ‘6.A.3’ but for billing notes.
- Enter the fee the customers will have to pay if they owe any money when an invoice is issued. The fee will be triggered if there are any unpaid invoices or billing note at the time an invoice is created. TelecomBilling.Net uses the date of any previously unpaid invoice and adds the number of days under the payment terms defined in the configuration.
- It is possible to create copies of the invoices that are created beyond simple originals. Indicate here the number of copies that should be created, if these should show the itemised part of the invoices or not and the numbering system that should be used and that will show on the invoice.
- Specify the date or day of current month when the next direct debit will occur for those customers who are subject to this kind of operation. This date will appear on the invoices of the relevant customers. An option (‘e’) under ‘Options 4′ inside the customers’ account, under ‘Various options’ has to be ticked.
- What is the number of calendar days when invoices are due.
- What is the number of calendar days for orders to be fulfilled.
- Customer referral system: Normal percentage rate granted to customers who obtain more customers for your company. If you change this figure later, only those customers that have this value as their current percentage will be updated. For customers who do not have any individual values, the commission rate that will apply to them will be this general value. For customers that do not have to have a commission rate, simply write 0 as being their current rate in their individual account. Each customer can individually be given a rate as explained per chapter 3.4.2 Commission rates apply to phone calls only.
- The program can increase the prices of all subscriptions and packages automatically. Specify the percentage increase and start date here.
- Write the text that will appear at the bottom of the invoices. Three boxes and one footer are provided; one could be for explaining things about the invoice, a 2nd one for advertising for example and the footer could have your company registration id.
7.A. Data management
An export can be done of all voice/data and recurrent services data. Select a lower date for the export.
It is useful to regularly clean out any old voice/data and services data along with any old transactions not needed anymore so the portal does not run too slowly. This will delete old CDR data previously rated but not needed anymore.
The portal’s logs can be periodically cleaned of all its entries by setting a number of days after which these will be deleted. Seven is the default number of days. Anything older will be deleted automatically.
7.B. Payment gateway
The fields for a possible payment gateway are provided if you use an electronic payment system when receiving funds from your customers (e.g., Bpay, Worldpay, Paypal,…). Under this point, specify the name of the electronic payment system available to your customers.
8.A. Various options
Tick the options under this heading as required.
More information about the options available to the user in order to handle the way subscriptions are billed: The established billing model in the Telecom sector is to pro-rate excess usage for voice and data services in arrears for the previous period and bill the cost of this service one period in advance. If this is your billing model, use options ‘1.a’, ‘2.c’, ‘1.b’ and ‘2.g’.
More information about option ‘2.b’: ticking this option will sort calls chronologically in packages and split calls that are at the threshold of a package into two parts: one part that belongs to the package and one part that falls outside of a package. Unticking will make the entire call fall within the package and sort from longest to shortest call.
More information about option ‘ab’: This option cannot handle certain aspects of the subscriptions: It stops the portal from managing billing periods as scrupulously as is explained in chapter 3.4.2.1, it will not allow certain types of billing such as billing periods in advance, it will not ensure that periods already billed will no longer be billed and does not track minutes and money used by the user if pro-rated billing is selected. Finally it will not bill periods of an item or package that was for instance deactivated for a while and then activated again at a later stage (option ‘2.h’). This is because TelecomBilling.Net uses certain fields to keep track internally where the user was in terms of the last date billed for the subscriptions. Ticking the option will stop the portal from tracking these dates. So, for instance, advanced billing is not possible if option ‘3.s’ is ticked as TelecomBilling.Net needs to know the dates it last billed. If a period is billed without this option and later the same period needs to be billed again, the items need to be reset as explained in chapter 3.4.2 and especially chapter 3.4.2.1 ‘Subscriptions and packages’.
More information about option ‘4.g’: A payment through authorize.net is inserted automatically if the option to automatically insert a payment when creating invoices has been selected in the configuration. Option ‘e’ (Options 4 tab) under a customer account also needs to be selected. This only applies to users with the payment services add-on and if an account for authorize.net has been defined.
More information about option ‘6.b’: Things like SMTP password and CC numbers are encrypted in the database if option ‘6.b’ is selected. Some settings are then shown back to the user unencrypted like the SMTP password but others are kept encrypted on the user interface like the CC numbers.
9.A. Inventory
Enter here:
- The different categories of assets
- The locations where these assets are kept
- The different statuses for these assets
9.B. Sales taxes
TelecomBilling.Net provides support for defining taxes for SNs and for up to 5 different percentage-based general sales taxes for you contact’s invoices. SN taxes can be defined as percentage or currency value.
The general sales taxes can be over-ridden for each contact by going to their individual account pageand modify values there.
Once created, the invoices will show a tax summary right after the invoice summary with a breakdown of all the taxes, their names and amounts.
The portal supports sales taxes of up to 8 decimals values.
Transactions already in the system will use the sales taxes that were defined for the items at the time not any new sales tax configuration set a later time.
9.C. Customer groups and sub-groups
Customer groups are groups of customers to whom the carriers decides to give free calls or calls at reduced rates depending on whether calls are placed to other members of the same group.
Link each group with a voice price list from this page. Each group can include any number of customer sub-groups.
It is important to pay attention to the fact that the call types you use in the customers’ underlying voice price lists need to be present in the price lists used here as the call types are what links an underlying voice price list with the price list you apply to a customer group. When TelecomBilling.Net comes across a call, it will extract the dialling code and look for a matching code in the customer’s underlying voice price list. However, instead of using the price in that list, it will use the call type it has found there and look up the correct price to use in the customer group’s price list. It will look to see first if the number called is a SN belonging to another customer within the same group.
3.3.2. Voice Settings

Access: Landing page > Settings > Voice settings
Call groups and call types are heavily used and are required throughout Dynasoft TelecomBilling.Net to:
• Show and organise the summary part of the customers’ invoices so calls are grouped according to what groups of similar destinations were called: Domestic landline, domestic mobile, North America, Europe, etc;
• For account reconciliation, to visualise profits made according to the groups of destinations that were called by customers.
Most carriers around the world issue invoices and organise destinations in groups of destinations (e.g., Domestic, Western Europe, North America…) or call types (e.g., national premium numbers together, national mobile numbers, etc…). Dynasoft TelecomBilling.Net requires that you identify in this page call groups and call types and so makes use of the same widely used convention.
Call types are sometimes called price groups, dial groups, dial classes etc. In the UK, Ofcom issues these for each type of number. More on this can be found at http://static.ofcom.org.uk/static/numbering/. TelecomBilling.Net includes them as download links in the configuration page, point ‘4.B’. The codes will require regular updating from the information provided by Ofcom and your providers and these are imported via the ‘Import Data’ page under ‘Tools’.
Call types on this page are useful also because they are used in parallel with the same page in the supplier’s accounts to give full control on how rates are billed across the day (peak-off-peak) and week (weekend rates) in your price lists. The tab in the configuration page is a general one for settings that are valid across your set of suppliers and price lists. Call types in a supplier page apply only to that supplier.
These call types are also needed so your customer’s invoices can show the types of call that were made and how much was spent on each such type. See a screenshot for a typical invoice in chapter 3.4.3.
Call groups are also used to organise the summary part of the invoices and organise the line items for voice services on the call group.
On the first tab you are required to specify the call types that exist in your operators’ price lists. Give a type name for each of the call types on the page. These types can be for instance GSM for national mobile calls, NTL for national landline, ITL for international, etc… A description field is required. It is this field of the description that will appear in the itemised part of the invoices rather than the call type field itself. Also, identify the dialling code that corresponds to the call type. This is used in case your price lists do not have such codes: the program will use the dialling codes identified in this page that correspond to the call types in the price list.
The definition of these types is done here, but the use of them is done in each price list, so don’t forget to add these types in the corresponding column when you import and create your price lists in chapter 3.5.1.
In the price lists and in order for the portal to use this functionality, it will be necessary to create a destination for the required price lists, where call types have to be identified in the columns CallType.
It is possible not to write any peak and weekend times for a call type. This then means the call type is valid throughout the day and week. This rule holds true also for call types added via the suppliers’ individual page.
In 3, write the default call type that belongs to the default call group as identified in 2.
In 4, identify the call group that includes the call types associated with local calls. This is used in order to apply a different pricing depending on whether a call is local or national. It is also necessary to identify destinations for local rates in the price lists and associate the appropriate call type for these destinations. An important consideration is that calls here are limited to ones to and from the same local dialling code. Another way of setting a different cost for local calls is through the use of packages.
In the database for TelecomBilling.Net there exists a table called Configuration. This is where most of the data for the portal’s configuration is kept. TelecomBilling.Net offers the ability to override all the parameters the user has selected via two fields in this table: FieldDataGlobal and UseDataGlobal. To set the parameters of the portal so that whatever the user selects is overridden, enter values of the parameters needed in FieldDataGlobal and set UseGlobalData to 1. Any other value in UseGlobalData (e.g., Null or 0) will make TelecomBilling.Net use the values in FieldData. The user can still modify the configuration via the portal’s interface and if he does so, then these settings are kept in FieldData. However, TelecomBilling.Net will use the values in FieldDataGlobal instead if one sets UseGlobalData against the parameters needed to 1. FieldDataGlobal and UseGlobalData can only be modified from the db. This is useful if the administrator wants to make sure certain parameters are used no matter what the user sets.
When importing countries in the system via the ‘Import Data’ page, ensure only the acronyms listed here are used as much as possible. This is especially true for call and service types. Using any other acronyms will result in billing errors.
3.3.3. Provisioning
Coming soon.
3.3.4. Payment Services (coming soon)

Access: Main interface > Settings > Payment services
(Payment services add-on only)
Payment Services makes it possible for your customers and distributors to pay for any outstanding money due (invoices…), pay for topping-up their account as well as to order products and services (subscriptions) that have been previously created via the main application’s Assets pages.
Activate the payment services required and fill in the necessary details. The activated services will reflect and show in the Web Access so users can select them to process their payments.
3.3.5. Billing files
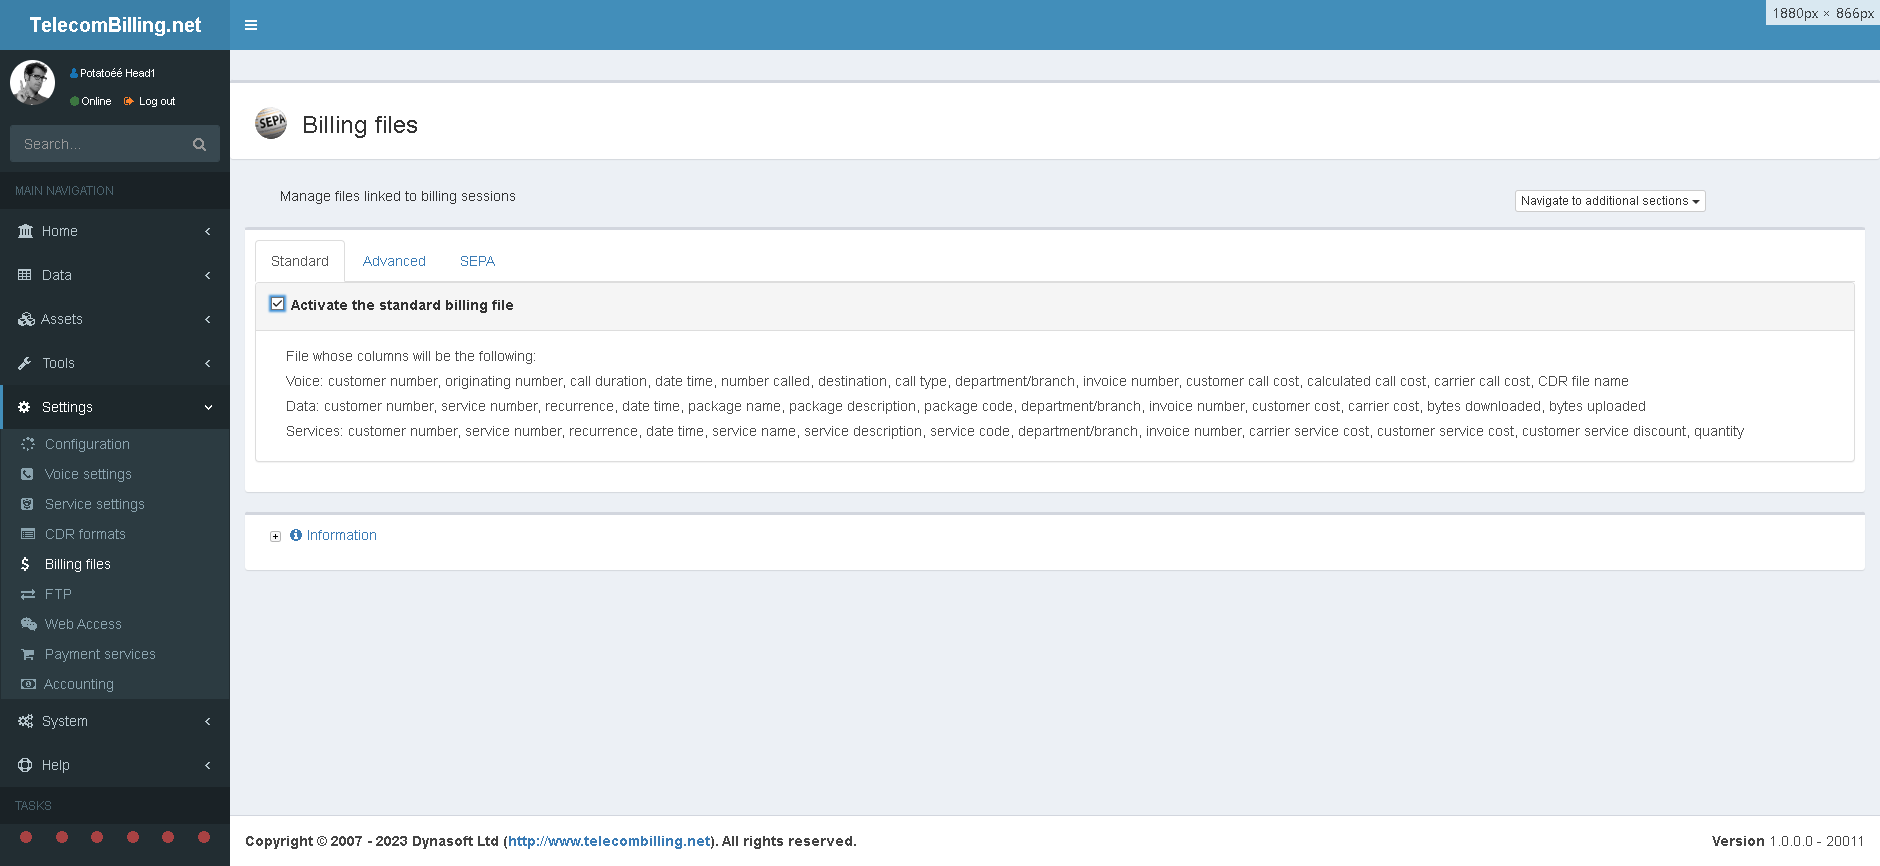
Access: Landing page > Settings > Billing files
Billing files are files that get created during a billing session (‘Home’ > ‘Billing’). It is a powerful tool that enables companies to generate a file that pulls together all the data that was billed during such a session (standard and advanced) or a SEPA file for processing by EU banks.
1. Standard
Activate the standard billing file. Billing files will show in the ‘Exported Data’ page under ‘Data.
2. Advanced
Enter the following information:
- In 1, select the default TelecomBilling.Net fields/columns and add them using the button with the right arrow. You may specify a different name for the column than the default names given. Advice: make a note of the original names of the renamed TelecomBilling.Net columns.
- Enter an ad hoc user-defined field/column in 2. Enter a column name and value. Add the column to the file fields using the same arrow button.
- In 3, view the file fields selected and identified. Use the left arrow button to remove fields and up and down buttons to change the order of the columns. Reset all identified fields back using the reset button. Point ‘3b’ enables you to identify values to look for in the default fields (see point ‘1’ above) and replacement values. Click the double arrow button for more options. It is possible to combine an option ‘*TEXT*’ and ‘*BLANK*’ at the same time. This will mean that the portal will replace any text found with the ‘*TEXT*’ option and if no text is found (empty fields), the text of the ‘*BLANK*’ option will be used.
- In 4, identify the extension of the file (csv, txt,…)
- In 5, specify the format of all date fields that has to be used
3. SEPA
Enter the parameters required for the creation of SEPA files. The invoice number and date will replace the tags ‘<InvoiceNumber>’ and ‘<InvoiceDate>’ respectively. Other parameters need to be defined inside the customers’ accounts (bottom of Options 1 tab).
Ensure option ‘f’ in the billing options form (‘Home’ > ‘Billing’ > ‘Customers’ > ‘Option’) is selected in order for the portal to save the file during a billing session. Only customers who pay by Direct Debit (option ‘e’ under point ‘4.B’ in customer accounts) will appear on the SEPA file. The SEPA XML tag <MndtId> will hold the customer’s Sales tax number and the second tag<AdrLine> their post code.
3.3.6. Accounting

Access: Landing page > Settings > Accounting
(Accounting add-on only)
TelecomBilling.Net is integrated with all versions of Sage Accounts since 2011 (UK and Canada editions) and Xero. Configuration options are given in the configuration (point ‘8.A’) and in the accounts for the customers and suppliers (see “Various options”). The portal will only work with Sage if you are hosting TelecomBilling.Net on the same Windows installation as Sage itself in a VPS or co-location set-up.
Version numbers for Sage apply as follows:
2011 applies to Sage UK and Canada
2012 applies to Sage UK and Canada
2013 applies to Sage UK and Canada
2014 applies to Sage UK and Canada
2015 applies to Sage Canada
2016 applies to Sage Canada
2017 applies to Sage Canada
2018 applies to Sage Canada
2019 applies to Sage Canada
2023 applies to Sage Canada
v21 applies to Sage UK
v22 applies to Sage UK
v23 applies to Sage UK
v24 applies to Sage UK
v25 applies to Sage UK
v26 applies to Sage UK
The add-on requires Sage 50 Accounts Pro Canada version 30.0.0.2. Enquire with Dynasoft if you need the files for any other version installed as currently this is the only version supported.
In order to activate all functionality linked to the Accounting add-on, make sure the following options are ticked in ‘Options 8’ tab under the configuration page: ‘5.a’, ‘5.b’, ‘5.c’, ‘5.d’.
Functionality offered include:
- Add, modify or delete customer accounts: A line is shown as ticked inside the accounts of those that are present in Sage/Xero. For this go point ‘4.B.’, Various options.
- Add, modify or delete supplier accounts: A line is shown as ticked inside the accounts of those that are present in Sage/Xero. For this go to point ‘4.B.’, Various options.
- Add, modify or delete customer bank details
- Add, modify or delete customer credit card details
- Add customer transactions (invoices, credit notes, payments, direct debits, credited amounts to the Debtors control account…): For this go to a customer’s account, then go to their transactions page and the drop-down box at bottom left-hand side has an option to send the transaction to Sage and/or its payment.
- Replication of new and existing customers and suppliers’ details from TelecomBilling.Net to Sage and Xero. This replication is triggered from the accounting page and occurs on opening TelecomBilling.Net.
- Import all invoice payments that exist in Sage and Xero.
- Fetch a list of all contacts that exist in Sage and Xero on start-up and load it in local memory so as to make checking user details quicker and smoother.
Limitations to these are as follows:
- Sage UK does not allow:
- Working with distributors
- Sage Canada does not allow:
- Deleting contacts such as customers …
- Deleting transactions such as invoices, payments …
- Working with distributors
- Updating contacts’ bank account details
- Updating contacts’ credit card details
- Xero does not allow
- Working with distributors
- Updating contacts’ credit card details
Sage
Enter the connection settings to Sage and write the following:
- User name (Required)
- User password (Required)
- Installation folder of the programme (e.g., ‘C:\Documents and Settings\All Users\Application Data\Sage\Accounts\2024\’) (Required)
- The default customer account in Sage (e.g., 4000, 4030…) (Required)
- The tax type code (e.g., G for Sage Canada or T1 for Sage UK) (Required)
- The default company (e.g., My Company Ltd) (Required). For Sage Canada write the name of the company file without the SAI extension.
- The hosting computer’s name so the portal can connect directly to Sage (Sage UK only) (Optional)
- The work-space (e.g., Example if you use the example company) (Sage UK only) (Required)
- In order to get the add-on to work correctly with Sage, write the path and name to the Sage Interop SDO file (e.g., ‘Interop.SageDataObject170.dll’) in the last box. The Interop file needs to be located in the bin folder of the TelecomBilling.Net Accounting add-on assembly. This file is provided by Dynasoft but we require that you email us the Sage SDO file (e.g., Sg50SDOEngine170.DLL) for your version of Sage 50 Accounts UK. Finally, Sage requires that a number of elements be in place for the integration to work. These are detailed in the help file of their SageDataObject’s SDK under the Getting Started chapter for your version of Sage (Sage UK only) (Required).
Sage Accounts truncates customer and supplier account numbers to 8 characters and so if more characters are used in TelecomBilling.Net, Sage will remove them. The consequence being that Sage might complain that is being added via TelecomBilling.Net already exists.
Sage Accounts has different field lengths that TelecomBilling.Net. Therefore, TelecomBilling.Net will truncate the fields to accommodate the maximum lengths allowed in Sage accordingly. Check the Sage objects lists in your SDK’s Sage Data Objects (Sage UK) or Data Dictionary (Sage Canada) for more on this.
Sage Accounts requires the activation of what is called Sage’s Third-Party Integration. Enquire with Sage in order to get the appropriate licence.
TelecomBilling.Net does not allow changing an account number if the contact is present in Sage as Sage does not allow this.
TelecomBilling.Net adds an invoice and not a transaction. In order for the program to identify that a TelecomBilling.Net transaction exists in Sage (especially from the customer transaction page), it is necessary to pass an invoice or any Sage movement as a transaction under Sage.
In order for the add-on to retrieve payments from Sage successfully, TelecomBilling.Net expects the reference/description/name of the payment to be followed by a space, a dash a space and the number of the invoice that was paid. An example would be for invoice INV_101, ‘My payment 123 – INV_101’. TelecomBilling.Net will always follow this format when adding a payment via it’s user interface.
Xero
For Xero, write the following:
- Client ID
- Redirect URL
- Application
- Certain common parameters:
- The sales account code (e.g., 200),The tax type code (e.g., OUTPUT2)
- Tax type code
- The account code for payments (e.g., bank 090).
The program matches contacts between Xero and TelecomBilling.Net based on the following field mapping and order:
| Xero | Account number | Contact code or number | Name | First and last names |
| TelecomBilling.Net | Accounting contact* number | Contact* number | Company name | First and last names |
| Order | 1st | 2nd | 3rd | 4th |
* Customer, distributor or supplier
The ‘Name’ and ‘Account Number’ fields in Xero must be unique if they are specified at the risk of producing an error.
Sage and Xero do not provide an API to delete transactions, customers and suppliers and these tasks are not possible via TelecomBilling.Net. Deleting a customer for Xero will only mark it with the status VOID.
If you get a message saying a customer is not present in Accounting, click ‘Yes’ or go to the settings’ Accounting page and set a replication of contacts to run so missing contacts in Accounting can be updated with those in TelecomBilling.Net.
TelecomBilling.Net uses what Xero calls api scopes which are computer programming areas of their service needed by TelecomBilling.Net in order to set and access Xero’s data. The scopes used are Contacts, Transactions and Settings. Go to https://developer.xero.com/documentation/api/api-overview for more information about aspects such as fields lengths allowed by Xero, field descriptions, etc.
There is a cost to using option ‘d’ because the process of creating the invoices will be slowed down due to the fact that the portal needs to wait for Accounting to return an invoice number before the invoices can be fully generated.
Xero uses version 2 of OAuth, the standard for authorising and authenticating a user and allows only 30-minute sessions. The option to log in at start-up is not supported because it is necessary to log in manually from the Accounting settings page.
To automate all activity fully between your add-on and TelecomBilling.Net the following additional options need to be selected:
- Under point 8.A in the configuration: options ‘5.b’, ‘5.c’
- Inside customer accounts, point ‘4.B’: option ‘j’ needs to be unticked
3.3.7. Service Settings

Access: Landing page > Settings > Service settings
This page is similar to the voice settings page but it used for recurrent services (UK WLR,…). They are required in order to correctly rate these services and need to have matching values in your services price lists and CDR data. Just like the call types if call types are used. See chapter 3.4.2.3.4 for more on service types as pertains to CDR formats and chapter 3.5.2.2 for price lists.
Click ‘Add’ to add a new service type. Enter the Service type, a code and a value in the description field. Click ‘Save’ to close the form and save the data.
When importing countries in the system via the ‘Import Data’ page, ensure only the acronyms listed here are used as much as possible. This is especially true for call and service types. Using any other acronyms will result in billing errors.
3.4. Home
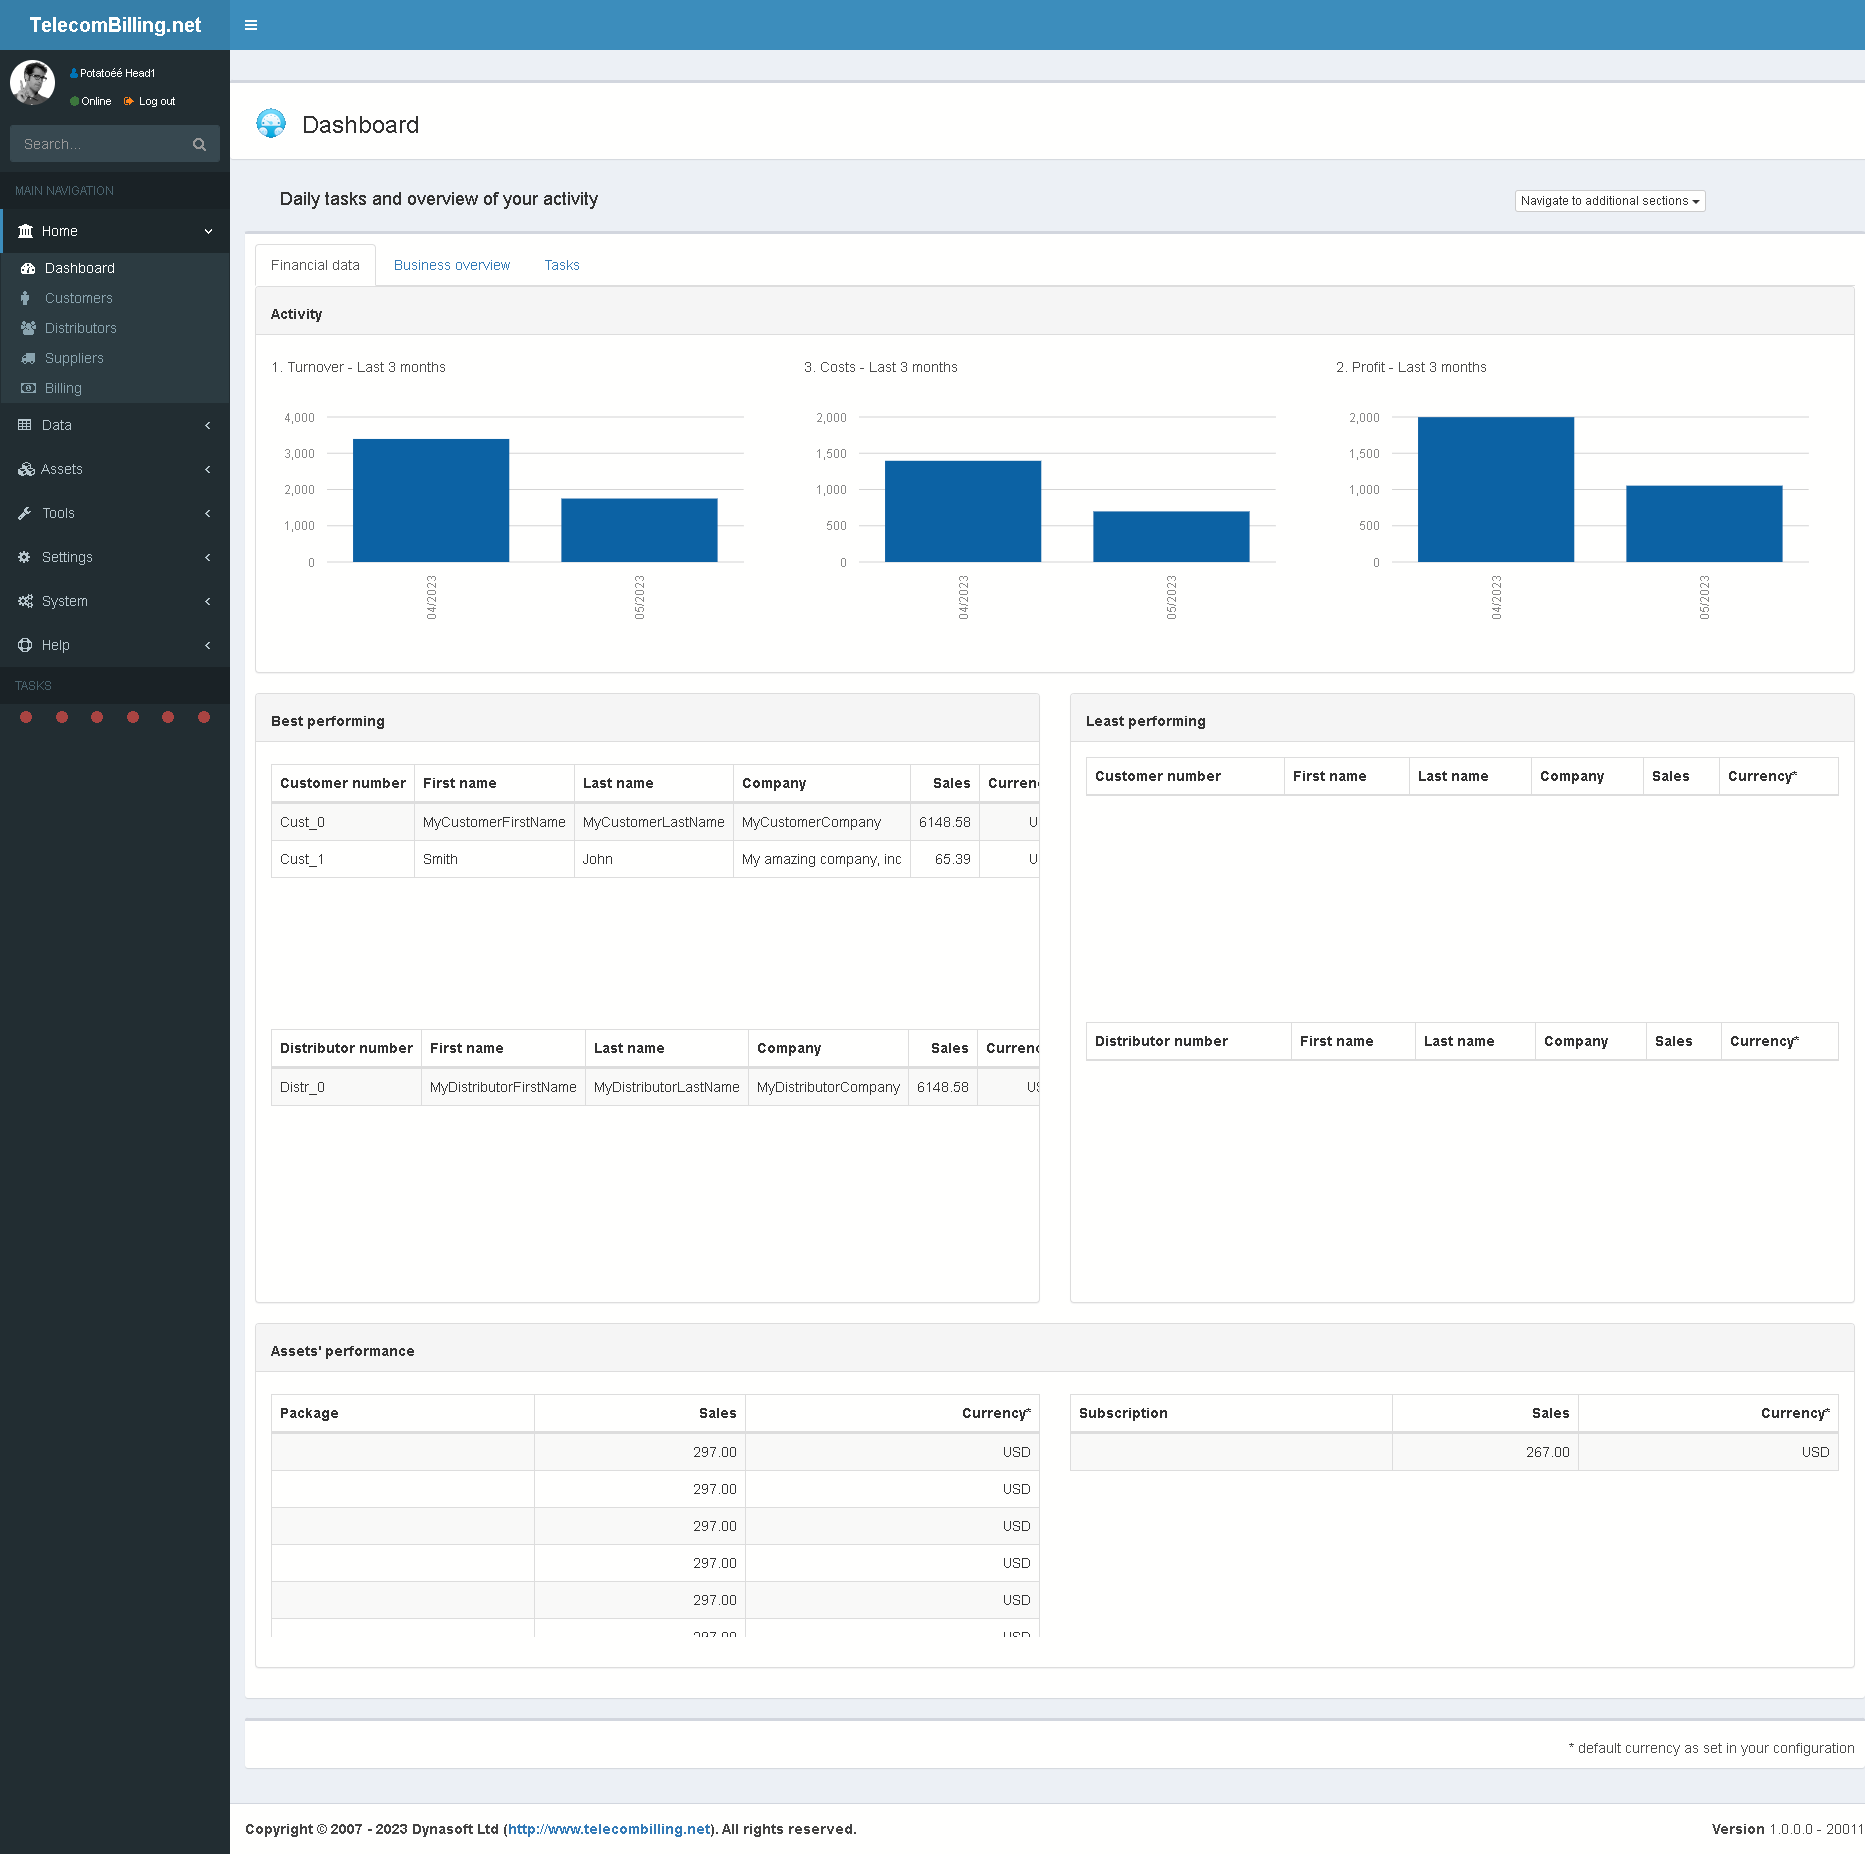
3.4.1. Dashboard
Access: Landing page > Home > Dashboard
Access 25 pieces of vital statistics about how your business is faring: from your turnover and profit over the previous 3 months to a list of best and least performing customers and distributors. Under the frame “Tasks”, access daily tasks such as: open a customer or distributor account, an invoice or price list …
Under ‘Tasks’, to see what the task refers to, go over the icon with the mouse. The taks called ‘Manage system’s default data’, this will import the default data you see in the portal (Customer ‘Cust_0’, price list ‘ExampleList_VoipDynasoft.csv’, etc…) or remove it.
3.4.2. Customers, Distributors and Suppliers
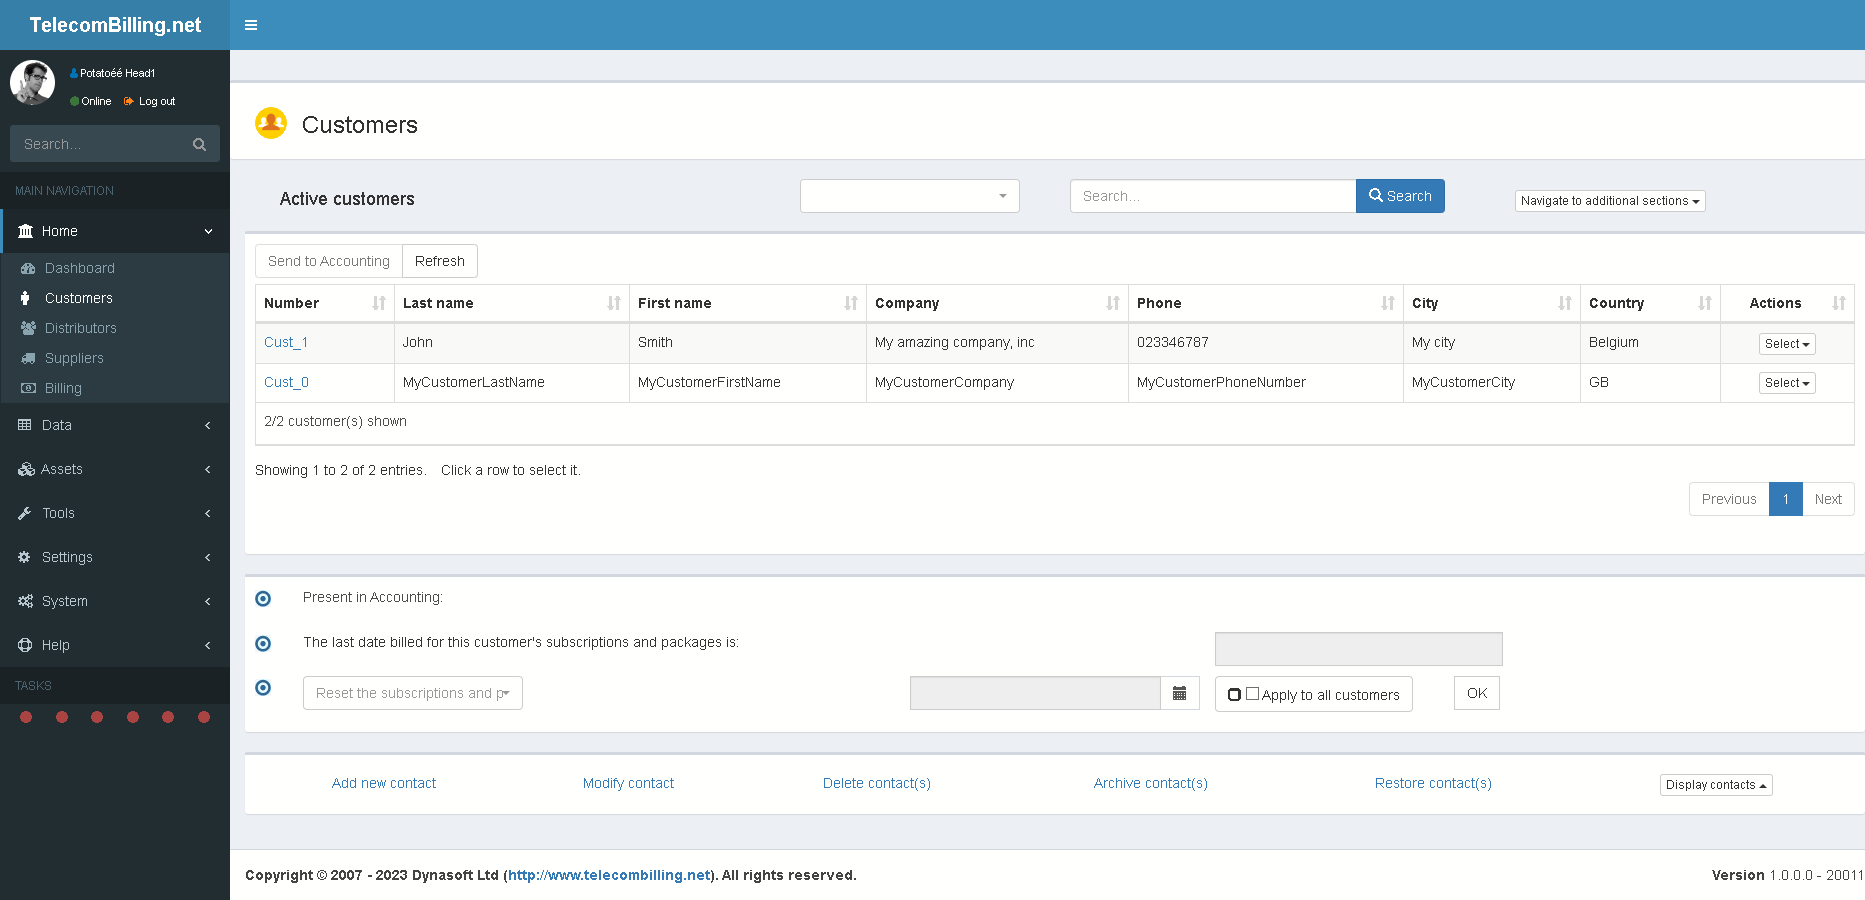
Access: Landing page > Home > Customers, distributors or suppliers
To view a customer, distributor or supplier, simply go to the drop-down menu at the end of a line and select ‘Modify’ to modify a contact or view to view it as read only. Click on Insert new or Delete selection to add or remove an existing contact. Select one or more lines and click on Archive contacts to remove contacts from the list but not from the underlying database. These will be merely archived. Click on Restore contacts to retrieve these contacts.
Using the same drop-down menu on each line of a contact, access additional pages to enter the customer’s bank and credit card details and more.
At the bottom of the page in the last bulleted point item in the page for customers, the OK button at the far right is used to reset the subscriptions and packages of the selected customers in the main table. TelecomBilling.Net uses a couple of date fields in the database to keep track of the last time subscriptions were billed and when they should show next in the customers’ invoices. The controls given here help the user manage these fields by enabling him/her to reset the next date when the items should show. There exist three possible ways to reset these items as indicated in the drop-down box to the left of the OK button:
• Reset the items to the date selected in the date field on the left
• Reset the items back to their activation dates
• Reset the items to the date of the last known invoice
It’s also possible to reset each individual item separately to their activation date by opening a customer account, go to their subscriptions/packages page, select an item and select ‘Reset dates only’. If a customer is clicked on the main customers page, it is possible to see under the second bulleted point ‘a’ date field that indicates what the last billed date for the customer’s subscriptions/packages was.
If resetting the items to a date using the date field to the left, the date needs to be the date of the first day of the billing period sought. So if the date sought for the first day of the next billing period is, say, May 1st, the date selected here needs to be May 1st. This resetting of dates is not needed if the option ‘3.s’ is selected in the configuration page, point ‘8.A’.
With the search box at the top of the table, you may do a search for any term associated with the customers’ details or search for a customer based on their SN.
3.4.2.1. Customer
3.4.2.1.1. Details
Details A & B
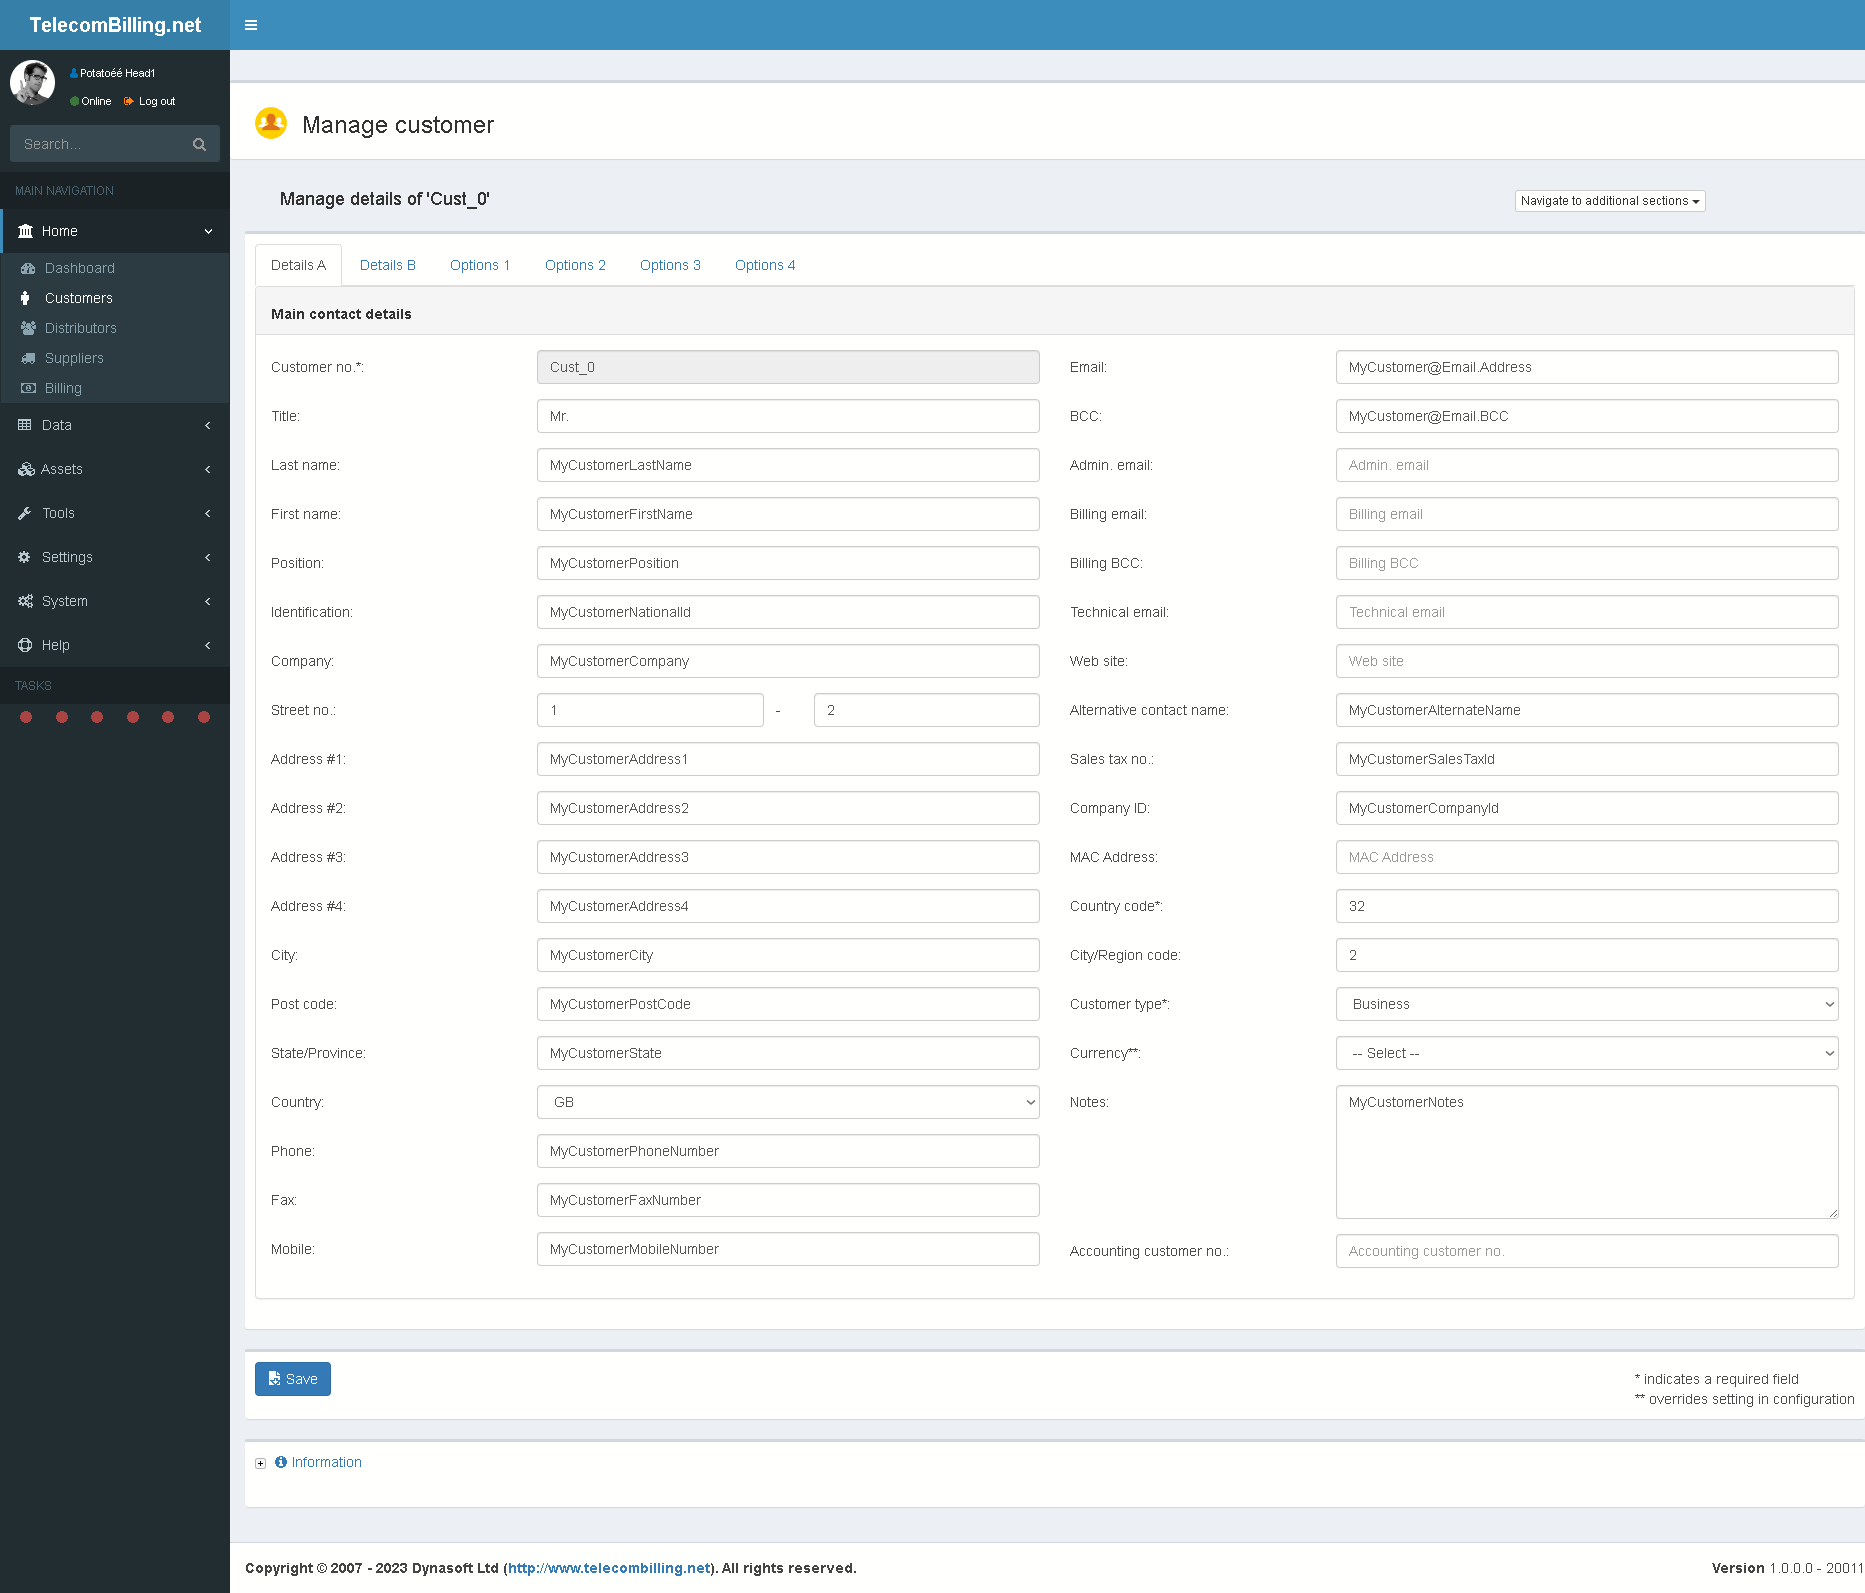
Access: Landing page > Home > Customers > Drop-down box under ‘Actions’ > Modify a customer > First and second tabs
Fill in the page with the customer’s details. Access additional pages to enter the customer’s bank and credit card details via the drop-down box at top right hand corner.
Options 1, 2, 3 & 4
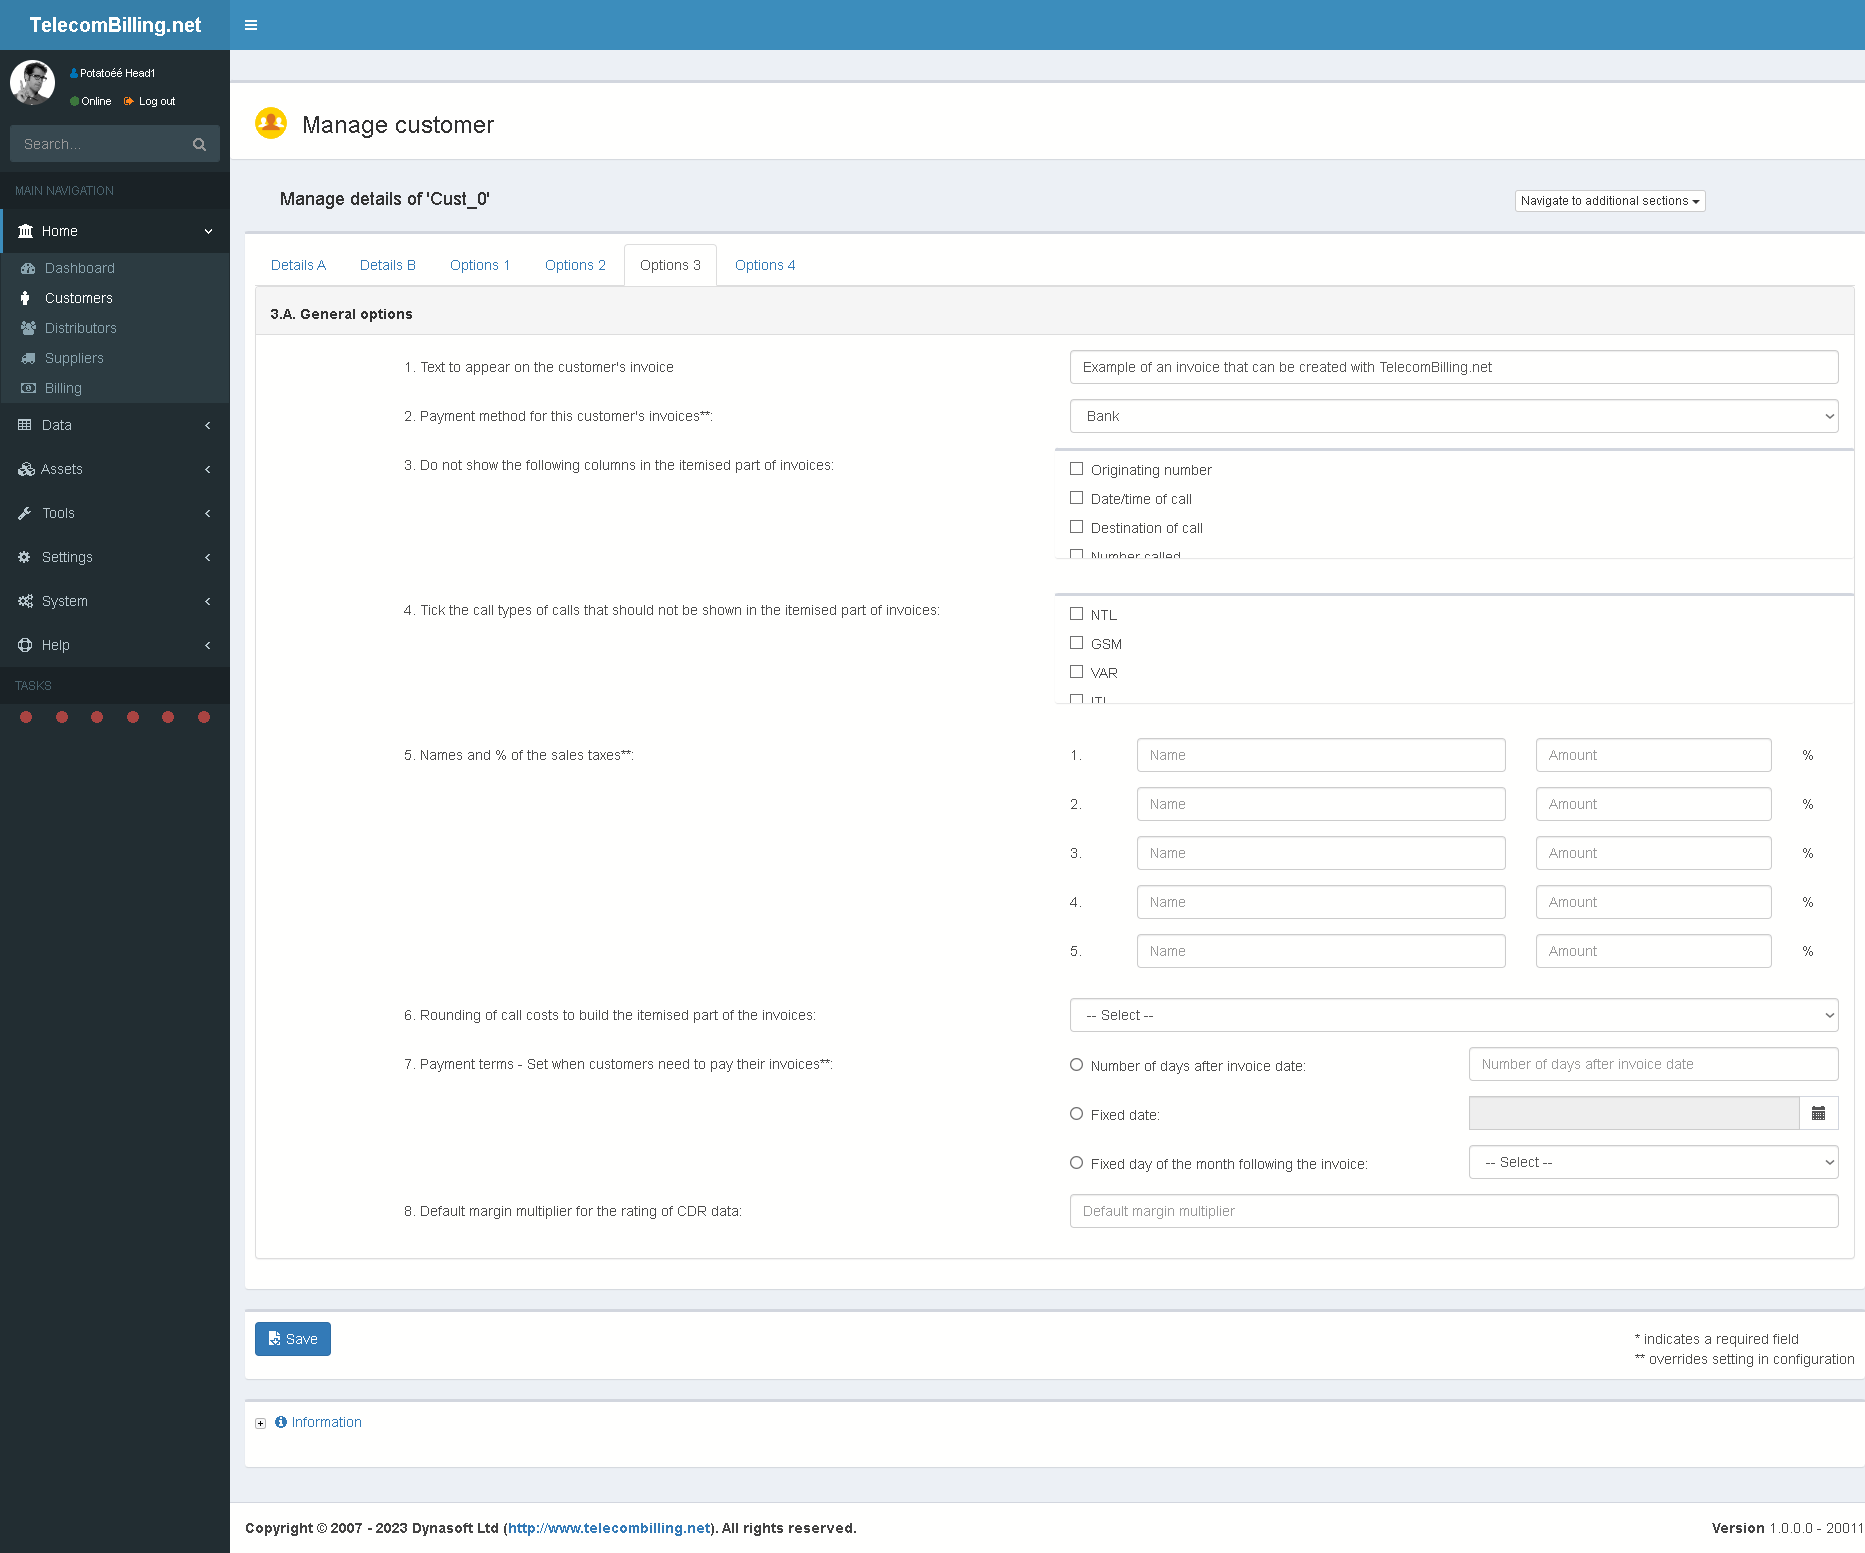
Access: Landing page > Home > Customers > Customer account > Drop-down box under ‘Actions’ > Modify a customer > 3-6 tabs
1.A. Customer associations
- Who obtained this customer? Give the name of the distributor by selecting it from the drop-down menu.
- Select the commercial representative that created this customer.
- Identify the customer group and sub-group to which the customer belongs.
- Add the different departments and/or branches associated with the customer. It is then possible to link each SN in the SN page with a department/branch.
1.B. SEPA
- The SEPA parameters for the customer. The direct debit sequence takes the value ‘FRST’ with the first invoice and then takes the value ‘RCUR’ with subsequent invoices. This sequence goes back to ‘FRST’ if the customer’s unique mandate reference code (”) changes.
1.C. Design of the invoices
Select the invoice template to associate with this customer and some of its design settings.
2.A. Customer parameters
- Enter the user’s user name and password for TelecomBilling.Net Web Access. Password length is limited to 50 characters for all passwords in TelecomBilling.Net.
- Set the status of this customer. This is just a placeholder for a status and is not used anywhere else in the portal.
- The next two boxes give to the user an idea of how many voice calls and minutes a customer is using at the moment. The option ‘2.f’ in the configuration’s point ‘8.A’ has to be ticked first. This information is also shown on the customer’s invoices and the usage within packages is shown in the itemised part of the bills too (subscriptions and packages section).
- Language for this customer. This is the language that will be used for his/her invoices and when they access the Web Access.
2.B. Display of the data in the invoices
As was explained in the Configuration chapter 3.3.1, specify how the invoice (or billing note) will be saved, displayed or printed for this customer. If different formats are selected for the summary and itemised parts, then two files will be created. Only one file if formats are identical.
3.A. General options
- Text to appear on the customer’s invoice or billing note.
- Payment method for this customer. See chapter 3.3.1, 1st Tab, for more information on how this works.
- Hide one or more of the columns that appear in the itemised part of the customers’ invoices.
- Do not display in the itemised part of invoices calls that are associated with the listed call types. This is useful if you wish to prevent certain calls from being shown on the customer’s invoice such as calls to adult lines, charities, social services lines, hide national calls to reduce the size of the itemised part of the invoices…
- Name and set the indirect sales taxes to apply to this customer’s account and invoices.
- Select the way numbers will be rounded throughout the portal for this customer. The way amounts are rounded by default is the one set in the configuration page.
- Write how many days this customer has to pay their invoices.
- Default margin multiplier for the rating of CDR data. When the system is billing and rating CDR data, it can do so in a number of ways: using a price list or rate card, a margin multiplier which will be applied onto a purchase cost of the call,…Margin multipliers can be identified for a whole type of CDR or per customer. This default value under this point is the per customer figure.
4.A. Customer referral and commissions
- If relevant, select the customers the current customer has referred.
- Who is referring this customer, i.e. which customer obtained this current customer whose file you are viewing?
- Select the types of commission the current customer will get. These can be:
a. The percentage discount he will get in his next invoice based on the sum total of the monies payable by his referred customers.
b. Customers can also get free periods for their subscriptions, inventory assets and packages if they have referred customers for the same items. Each quantity sold will get them a free period with a maximum of 12 free periods. The number of currently given free periods is reset to 0 if a billing period starts on the same day as an item’s activation date in the billing page. More on this in chapter 3.4.2.1, ‘Subscriptions and packages’ for more information.
Notes:
Any changes you make to the table of referred customers and to the drop-down menu holding the customer’s referrer will reflect on all other customers. For example, if a referred customer X is clicked in drop-down menu under point ‘2’, it will be unchecked for all other customers in the system, as customers can feature as referred customer only once. If a referring customer Y is unchecked in table 1 and if you open his file, no referring customer will appear for him/her.
4.B. Various options
Tick the required options.
3.4.2.1.2. Transactions
Access: Landing page > Home > Customers > Customer account > Drop-down box under ‘Actions’ > Transactions
This page keeps track of all transactions and payments done by the customer and of all monies by him/her owed to you. This is also where invoices will show after each billing session for a particular customer.
Click ‘Add’ to open a new form:
From top to bottom:
- Select the type of transaction: a discount, a refund, a cancellation, a chargeback, a commission, a new invoice, a payment carried out by or to your customer, etc… Top-ups are typically money a customer says he will pay which will decrease the money owed by a customer. This is often used with prepaid accounts when the actual money has not been received yet from the customer, but a confirmation by fax has been received, for instance. Normally with prepaid accounts, the sums that appear on a customer’s invoice are the sums that were paid to reflect the use of top-ups. A billing note with the details of the calls made is then attached with the invoice. When running a billing session in chapter 3.4.3, the discount entries for this customer will be aggregated and deducted on the customer’s invoice for the period sought. If you select to use post-paid accounts, you then would enter customer invoices and not top-ups. Customers will pay on receipt of their invoice. Top-ups should be deleted when invoices are sent out to maintain consistency between the payments done by the customers and the invoices they receive. ‘Latest usage’ is the total amount of money owed since the last invoice and up to the very last CDR that was analysed in the billing page. Note that depending on the type of transaction selected some fields appear or disappear. Any transaction that is similar to a payment will see a ‘Linked with’ drop-down that will let the user link the transaction with say an invoice.
- Write a reference number, such as an invoice number
- Transaction date. A due date follows if you selected a transaction of the invoice type.
- Any notes or remarks about this transaction
- Identify a representative (sales person…)
- If the transaction has been paid
- Payment method that was used by the customer: bank, credit card, a popular online payment service…
- If the transaction is to be excluded from the overall balance of monies due/owed
- Attach any document needed such as delivery note…
- Write the net amount of the transaction. Transactions such as invoices will not have any amount field as this is calculated based on the line items in the invoice added later by the user.
- Press ‘Save’
A number of actions can be performed once a transaction has been added via the buttons at top of table:
- Exclude it from the balance
- Enter a payment for an invoice-type transaction
- Remove (i.e. delete) the document attached to a transaction
- Send it via email to the customer
- If the accounting add-on is included, transactions can be sent to or deleted from Sage Accounts or Xero
Once added and if the transaction is an invoice or similar, add the line items by clicking on the blue bulleted point with the plus sign. The form to add an item looks like this:
Use the drop-down menu at bottom of page to display transactions based on the filters given.
The aggregated total of all transactions can be displayed in three ways: either for all the transactions, for invoices-type transactions or for all other transactions. Invoices-type transactions are the following: invoice, billing note, purchase order, credit note, credit advice and pro-forma invoice.
Any money that increases a customer’s balance (e.g., credit notes,…) will show as a negative number. Sales taxes are applied to the following transaction types only: invoice, billing note, purchase order, credit note, credit advice and pro-forma invoice. The amount entered will show under the net amount column for all other transaction types. Documents and line items cannot be created for the following transaction types: computed usage, latest usage and commissions, payments, top-up, refund, cancellation, charge-back, discount, adjustment, direct debit.
It is possible to link any file with a transaction using the file upload functionality inside a transaction form. If an invoice was created via billing or any invoice-like transaction via the ‘Create document’ button, then it will be that file that will show linked to the invoice.
When using the Billing part of the portal explained in chapter 3.4.3, if you click the option that says to include the invoice in the customer’s billing, the invoice will be added to the list in the table here for a particular customer. Positive amounts are monies owed by the customer to your company. These are normally invoices and charge-backs. When running a billing session for those customers that have referred other customers, any commissions they are entitled to will not show on this form, rather they will be deducted from the invoice and it is this reduced amount that will show here. If, on the other hand, some referred customers are invoiced, but not the referring customer, then the money owed as commission will show here.
This page can also be reached from the ‘Data’ menu for all customers.
3.4.2.1.3. Finances
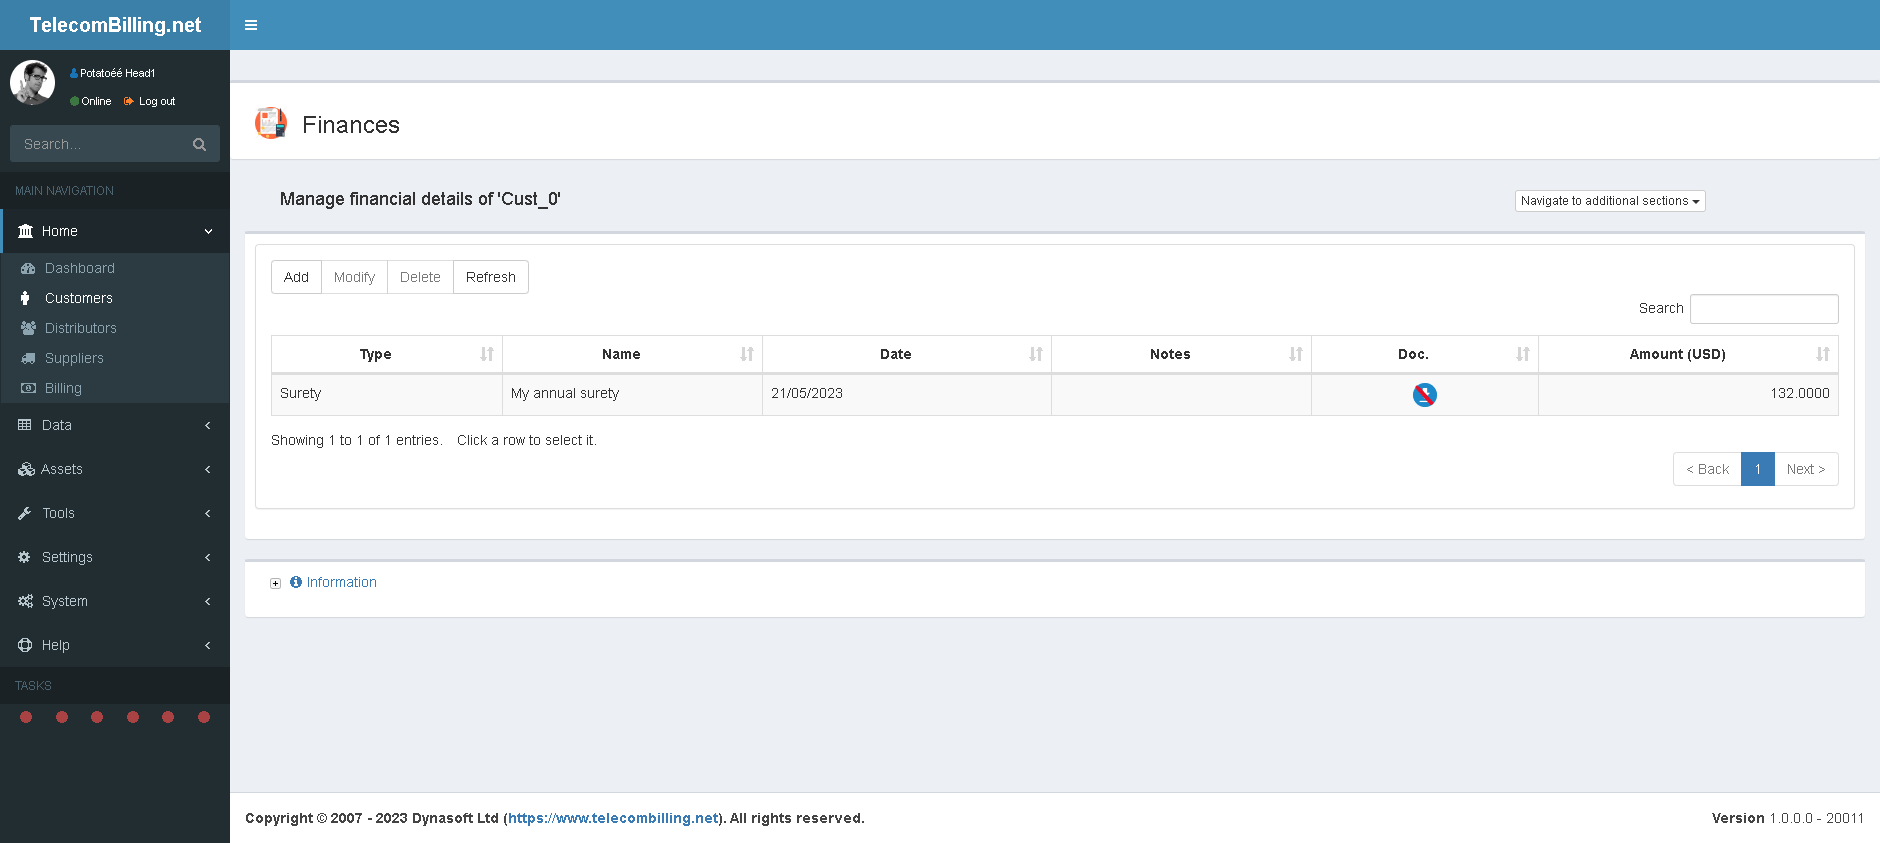
Access: Landing page > Home > Customers > Customer account > Drop-down box under ‘Actions’ > Finances
This page makes it possible to enter all sorts of other transactions or movements of money with the customer. The ones that appear in the first drop-down box in the add or modify forms are defined in the configuration.
A credit limit can be set for a customer and is a transaction type given as standard. Credit limits are used in combination with credit limit alerts under the customer accounts and outlined in next section. See the messaging tool where the details about the sending out of alerts are set.
3.4.2.1.4. Alerts
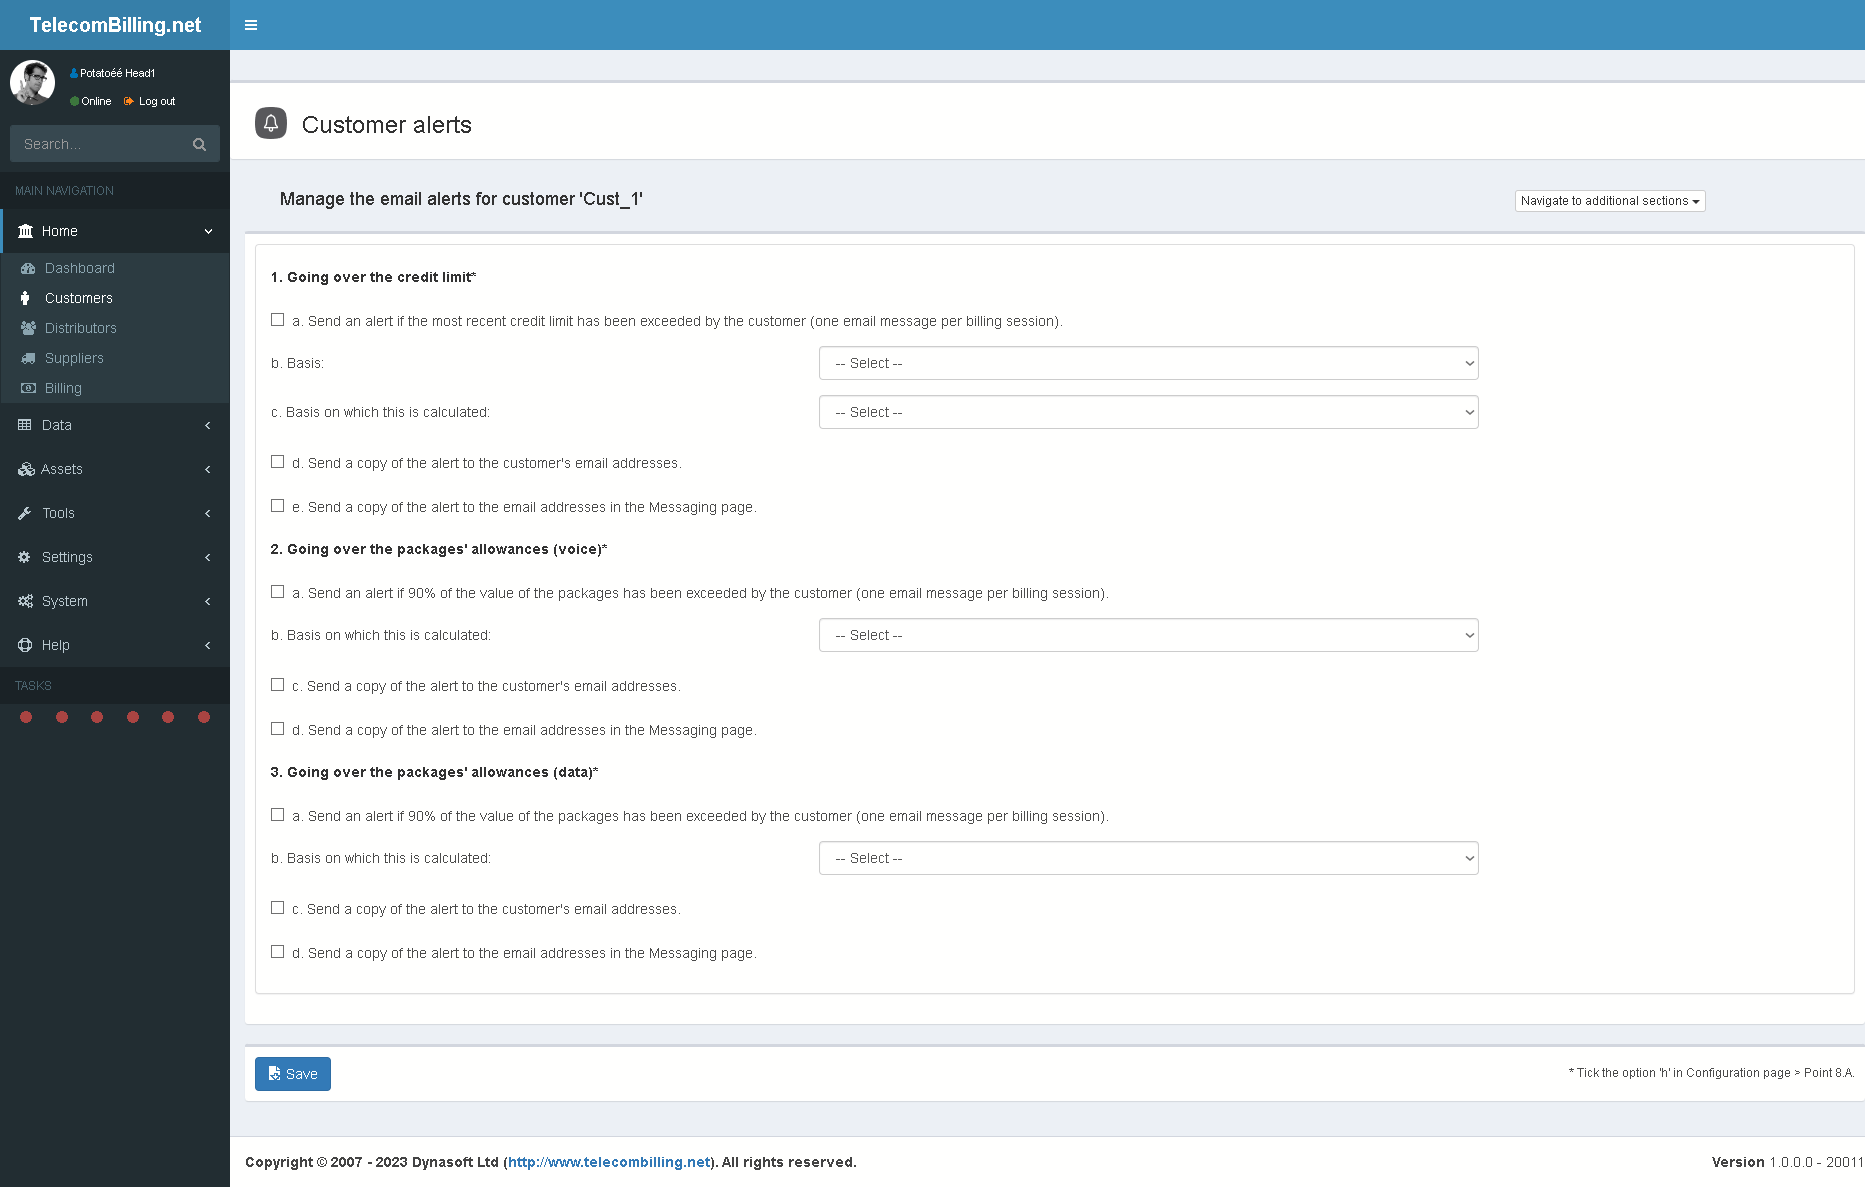
Access: Landing page > Home > Customers > Customer account > Drop-down box under ‘Actions’ > Finances
This page makes it possible to set:
- The parameters whenever a customer goes over their credit limit. This alert can be based on money or minutes allowed and are calculated for the current billing session (i.e. the data TelecomBilling.Net analyses if you have a billing session running at the moment), the amount since the last known invoice or the current month. Tick the last option if a copy of the alert message has to be sent to the customer as well. The alert is sent once only as soon as the customer goes over their limit. So the alert is not sent repeatedly but once only for the session currently under-way. Define the messaging parameters in the messaging tool.
- The parameters whenever a customer goes over 90% of the number of minutes or calls associated with each package.
- The parameters whenever a customer goes over 90% of the data allowance (bytes) associated with each data package.
3.4.2.1.5. Friends and family numbers

Access: Landing page > Home > Customers > Customer account > Drop-down box under ‘Actions’ > Friends and Family numbers
Enter numbers that are likely to be called by the customers that should be included in the customers’ packages. Here, whenever they call these numbers, TelecomBilling.Net will include them in the packages, in a similar way that numbers called of a particular call type are included in the packages page.
3.4.2.1.6. Subscriptions and packages
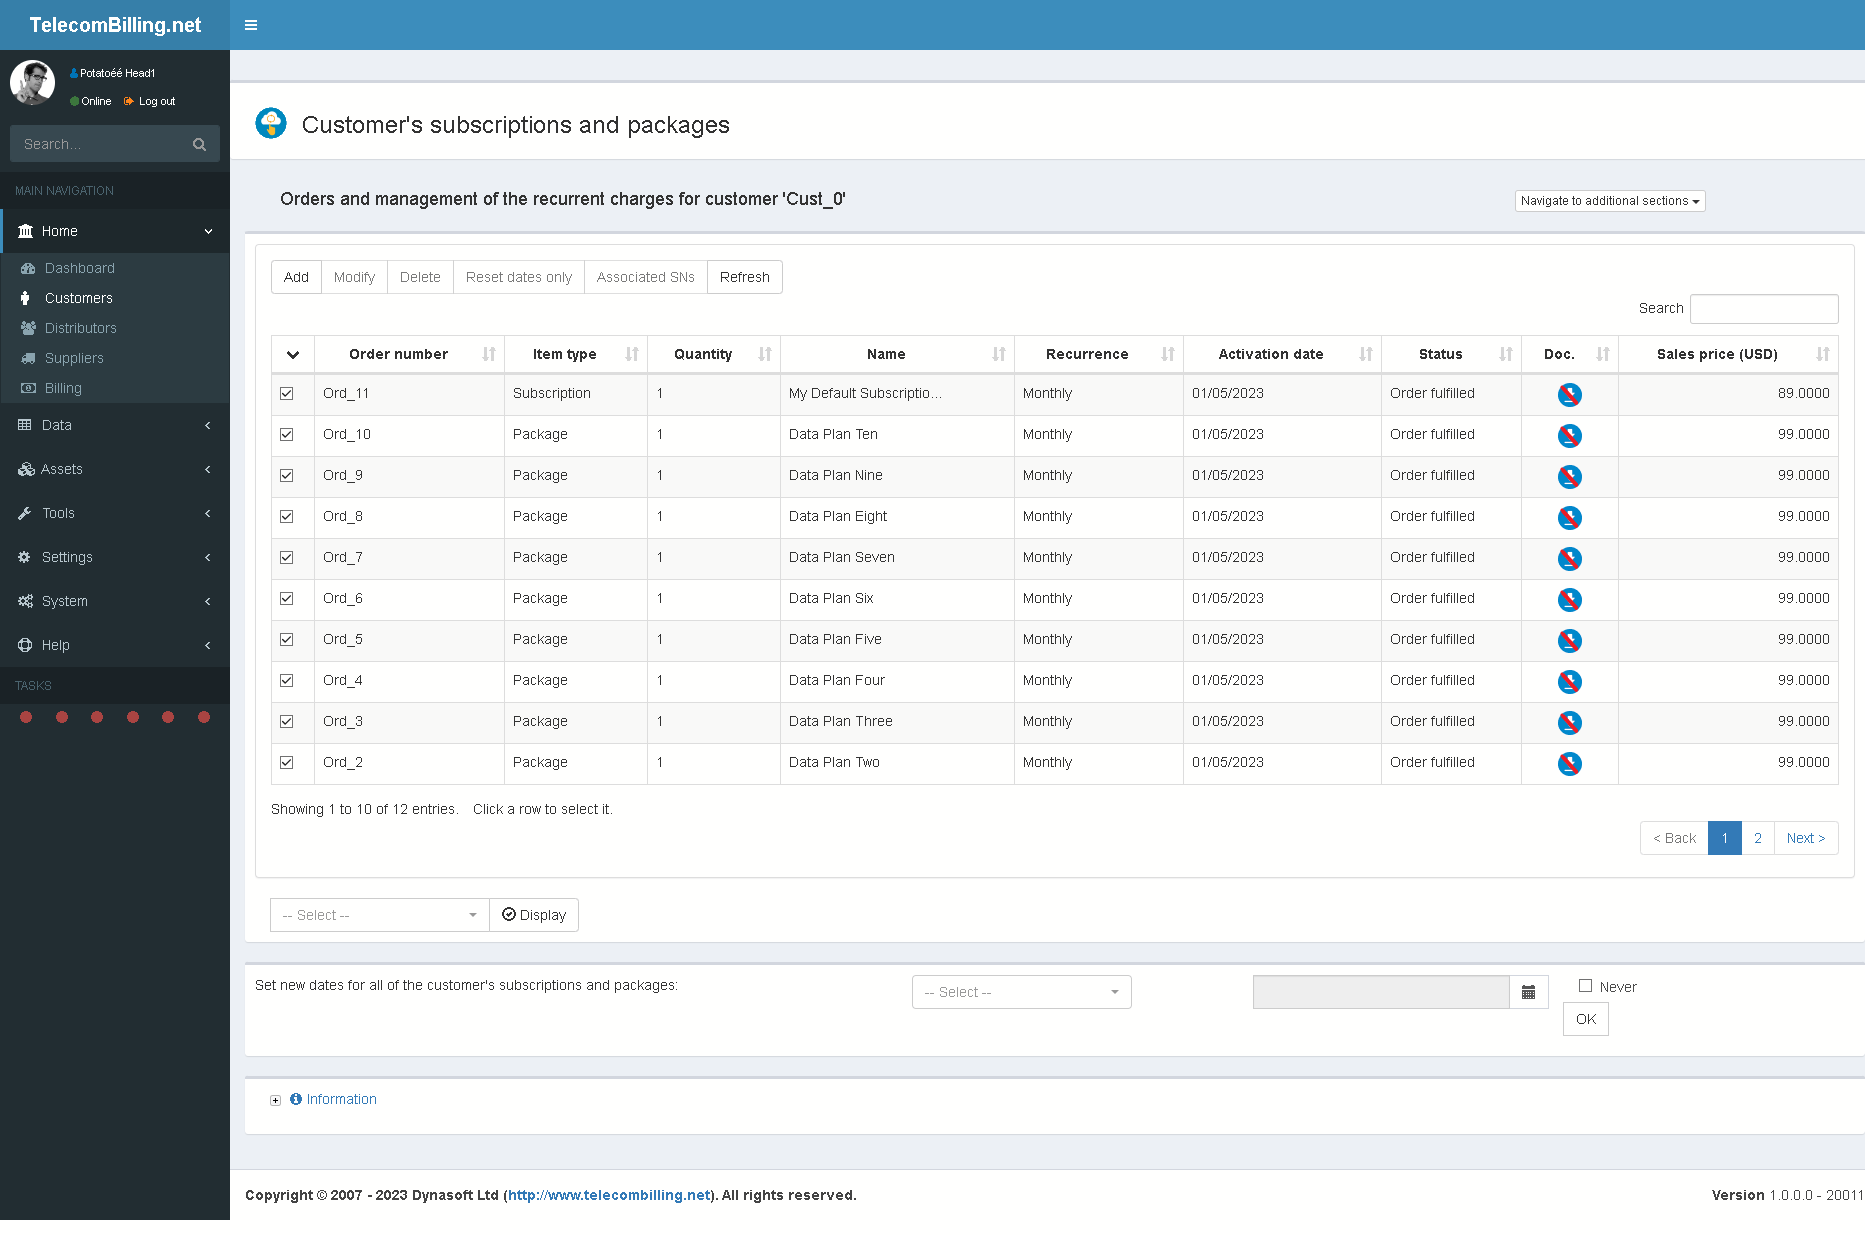
Access: Landing page > Home > Customers > Customer account > Drop-down box under ‘Actions’ > subscriptions and packages
This page keeps track of all subscriptions and packages associated with a customer. It lists the items other than voice/data and CDR-based services that can appear on a customer’s invoice. Items here can be of five sorts: Packages, subscriptions, DDIs, SIMs or inventory assets.
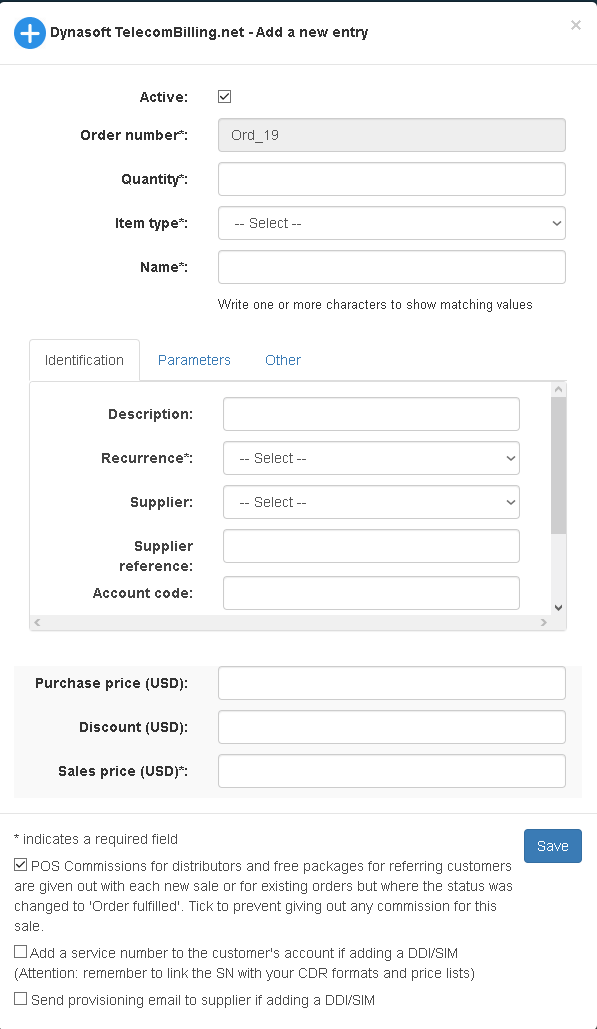
Click ‘Add’ to open a new form:
Packages refer to the rating packages that are identified in the Packages page under ‘Assets’. Subscriptions are typically sales to the customer (e.g., phones, phone cards…).
From top to bottom:
- Tick to activate the item. If ticked, the item will be ignored by the system
- An order number is generated from the configuration
- A required quantity
- Select an item type in the drop-down box and all available item (packages, subscriptions, DDIs, SIMs or inventory items depending on what you select) will then show in the Item name box underneath. Type a letter or number to bring up matching items. Click the item when it shows in the drop-down selection and use your keyboard tab key to pre-fill some of the fields on this form.
- Identification tab:
- Enter a description
- Select a recurrence: daily, weekly, …
- Link a supplier with this item
- Identify a supplier reference
- Account code which will be used in the Accounts system if you have the Accounting add-on
- Product category, again defined in the configuration page
- Tick the last tick box if a package is given away free during the first billing cycle. Note this giving away of free periods will only work if option ‘3.s’ in the configuration’s point ‘8.A’ is unticked. Options ‘1.a’ and ‘2.c’ will also need to be ticked if pro-rating is required.
- Parameters tab:
- Department/Branch
- A distributor commission is entered next which is convenient as one does not have to go and set it in the distributor’s commissions page.
- An activation date which is a required field. An item will only start to be billed once the activation date has been reached in the billing page.
- Deactivation date. Setting a deactivation date will mean the item will not be billed after that date. Leave this field blank to mean ‘Never’, i.e. an item will never expire.
- The status date box will always show the date of the latest status change
- There is a status box so these items can be tracked internally within your organisation. The statuses are there so each package/subscription can be marked with a status. This is useful if the progress of sales for instance needs to be traced and followed so that each product and service sold to a customer (i.e., each package/subscription) can to be tracked as it is being delivered to the customer until it is billed. For TelecomBilling.Net to bill an item, it needs to be marked as ‘Order Fulfilled’.
- Other tab:
- Attach a document with the sale. This could be a contract etc…
- Write the purchase and sales prices and possible discount for the item
Explanation of the different statuses:
- Order Received: new order that just came through.
- Pending Configuration: could be a new server or piece of equipment needing to be configured with the customer.
- Pending Installation: could be a new server or piece of equipment needing to be installed with the customer.
- Pending Shipping: item ready to be shipped.
- Pending Activation: service waiting to be activated (DDI/SIM,…).
- Order Cancelled: order was cancelled by the customer and no longer is being billed.
- Order Closed: product or service that has run its course with the customer and that should no longer be billed.
When billing using the general configuration option 8.A, ‘3.s’ unticked and option ‘a’, ‘Make the session an official one and save all its data’ (see chapter 3.4.4) ticked in the billing page, this will cause packages, subscriptions and inventory assets entered in each customer’s ‘Subscriptions and packages’ page to be billed once only even if you rerun the same period. The implication of this for call packages for instance is that calls (and the associated package itself) that were identified by the portal as being covered by a package will not be re-billed if the same period is selected twice in the billing page. Packages and their recurrence are then scrupulously enforced. The portal uses anchor dates and fields that track the values of minutes, cost or number of calls of a package. This is used to keep track of when subsequent billing periods are due and will ensure that, if you run a billing session twice for certain dates, calls that were covered by a package will not be re-billed. To better illustrate this, let us take the following example:
I have a package that gives the user 500 calls to GSM and landline calls to North America but valid every three months. However, I run billing every month. So, the portal will have to keep track of where I am in terms of calls free over the course of these 3 months. Say the system finds 123 calls for month #1, 233 calls for month #2 and a total of 498 calls for month #3. The user’s package will cover him for months #1 and #2 (accrued total of calls equal to 356) and then 146 calls out of the 498 calls found for month #3. It is clear therefore that we need to find a way for the system to know how many free calls he got for each one of the 3 months as I bill calls month to month. If I decide to go back and bill month #2 for this customer and other customers it is important to ensure the values accrued of calls for each package and customer is tracked. If I wish to just cancel this and get the system to restart the accruing to a different month, I need to tell the system to scrap these values and start this accruing from another month. Hence the need to let it know to reset these values by manually resetting the subscriptions/packages and customers concerned.
Resetting these fields is required if you wish to bill the same period again.
In order to reset these anchor dates and fields for the subscriptions/packages associated with your customers, simply go to each customer’s ‘Packages and subscriptions’ page in their individual page, then click on a package and click ‘Reset dates only’. The anchor dates will now be reset to the item’s activation date for your customer. Alternatively and to reset all of a customer’s subscriptions and packages, go to the main customers page, select a customer and reset dates using the controls in the last bulleted point near bottom of page:

In the database, these anchor dates are:
LastBilledDate
NextBillPeriod
These are found in table CustomerSubsPacks.
An example to illustrate this is as follows: Customer A has a package that was activated on the 10th of May and that runs every month. In the Billing page, dates are selected from May 1st to May 31st. The package will be billed for this customer from May10th to June 9th if no pro-rating is used. When the package is billed again for the month of June, the portal will then go through calls from June 1st to June 9th and assess whether these calls were part of the package of the previous month or if they need to be billed separately. This will not be done if the customer had already used up the allowance in calls that his package provided back in May.
The same system exists for a customer’s subscriptions. This method is used only if the option in the configuration page, point ‘8.A’, option ‘3.s’ is unselected. If it is selected, TelecomBilling.Net will always reset the number of calls or minutes to the start date of the billing period selected in the billing page and so it will not keep track of previous calls already billed for a particular period.
If periods have to be pro-rated, options are available for this; both for subscriptions and packages in the configuration page, point ‘8.A’, options ‘1.a’ and ‘2.c’. If subscriptions need to be billed one month in advance following the first period after the activation date, select option ‘ad’ in the same table of options. In this scenario, if new items are entered in a customer’s account, the portal will show on the invoices entries for the first month (or day,…) plus one month in advance. The following month, only the advanced month will show. In terms of our anchor dates, they will be as follows:
ActivationDate: 01/05/2023
LastBilledDate: 31/05/2023
NextBillPeriod: 30/06/2023
The example here is for items that need to be billed in advanced for June having selected the dates for May on the UI. For packages, if the user billed on June 1st, this means the usage will be in arrears (month of May) and billing period is billed in advanced.
You then select 01/05/2023 to 31/05/2023 as start and end dates where invoices are created.
Normally, TelecomBilling.Net keeps track of these dates automatically from billing period to billing period. So for instance next month if 01/06 to 30/06 are selected, the portal will bill the subscriptions for July and the calls for June.
When adding a package or a subscription, it is possible to select the SNs that apply to this item by clicking a line once it has been added and selecting/deselecting the required SN(s) via the button ‘Associated SNs’. Note that if you decide to show the cost centre section in a customer’s invoice, only the first SN selected here will be shown in the SNs column in the cost centre’s section, against a particular package or item.
If a system-wide subscription is modified from under the ‘Assets’ menu, the modifications will not affect the values that were set in the subscriptions page under each customer’s page where the item might have been added to him/her. If a subscription is linked to a customer’s account and the user wishes to modify it, it will have to be done from within each customer’s account. Once a subscription is added to a customer account, it becomes an item that is independent and specific to this customer. The same goes for inventory assets. For packages on the other hand, modifications made to a package’s voice, data and other charges parameters (e.g., call types included in a voice package,…) will modify the entry for this item that might have been made in a customer’s account.
The prices entered have to be free of any sales tax.
3.4.2.1.7. Extended notes

Access: Landing page > Home > Customers > Customer account > Drop-down box under ‘Actions’ > Extended notes
Page that can be used to enter daily notes about the customer.
3.4.2.1.8. Invoices
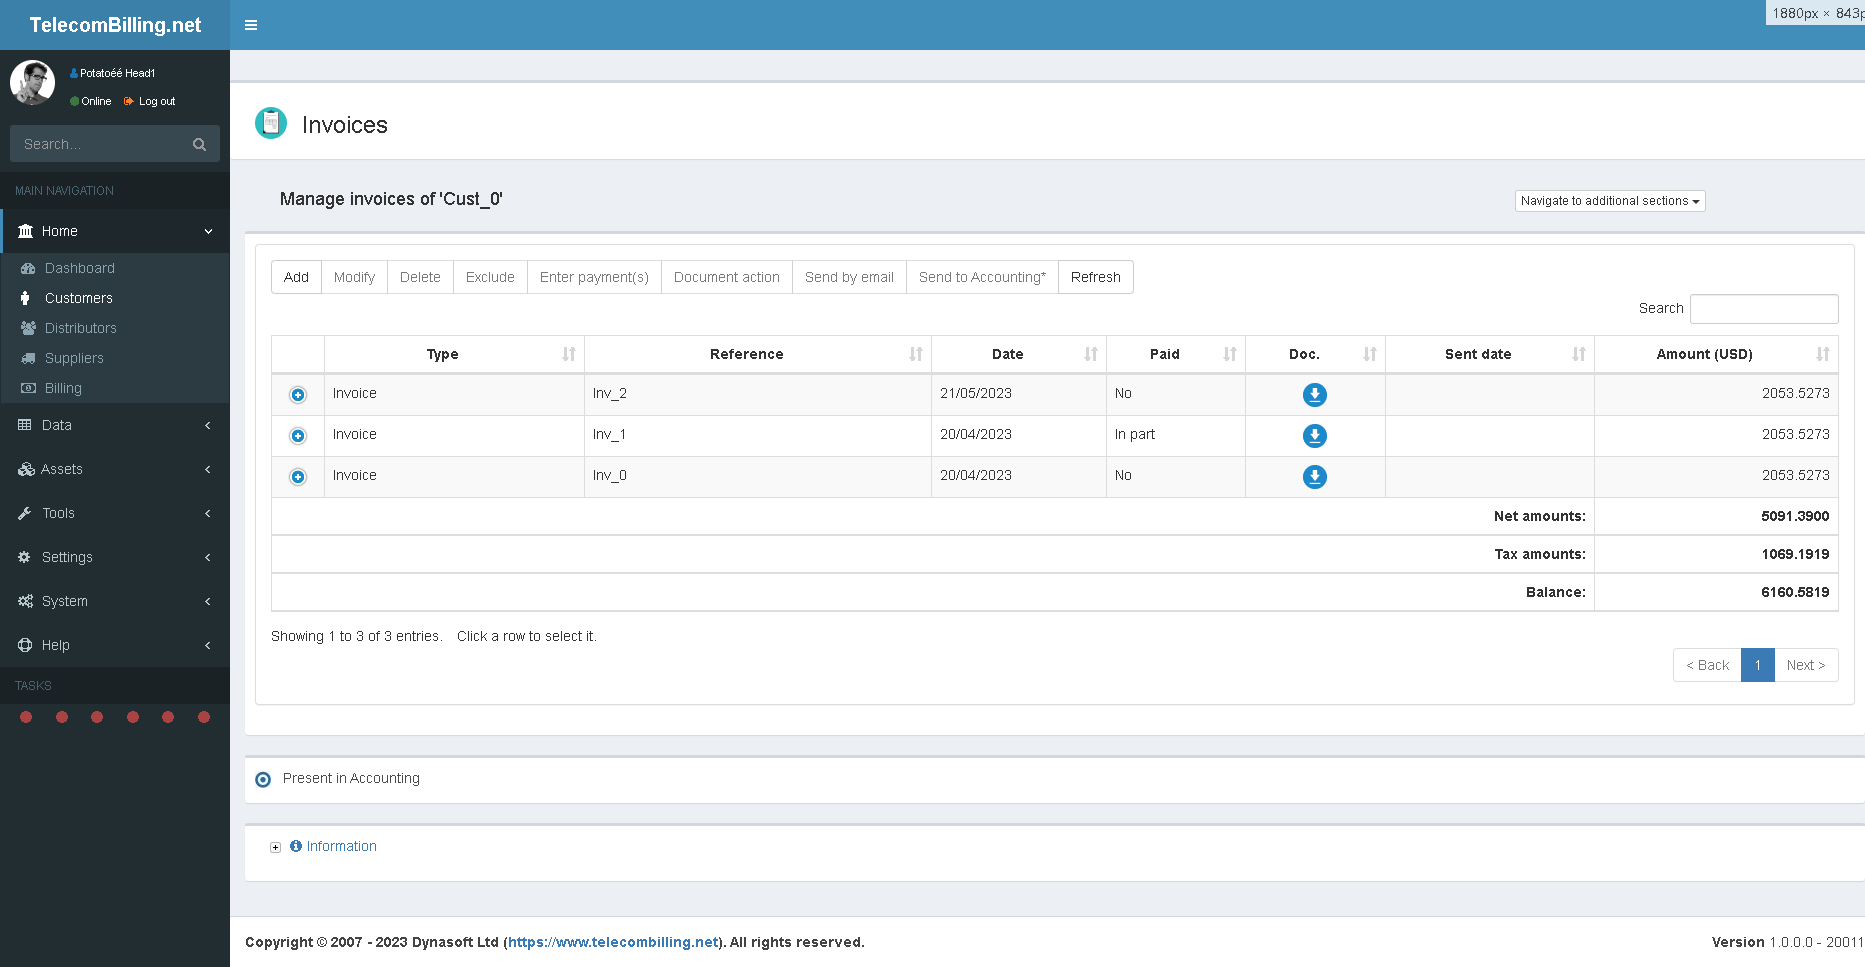
Access: Landing page > Home > Customers > Customer account > Drop-down box under ‘Actions’ > Invoices
This page displays invoices only whether they were created by saving them or by opening them from the configuration page.
You may delete a customer’s invoices or send them via email to him/her. It is necessary to configure the sending of invoices by email in the ‘Messaging’ page for this to work.
This page can also be reached from the ‘Data’ menu for all customers.
3.4.2.1.9. Service numbers (SNs)
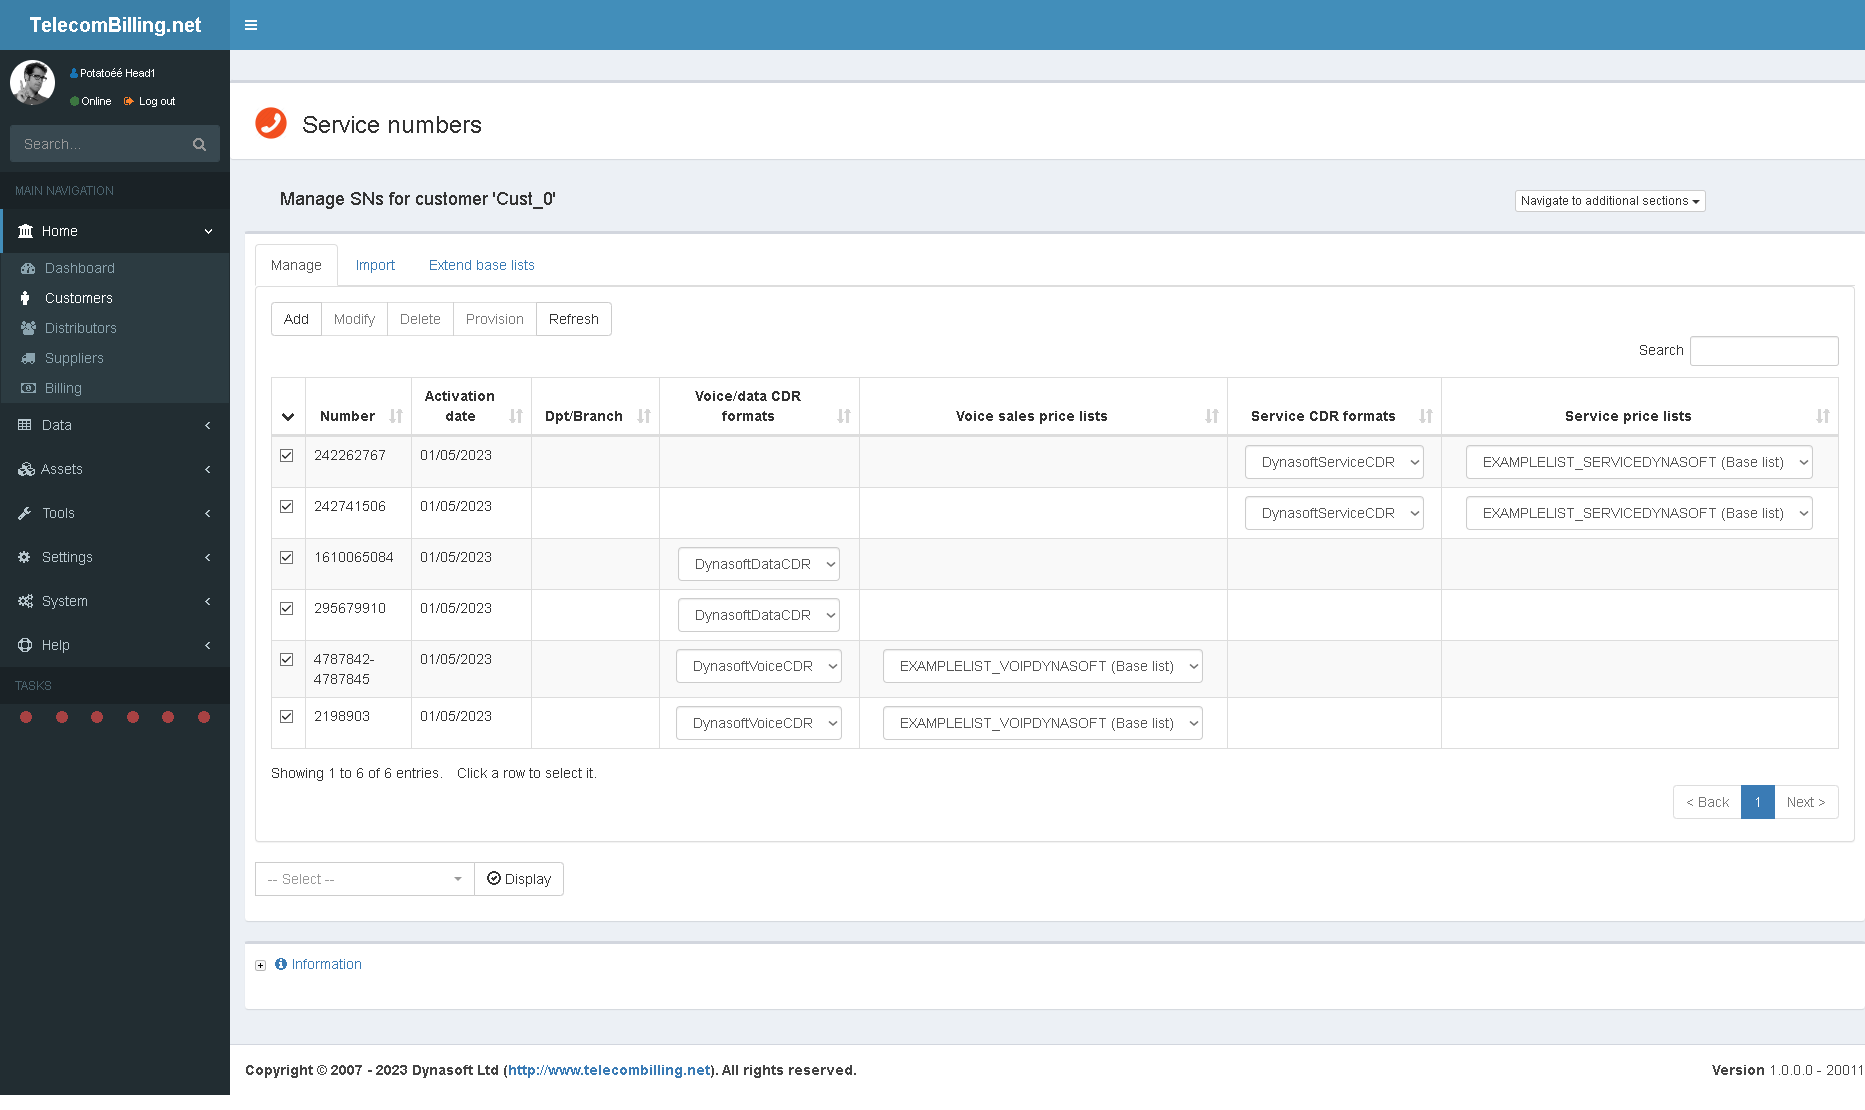
Access: Landing page > Home > Customers > Customer account > Drop-down box under ‘Actions’ > Service numbers
In TelecomBilling.Net, SNs are the customer’s phone numbers or account IDs. However, it is possible to define any series of character here: a Direct Dial-In (DDI), a Direct Inbound Dialing (DID), a Calling Line Identification (CLI), phone number, phone line, customer account ID, ANI number, IP address, PIN number, tariff class, NDI or anything that serves to identify a customer and their phone services.
‘Manage’ tab
Click ‘Add’ to open a new form:

From top to bottom:
- Determine of the number is active or not
- Identify the type of SN
- Select an existing DDI or SIM number or write a SN in the form. You may add phone numbers (no dots or slashes), IP addresses or any other series of characters as an SN
- Excluded numbers are those numbers that need to be ignored in a range of numbers
- Enter a regional dialling code
- Enter a national dialling code
- Enter the activation date for when the SN will start to run
- Enter a deactivation date, when calls for this SN will stop being billed
- Identify the department or branch that is linked to the SN
- Write a discount value
- Tick one or more voice CDR formats to associate with the SN.
- Tick one or more purchase price lists for voice services.
- Tick one or more sales price lists for voice services.
- Click on the ‘Services’ tab to select the services CDR formats associated with this SN
- Click ‘Save’
Write phone numbers by omitting any dialling code such as 00 or country code such as 44 (e.g., U.K.). If the full international number for one of your customers is, say, 00442071234567, write the root of that number likely to show in your CDRs as being the caller’s phone number (i.e., 2071234567 in this case). The root is the number but without any leading zeros or dialling code. Enter the national and regional dialling codes in their respective boxes on the form.
You may specify a range of numbers as a SN. For example, for 25557000 to 25557099 write 5557000-5557099. For SNs to be ignored inside this range, identify these in the ‘Excluded numbers’ box. E.g., for range ‘5557000-5557099’ and excluded numbers 5557020,5557021 this would be a range of 100 SNs where numbers 5557020 and 5557021 will be ignored. Duplicate entries for the SN are possible provided they each have different CDRs. Regular expressions can be used to manage the SN. Write the expression in the ‘Number’ box. Example of regular expressions: (25551234), voip:.+”(25551234)”, (25551234).* means the portal will pick up any SN that starts with 25551234,… The benefit of being able to work with regular expressions is that SN numbers are often “buried” in the CDR data and can be hard to extract. A regular expression will make it possible to extract the SN quickly and effectively. Ensure that the SN in the expression is enclosed in open “(“ and close “)” brackets as per examples above. More on regular expressions can be found here and expressions can be tested here.
Department and branches are linked to all the numbers in a range of numbers if a range is added via this form.
If there is any issue with the SNs in terms of some SNs missing their association with a price list or CDR format, the portal will show a warning message at the top of the page and highlight the problem numbers in orange in the main table. Only voice and service CDRs need to be associated with one or more price lists. Data CDRs get rated via the packages.
If a SN is associated with two or more price lists and that in these lists some destinations have the same dialling codes, the portal will always use rates from lowest to highest in the lists.
It is possible not to enter an end date. This will be taken to mean that billing will never expire for a particular SN. The dates entered here will be compared with the dates found in the CDRs and not the actual date a billing run is made. So for instance if you enter that a price list for a SN is available from say 01 May 2023to 31 May 2023, the portal will use this price list only for those calls that were made during that period. If you wish that all say April calls, be billed using this price list, you will have to backdate a list’s validity to April of that year or to any date that precedes the date the 1st call of a billing period was made.
It’s not necessary to link an SN with a price list if the CDR that was selected is rated using a sales price column in the CDR data, a purchase price column and margin multiplier, or if the CDR format is a data CDR only and contains no information about voice services.
If the tick box under the end date is ticked, the portal will propagate the same end date to all the other SNs in the list in the table.
It is possible to add several times the same SN provided each entry has a different start and end date, i.e. provided these periods stagger over time. The portal will, when running a billing session use the SN once only if the dates match the dates selected for the billing run.
All numbers entered here for a particular customer will be billed when performing a billing session in chapter 3.4.3, if the dates identified here fit the dates selected in the Billing page and if the CDR format identified here has corresponding CDR files/tables/web pages.
You may associate SNs with country codes different to the code of the country of residence of the customer.
You may also enter the word ‘ALL’ as a SN to associate an entire group of CDRs with a particular customer. This is useful to avoid having to manually enter all of a customer’s SNs and if you have one single big customer activated with one sole carrier. The portal will rate all the CDRs within a particular group of CDRs and associate all call, data and service items with this customer. You may then to make things even easier simply create a price list that has a value in the MarginMultiplier field and ensure that this CDR group has a cost column, to rate CDRs based on a permanent percentage value that does not change overtime.
If the SN is a DDI or SIM and it is being deleted, then any reference to the DDI or SIM in a subscription or package will be also be deleted.
‘Import’ tab
Use this functionality to quickly import large numbers of SNs. Simply follow the steps to the end and enter the required data when asked.
‘Extend base lists’ tab
It is possible to extend a base list and create one specific to a customer. Select a base list and click ‘Extend’. This will cause the system to create a new instance of the list but this time created for the current customer. As long as it is selected in the SN parameters form that we saw in the ‘Manage’ tab previously, the underlying base list accessible from the Price lists detail page will still be used by TelecomBilling.Net when the billing is done in case there should be any calls that cannot be matched to a dialling code using this new customer price list created here. It is possible to access the customer’s newly created price list from the ‘Price list details’ page. The rates TelecomBilling.Net will use first when billing, are the ones defined in this newly created price list and then it will fall back on the base list, again if both lists are linked to the SN.
Finally, ensure the column in the SNs for national dialling codes is reviewed if some of these codes are empty. Leaving these codes empty might introduce errors later when billing your customers.
The discount identified for each SN will be added to the discount identified in the price lists for data and recurring services during invoicing.
• If the SNs are true phone numbers, i.e. the whole number is numeric, then these should not have any leading zeros and the national and/or regional dialling codes need to be placed in their respective boxes.
• Non-true phone numbers (i.e., non numeric numbers) can have leading zeros.
• Dialling codes should not have any leading zeros or spaces.
• Often CDR data includes national numbers calling (that is to say a customer’s SN) or national numbers called that have no country code. In this case, the portal uses the country code set alongside the SN to manage such numbers. If SNs defined herein include non-numeric characters, the portal considers that these numbers are not real phone numbers. From then, when the portal compares the SN to an originating number encountered in the CDR data, it will ignore the prefixes for the analysis of the originating number. If this is the case, leaving the boxes for the dialling codes empty should not affect billing. In terms of the called number and if no country code is defined with the SN, the portal will use the customer’s general country code to identify the originating country of the calls.
• It is strongly recommended to limit the number of lines in all price lists as a large number of lines may slow down the optimal running of the program when billing.
3.4.2.1.10. Account Codes
Sometimes certain CDR formats require to rate services (voice, data or recurrent services) and identify the user these belong to via customer-specific codes rather than their service numbers. Identify the account codes for customers via this page. In the CDR format import wizard, you will find an option that will require identifying if SNs or account codes should be used to link a service to a customer.
3.4.2.1.11. Bank account
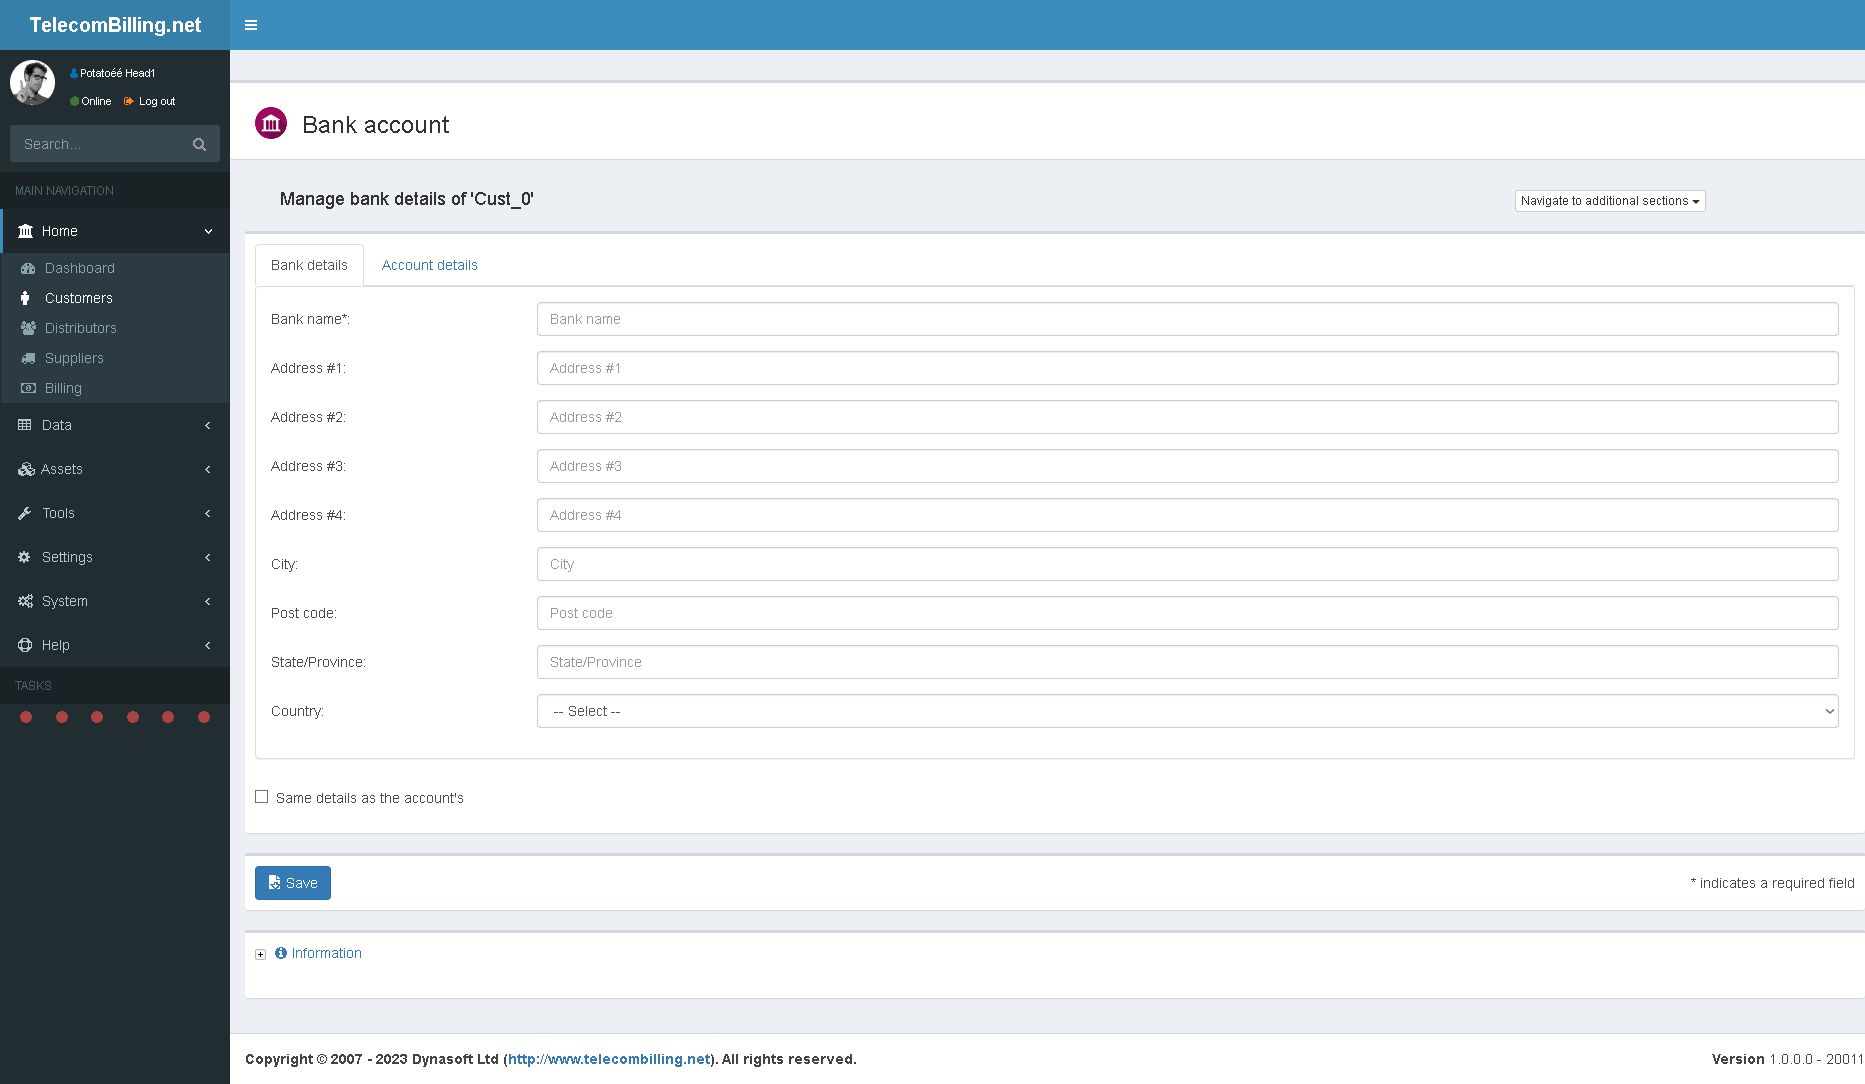
Access: Landing page > Home > Distributors > Distributor account > Drop-down box under ‘Actions’ > Bank account
Fill in the page with the customer’s bank details.
3.4.2.1.12. Credit card
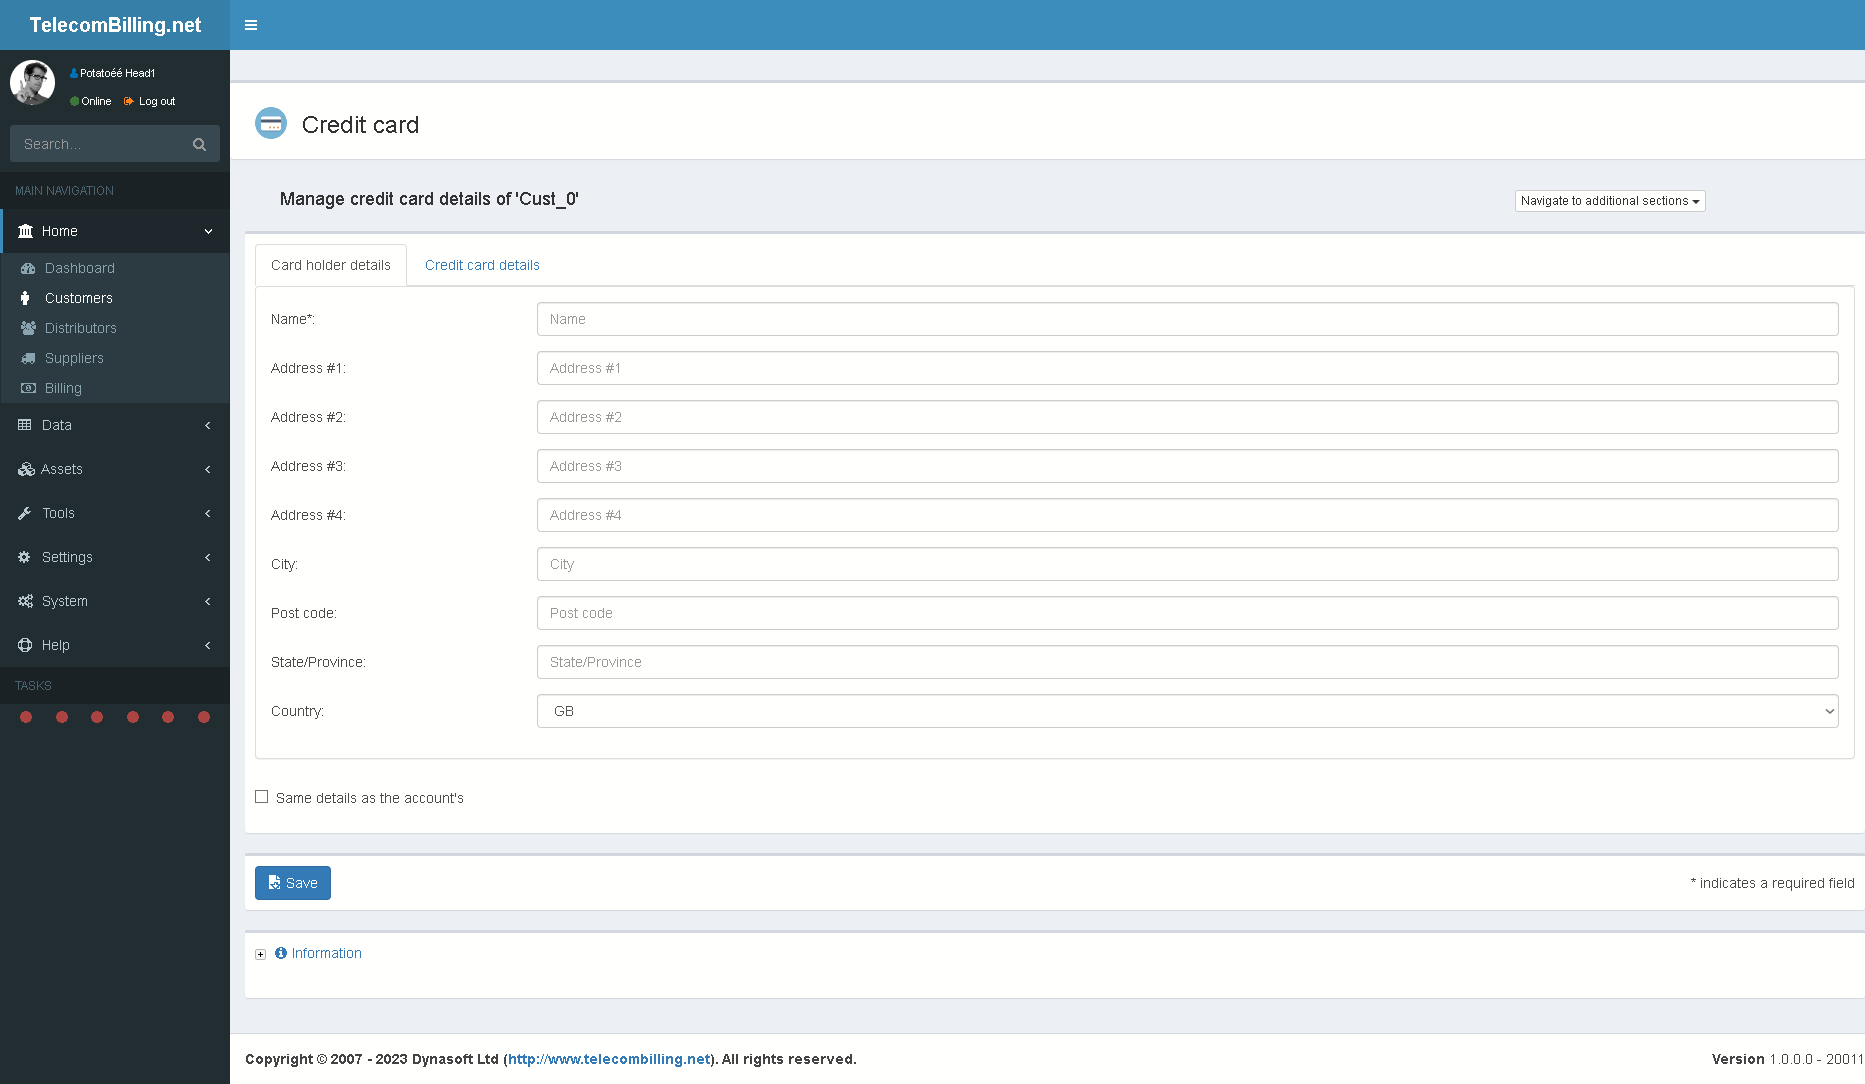
Access: Landing page > Home > Distributors > Distributor account > Drop-down box under ‘Actions’ > Credit card
Fill in the page with the customer’s credit card details.
Options such as credit card types are set in the Configuration page.
3.4.2.2. Distributor
3.4.2.2.1. Details
Details A
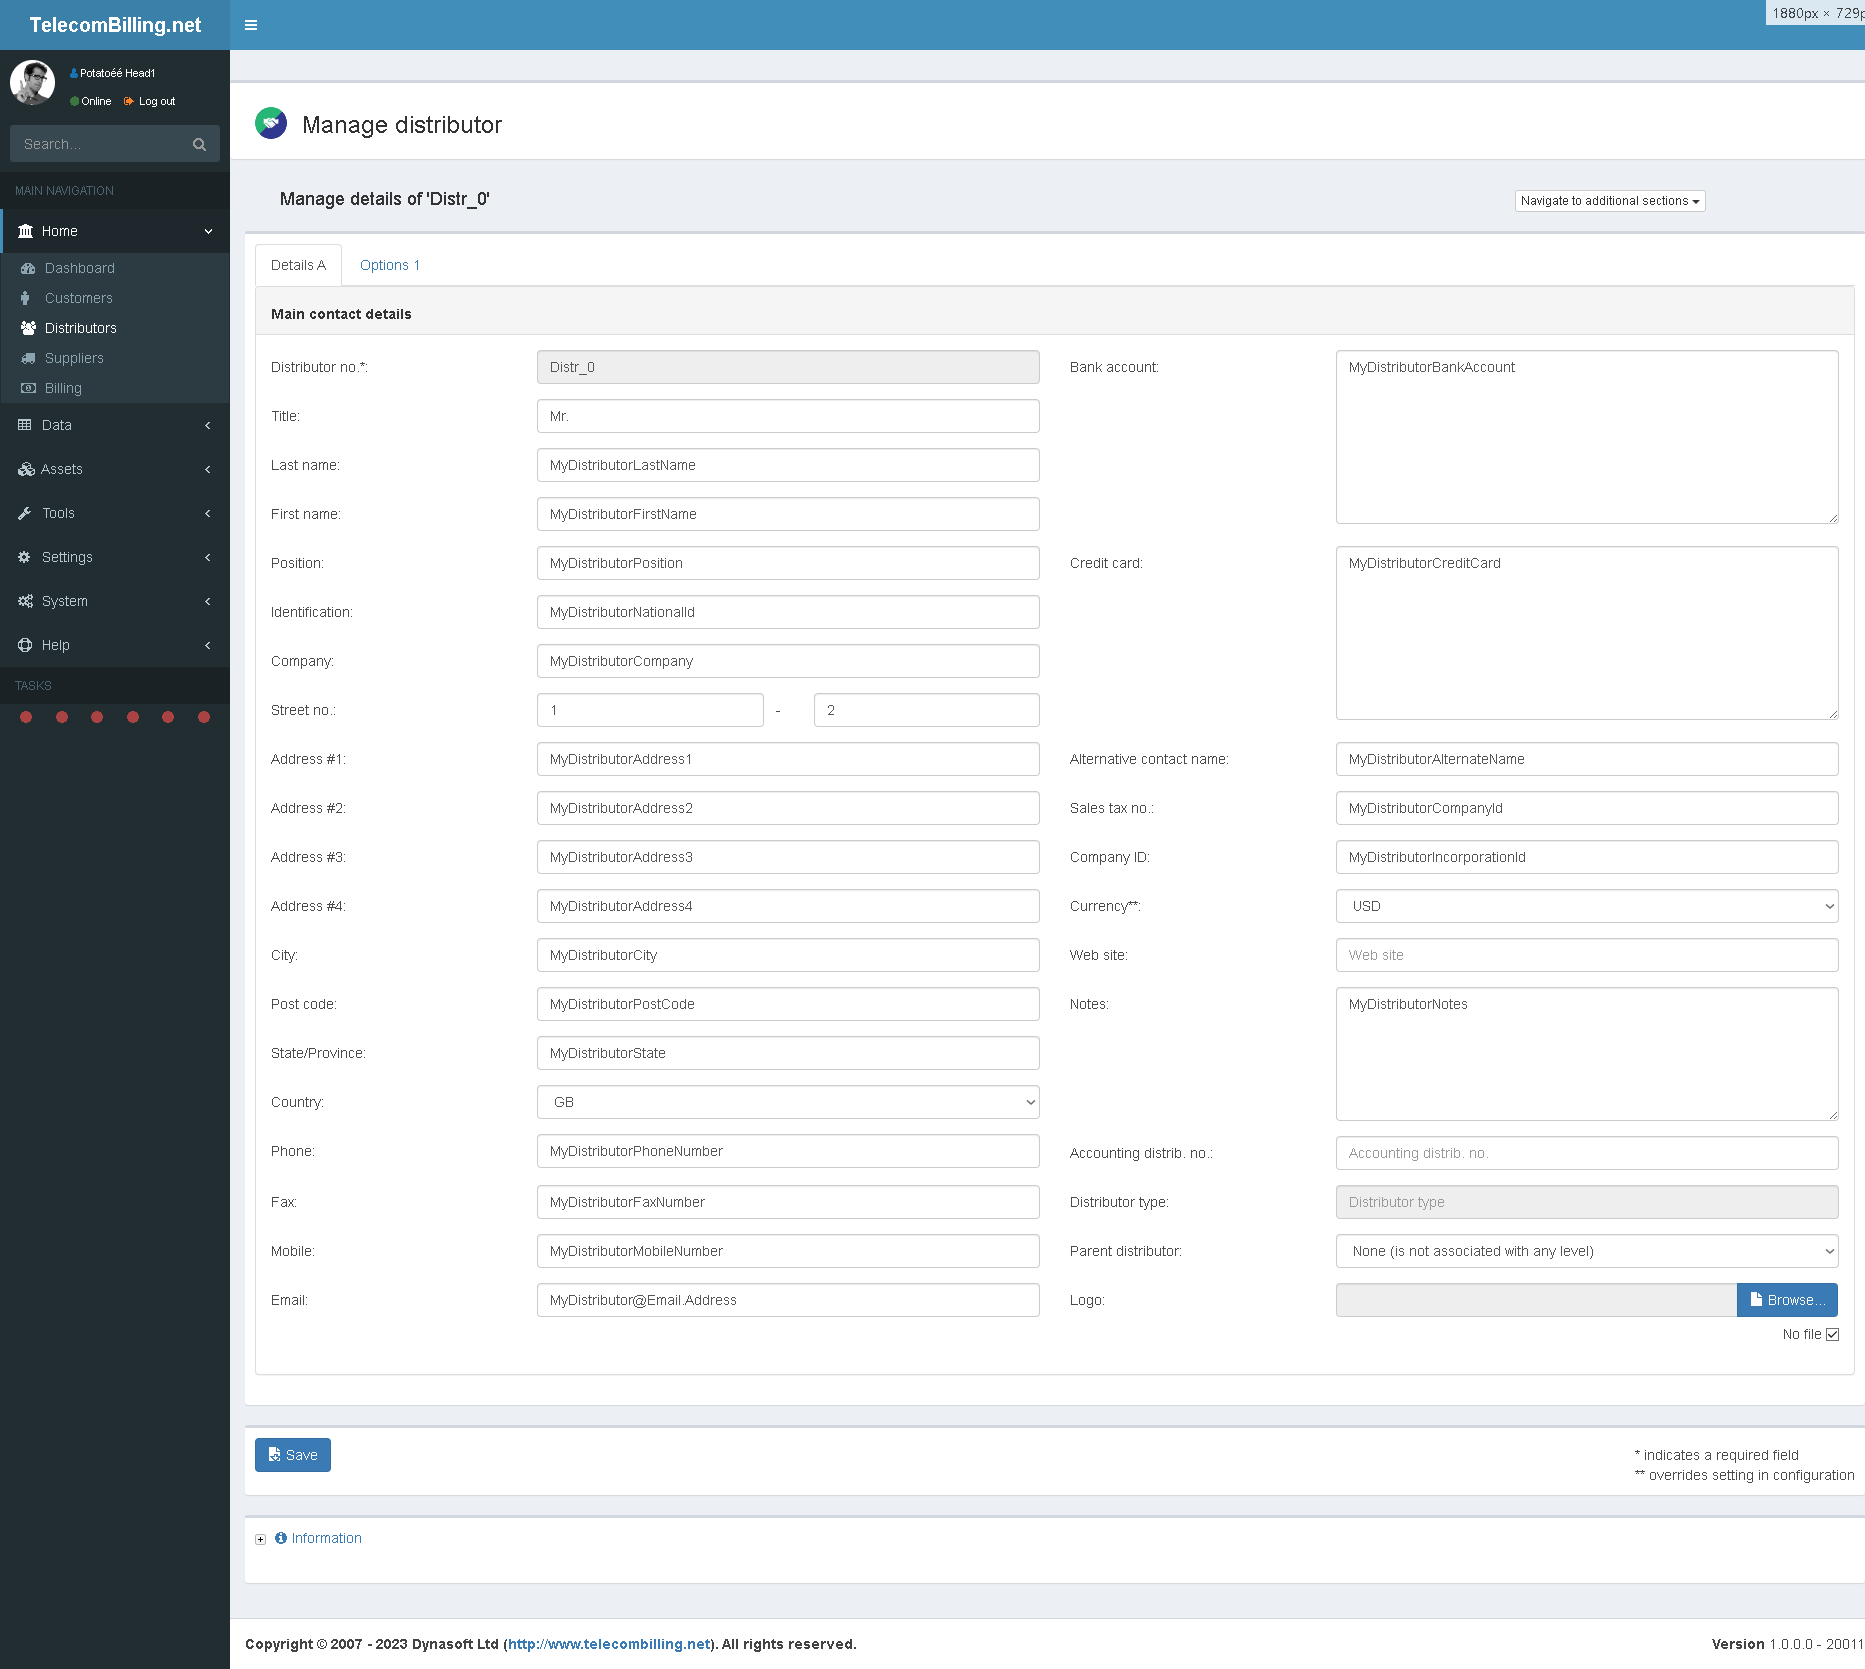
Access: Landing page > Home > Distributors > Drop-down box under ‘Actions’ > Modify a distributor > First tab
Fill in the form with the distributor’s details. Access additional pages to enter the distributor’s bank and credit card details via the drop-down box at bottom right hand corner.
Three types of distributors can be used with Dynasoft TelecomBilling.Net:
• Distributors are customers of your company’s and so use your company’s services: Create an entry for the distributor in the customers page and enter the distributor’s SNs and that of his customers as if he was a normal customer;
• Distributors do not use your company’s services: Use the distributors page and issue them with a credit note;
• Distributors are customers of your company’s and so use your company’s services, but both him/her and his customers have to be billed separately: Enter the distributor and his customers separately as normal customers and associate each customer with the distributor using the sponsorship scheme provided with Dynasoft TelecomBilling.Net.
In all three cases, remember to tick the option ‘a’, ‘Make the session an official one and save all its data’ in the Billing Options page to let the portal work out any commissions payable to your customers and distributors.
Options 1
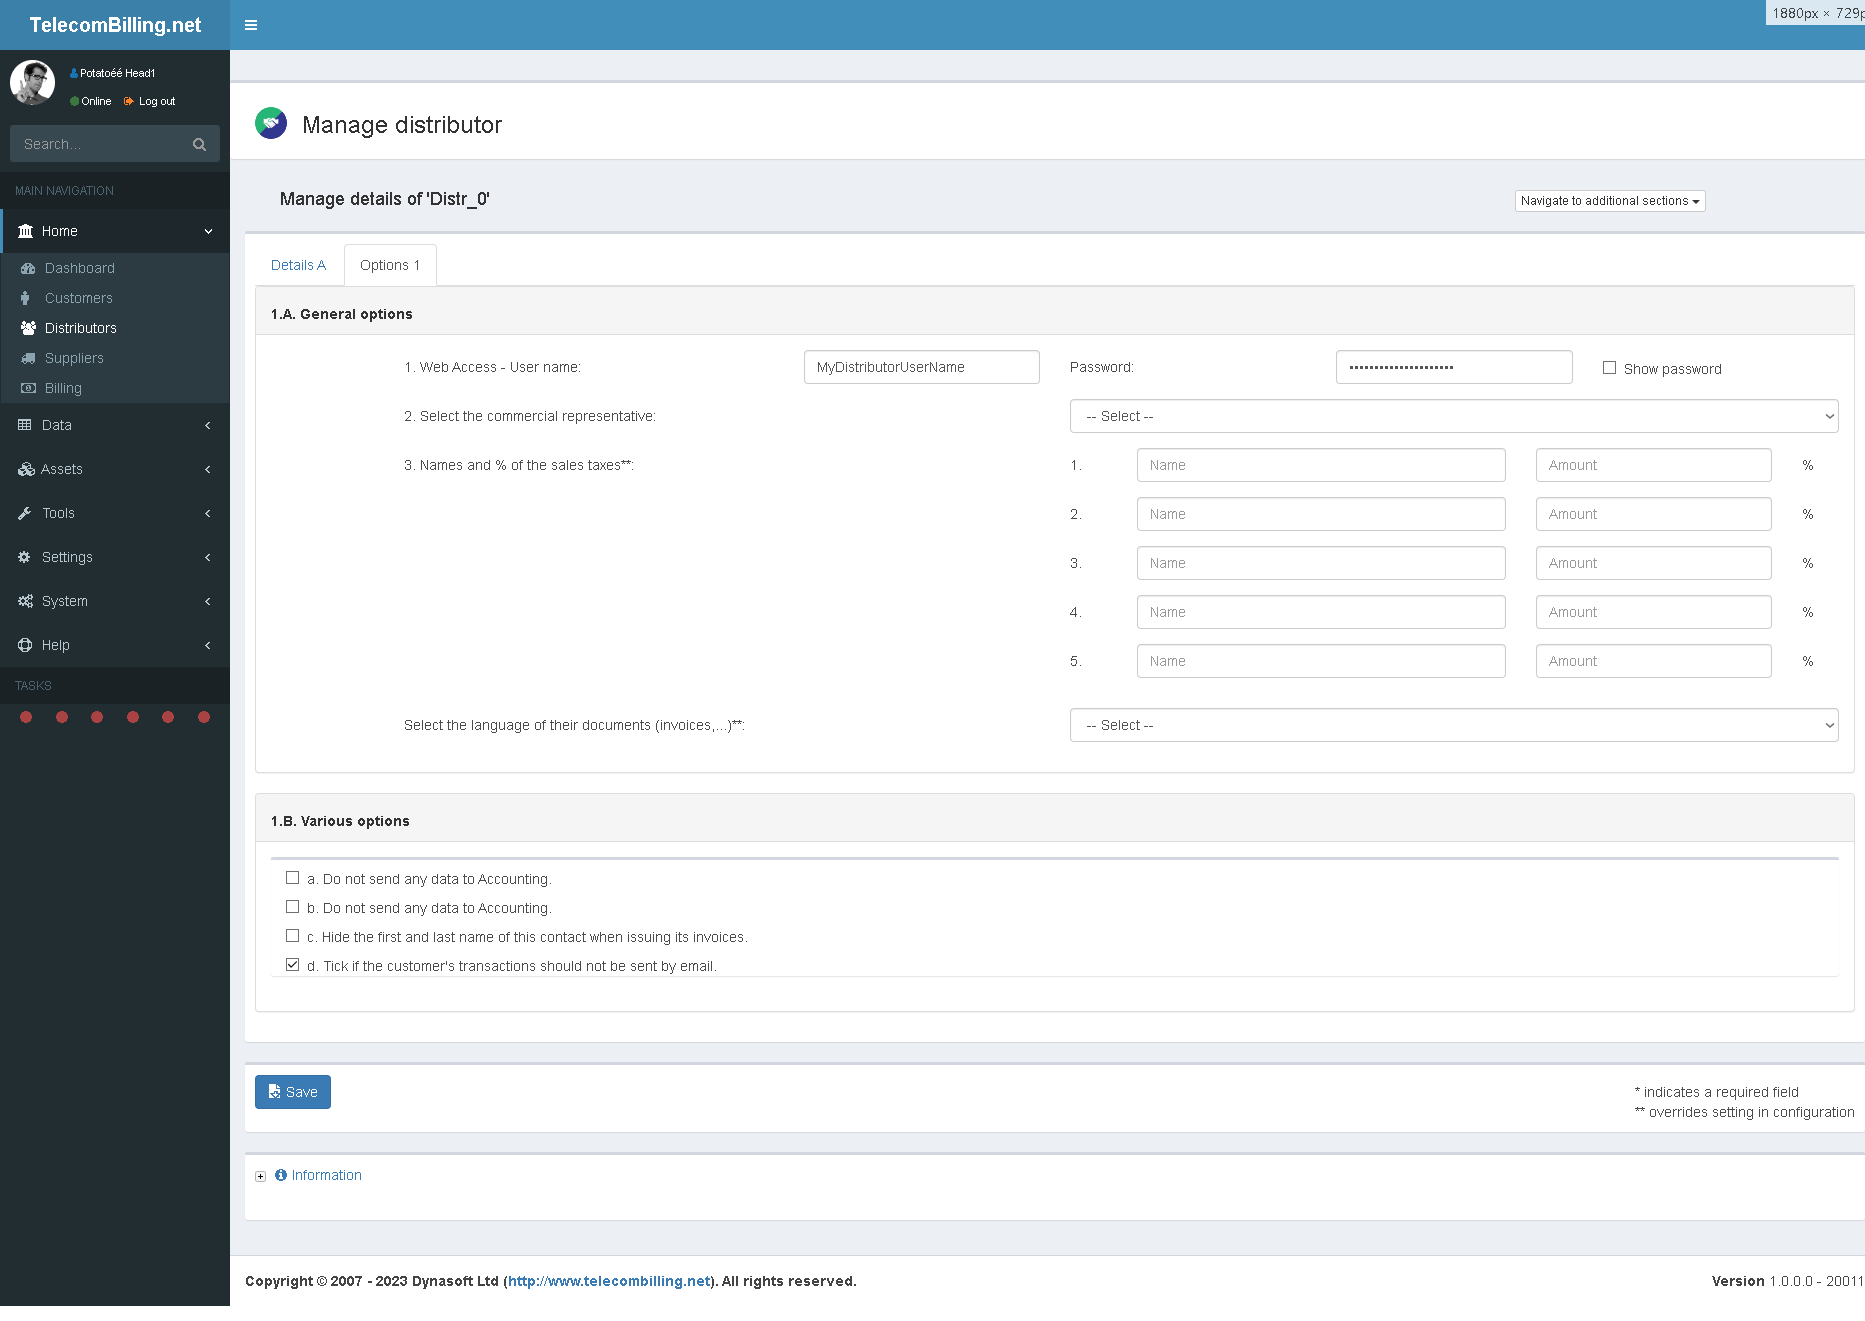
Access: Landing page > Home > Distributors > Drop-down box under ‘Actions’ > Modify a distributor > Second tab
Select the user name and password for TelecomBilling.Net Web Access, the commercial representative who created this contact, the levels of the sales taxes that apply to this distributor, their language, various options …
3.4.2.2.2. Commissions
Access: Landing page > Home > Distributors > Distributor account > Drop-down box under ‘Actions’ > Commissions
TelecomBilling.Net uses two types of commissions: Point of Sale and residual. The latter type applies to voice/data and recurrent services and is given to the distributor each time a customer invoice is raised. The former type is given to the distributor on each sale the distributor manages to secure. Typically, these are on subscriptions, packages, DDIs, SIMs and inventory assets sold by your company to a customer. This occurs when a new sale is entered in the customer’s subscriptions page. Residual commissions are always given as percentages. The packages and subscriptions that show are the ones associated with all the customers linked to the distributor.
TelecomBilling.Net supports three scopes when it comes to commissions:
- Commissions that are applied on all items, from voice services to subscriptions. Here, Point of Sale commission can be a percentage figure or be based on a fixed amount given out each time a sale is secured.
- Commissions that are applied separately on each item type, i.e., on each package, subscription, and inventory item (Point of Sale only) or call group or recurrent service (Residual). An item from inventory will be treated the same as a subscription when it comes to commissions.
- Commissions that are applied separately on each item type as residual commission only, given out when invoices are raised. This type of commission is applied to all products and services from voice services to subscriptions.
Finally, specify at the top of the first commissions tab:
- The basis upon which commissions will be calculated: sales price, purchase price or profit of the item.
- How the commissions identified will be split between the different distributors located above this one in the hierarchy.
- Distributors can get extra commission if they reach a certain number of sales. Specify these values here.
Commissions are calculated on the price of the packages, not on values that correspond to any excess usage for the data part of packages. For POS commissions to a customer’s distributor, these are given whenever an item is entered or modified via this page and is marked with ‘Order fulfilled’. Commissions are only given if a new item’s status is marked as such or if an existing item is given this status from a lower one. A value for the commission for any new item has to be entered here if the commission is of the POS type because this item will not show in the commission tab of the distributor’s account yet as it is a new item and it would not be possible to enter this value via that page.
It is possible to move between the activation of type 2 and type 3 commissions and the data stored will be preserved. Only the actual type activated/clicked will be used during billing.
3.4.2.2.3. Branded billing
Access: Landing page > Home > Distributors > Distributor account > Drop-down box under ‘Actions’ > Branded billing
Here, all the elements required for the design and handling of invoices are given again but apply to the distributor. Branded billing means it is possible to show on an invoice the distributor’s detail in lieu of the billing company in case billing of their customers is sub-contracted by them to the billing company. Fill in the information required from point ‘1’ to ’10’ so that the distributor’s full design elements and details will show when his customers’ invoices are raised. For this option to work, make sure you tick the ‘Branded billing by distributors’ option in the Billing page, activate this option here with the tick box and enter correct data for all the points on the tab.
3.4.2.2.4. Bank account
Access: Landing page > Home > Distributors > Distributor account > Drop-down box under ‘Actions’ > Bank account
Fill in the page with the distributor’s bank details.
3.4.2.2.5. Credit card
Access: Landing page > Home > Distributors > Distributor account > Drop-down box under ‘Actions’ > Credit card
Fill in the page with the distributor’s credit card details.
3.4.2.2.6. Transactions
Access: Landing page > Home > Distributors > Distributor account > Drop-down box under ‘Actions’ > Transactions
The page is identical to the page for a customer. See customers for more.
When using the billing part of the portal explained in chapter 3.4.3 and if you click the option that says to include the invoices in customers’ billing, the commissions associated with these invoices and distributors will be added to each distributor here. The same types of transactions exist here as do for the customers.
Distributors can also log into TelecomBilling.Net Web Access and search calls made by their customers and check their balance.
3.4.2.2.7. Invoices
Access: Landing page > Home > Distributors > Distributor account > Drop-down box under ‘Actions’ > Invoices
The page is identical to the page for a customer. See customers for more.
3.4.2.2.8. Finances
Access: Landing page > Home > Distributors > Distributor account > Drop-down box under ‘Actions’ > Finances
The page is identical to the page for a customer. See customers for more.
3.4.2.2.9. Extended notes
Access: Landing page > Home > Distributors > Distributor account > Drop-down box under ‘Actions’ > Extended notes
The page is identical to the page for a customer. See customers for more.
3.4.2.3. Supplier
3.4.2.3.1. Details
Details A
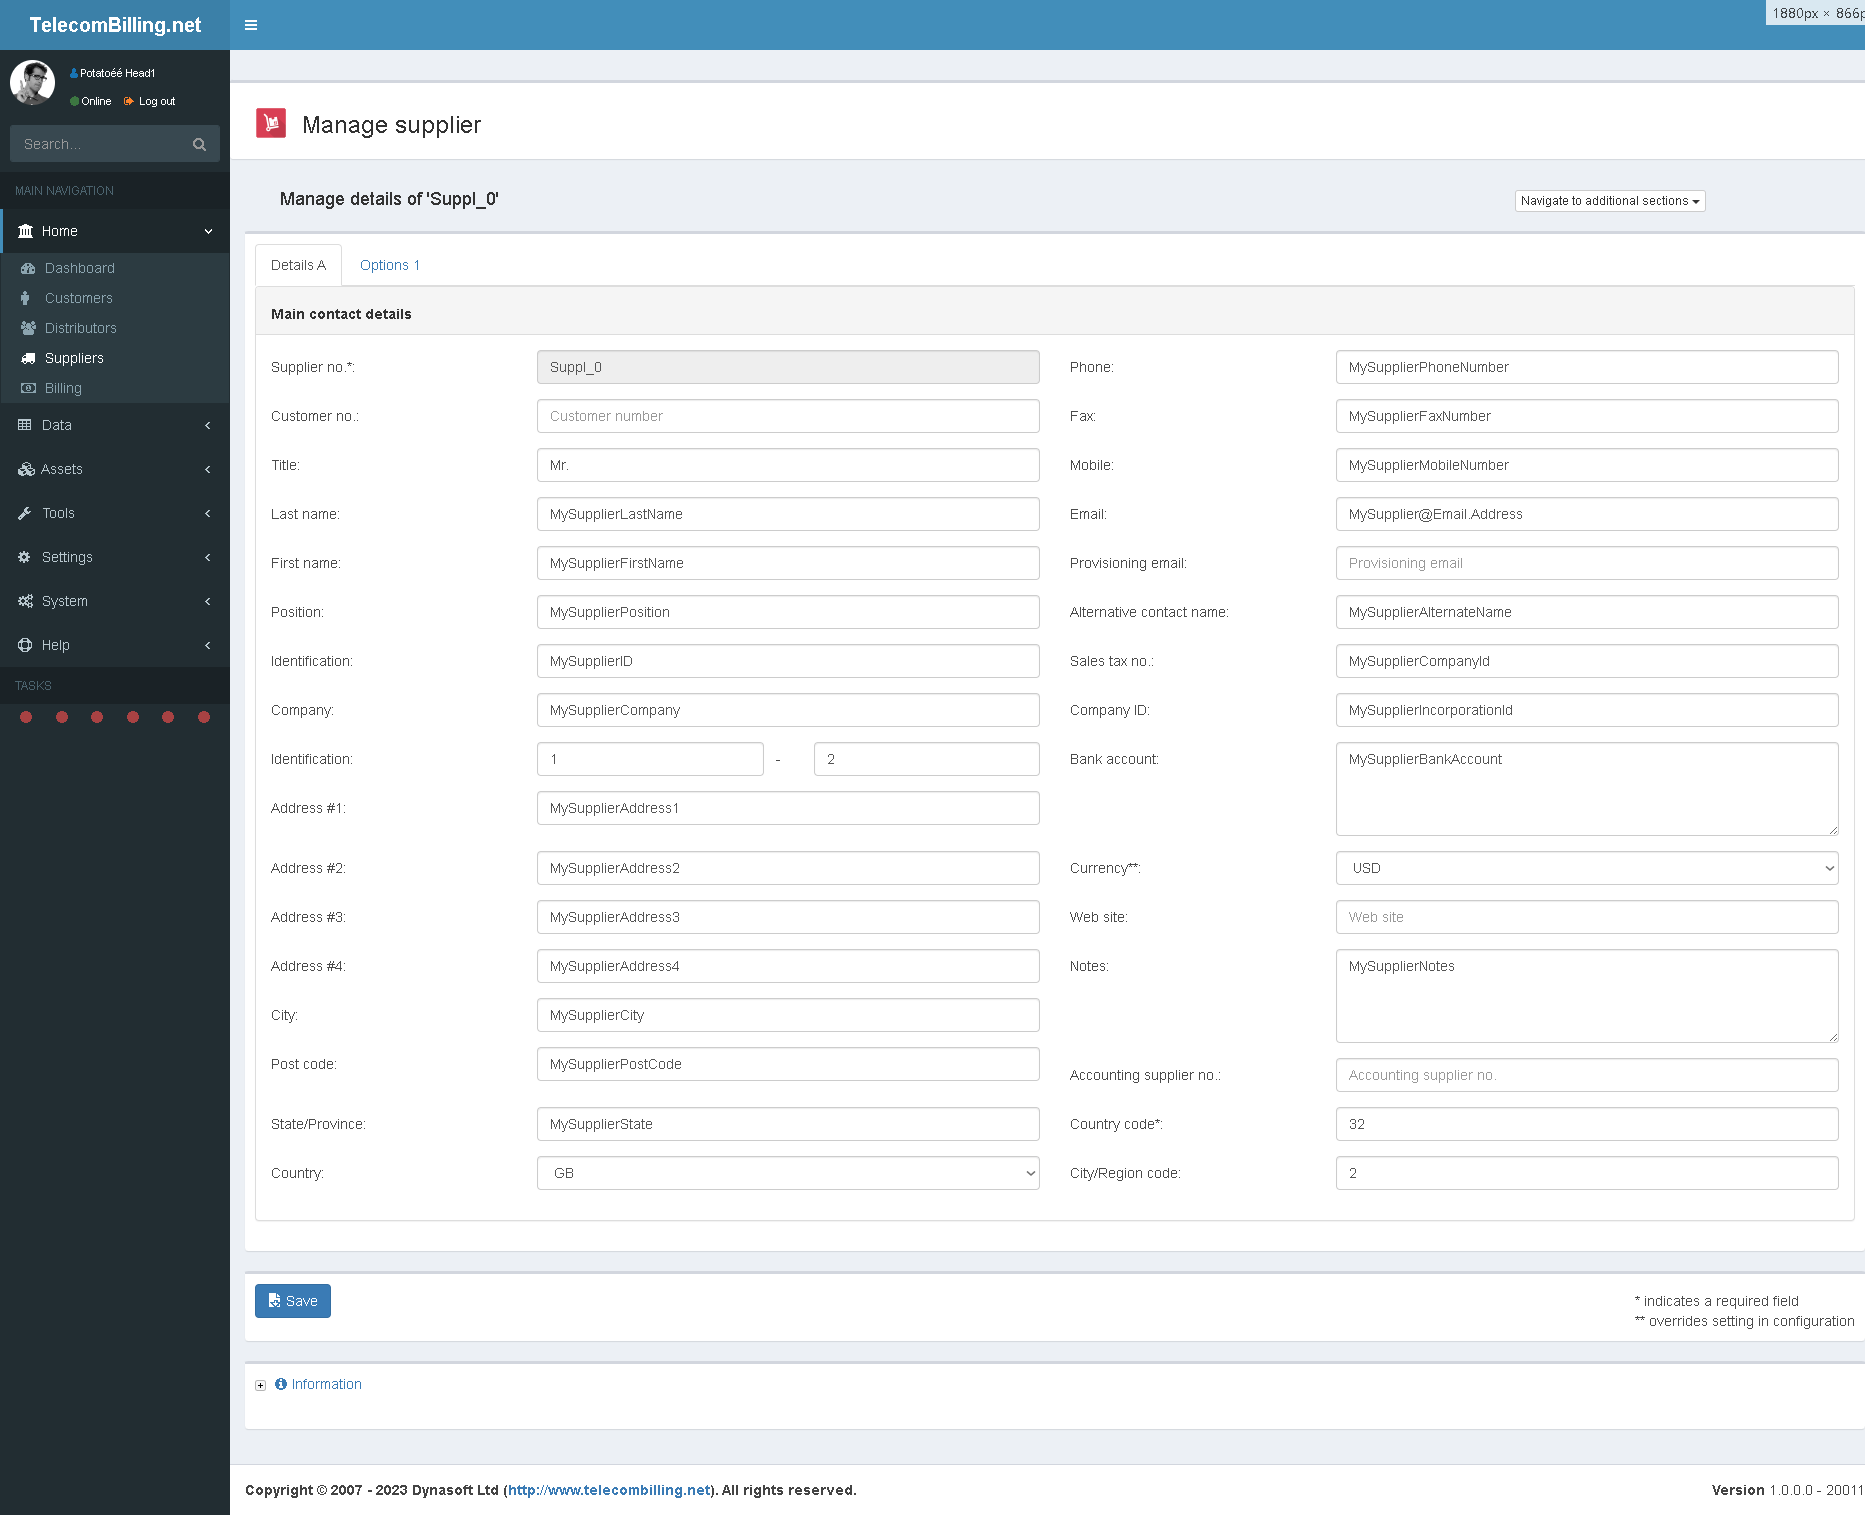
Access: Landing page > Home > Suppliers > Drop-down box under ‘Actions’ > Modify a supplier > First tab
Fill in the form with the supplier’s details. Access additional pages to enter the distributor’s bank and credit card details via the drop-down box at top right hand corner.
Options 1

Access: Landing page > Home > Suppliers > Drop-down box under ‘Actions’ > Modify a supplier > Second tab
Identify the supplier’s representative within your organisation, the supplier type, the levels of the sales taxes that apply to this supplier, their language, various options…
3.4.2.3.2. Voice settings

Access: Landing page > Home > Suppliers > Supplier account > Drop-down box under ‘Actions’ > Voice settings
This page is identical to the one provided under the ‘Settings’ menu but applies to the supplier being viewed only. Bank holidays are identified for each supplier at the bottom of this page.
3.4.2.3.3. Service settings
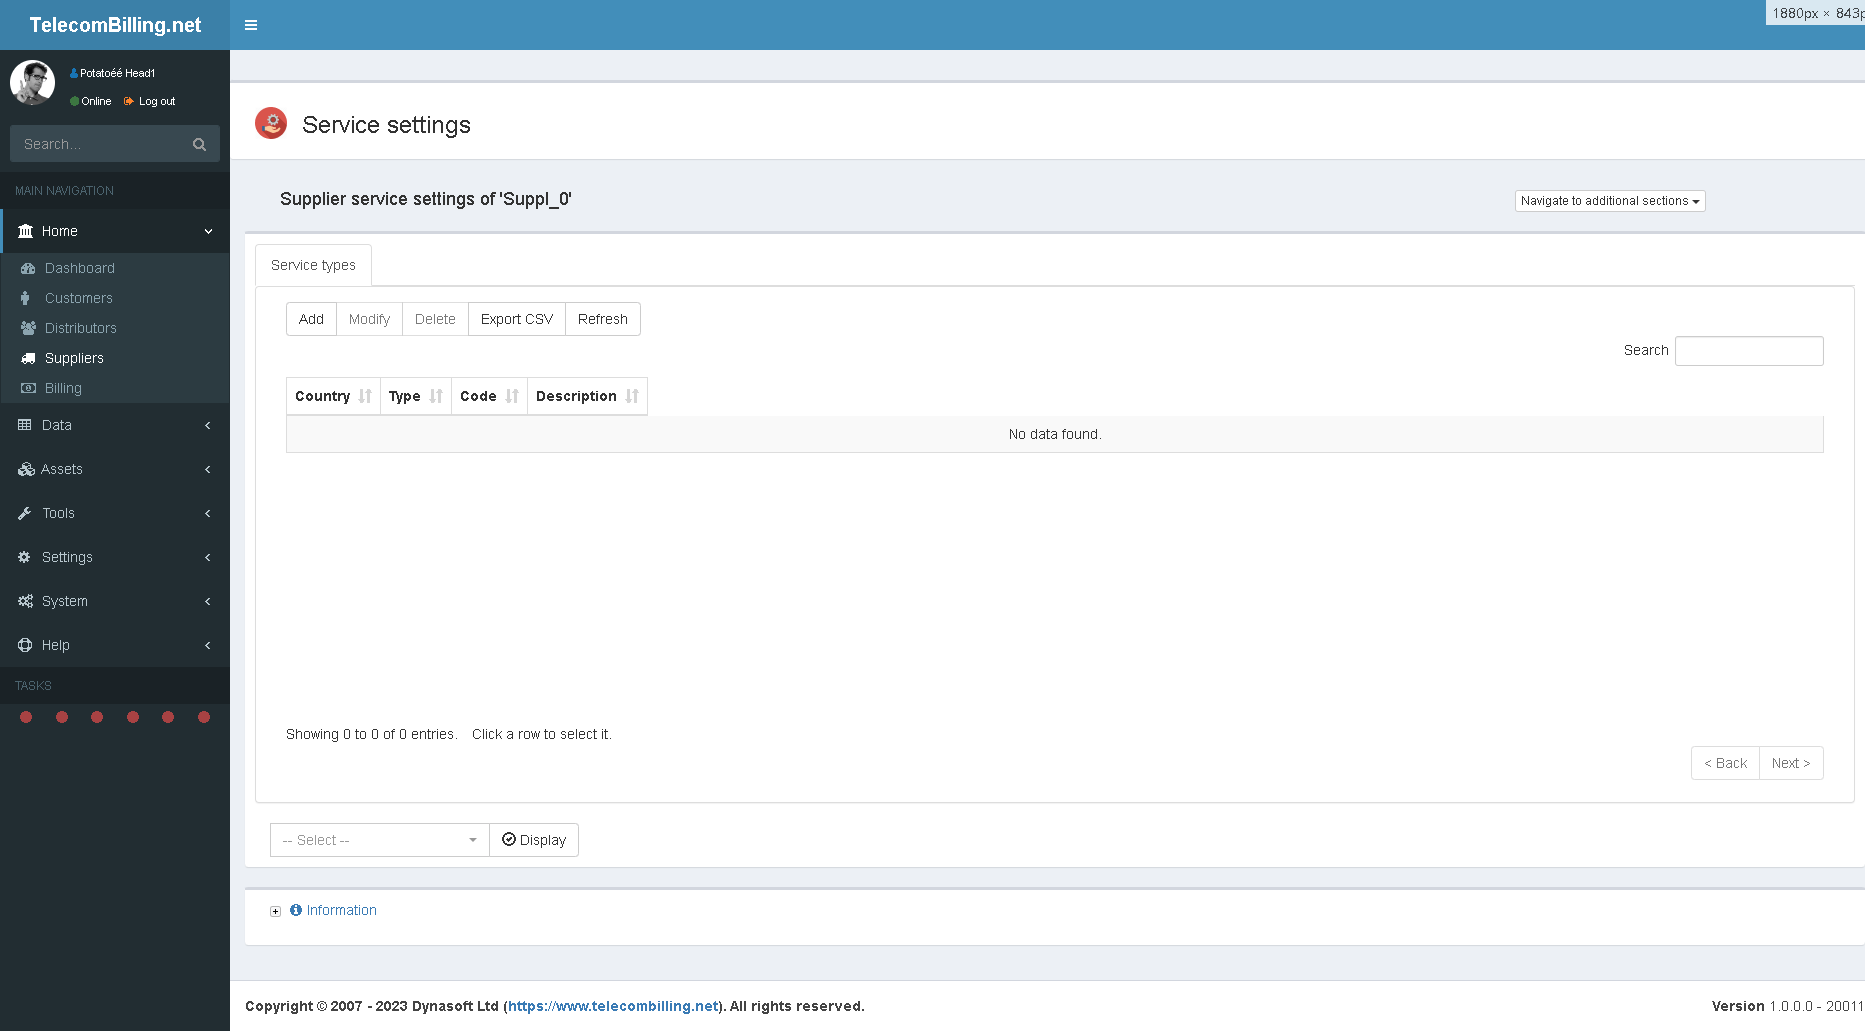
This page is identical to the one provided under the ‘Settings’ menu but applies to the supplier being viewed only.
3.4.2.3.4. CDR formats
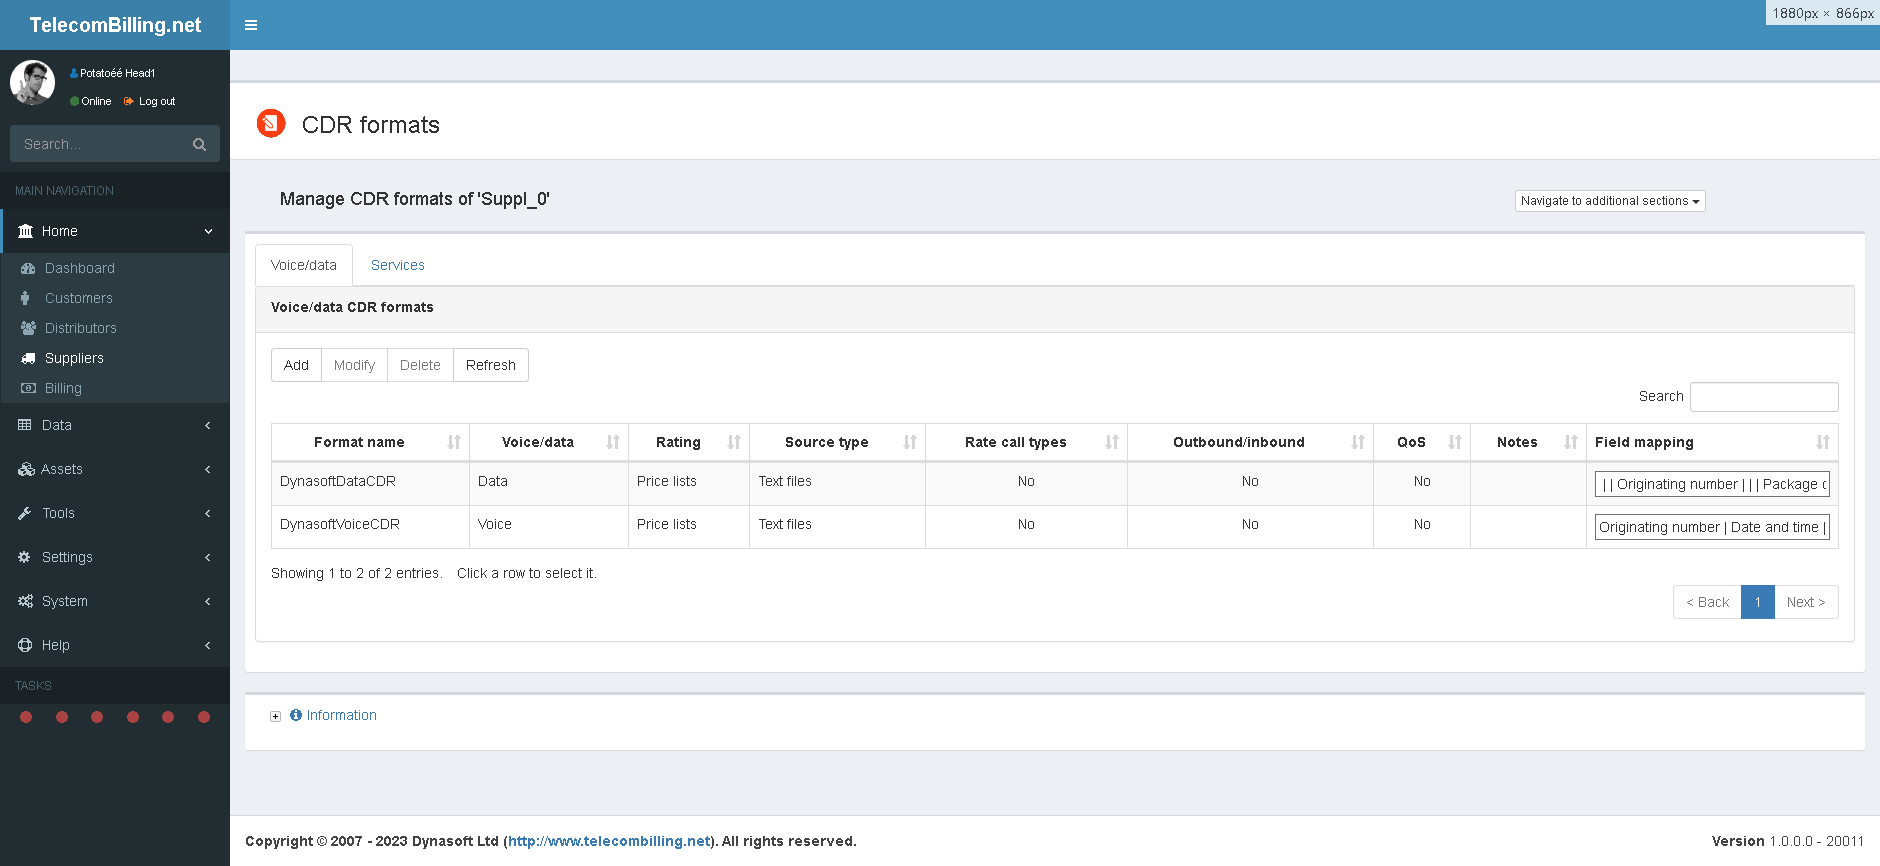
Access: Landing page > Home > Suppliers > Supplier account > Drop-down box under ‘Actions’ > CDR formats
Some major aspects about CDR billing data with TelecomBilling.Net are as follows:
- TelecomBilling.Net makes it possible to bill voice/data and recurring services CDRs
- The source of the CDRs can be: text files, http requests, webhooks and databases
- For text files, the file encoding needs to be UTF8
- Rating of customer data can be made in three ways:
- By defining rates in price lists
- By identifying a purchase price column in the CDRs and a global margin multiplier
- By identifying a sales price column in the CDRs
- By identifying a purchase price column in the CDRs and a customer-specific margin multiplier
The rating of a package is done based on package codes. For the rating to work, the codes identified within a package code column in the CDR format will have to match the codes identified in your packages.
There are several ways TelecomBilling.Net works out which purchase price to use for a voice call, data package or recurrent service:
• The purchase price will be taken first from the CDR data if a purchase price column was identified when importing a CDR format (voice and services)
• Then, the portal will fall back on the purchase prices identified in the sales price lists identified in a customer’s voice/data or service parameters under their account’s SN page (voice and services)
• Failing all that, the system will use the purchase prices identified in the customer’s purchase price list (voice and services) or packages (data)
If margin multipliers are identified in a price list, these, combined with a purchase price in the CDR data, will always have precedence over per minute rates and fees in the same price list.
For the recurrence of data packages and services, ‘one time’ means that each cost that appears in the CDR data will be priced once. Here the price for example in a data price list will be a price per kilo, mega … bytes.
The CDR format page has 2 tabs and are where the different CDR formats are added, whether for voice/data or recurrent subscriptions. A number of parameters have to be associated with each CDR format. A number of parameters must be associated with each CDR format. These are identified with an import wizard for CDR formats.
For Service CDRs, TelecomBilling.Net makes it possible to have CDR data that runs to a different recurrence from the recurrence specified in the price lists. Simply specify the recurrence in both instances (i.e., in the CDR format as seen above and in the price lists for the different services).
TelecomBilling.Net supports the billing of outgoing and incoming calls. The former is also sometimes called outbound, egress or ‘b leg’ calls. The latter are sometimes called inbound, ingress or ‘a leg’ calls.
TelecomBilling.Net makes it possible to bill a single CDR line that can hold both outbound and inbound calls.
Voice/data CDRs
To add a new type of voice/data CDR, click the ‘Add’ button. You will be taken to a wizard. Simply complete the import process of your new format there.
Not all options are relevant to the format you want to import. Select ‘>Not applicable<‘ if you are faced with an option that does not apply.
Steps involved are detailed below:
- 1. Identify if the format is for voice, data or both. The guidance that follows will be for a format that uses both types.
- 2. Give it a name. This name is automatically used by TelecomBilling.Net to identify the CDR data or files in various places in the portal such as the CDR Data page.
- 3. & 11. The format of the date and time fields, ISO dates either of the basic type (e.g., yyyymmddhhmmss) or extended that use a separator between the year, month and day, hour, minutes and seconds. It is important to ensure that the date and time formats identified here are correct as this will ensure that errors are avoided and ensure formats are changed in the portal if they have changed in the CDR data. Another important aspect is to correctly identify if months and hours should be represented as capital H or capital M. For instance for the time part ‘HH’ would mean 24 hrs and ‘mm’, 12hrs time formats. The tricky part in dates usually is the months, which should be mm if March (e.g.) is given as ‘3’ and MM for ’03’. if the date format sought is for a database source (MySQL or MsSQL), write ‘dd/MM/yyyy’ and not ‘yyyy-mm-dd’. If you identified any one of the formats on one of the lines below, the format you identified along with the other 3 formats on a line will be tested in order to format date:
- ‘yyyy-MM-dd’, ‘yyyy/MM/dd’, ‘yyyyMMdd’, ‘yyyy-mm-dd’, ‘yyyy/mm/dd’, ‘yyyymmdd’
- ‘dd-MM-yyyy’, ‘dd-mm-yyyy’, ‘dd-MM-yy’, ‘dd-mm-yy’
- ‘dd/MM/yyyy’, ‘dd/mm/yyyy’, ‘dd/MM/yy’, ‘dd/mm/yy’
- So for instance if you identified that the date format follows the pattern ‘yyyy-MM-dd’ and a date can’t be extracted then all six patterns on that line will be tested: ‘yyyy-MM-dd’, ‘yyyy/MM/dd’, ‘yyyyMMdd’, ‘yyyy-mm-dd’, ‘yyyy/mm/dd’, and ‘yyyymmdd’. Always check logs for any issues with formatting dates and times. Important: We cannot stress the notion that even if your system did not generate an error on dates and if the date format was incorrectly identified then the system is likely to have mis-formatted the dates.
- More information about date and time format strings can be found below:
- 4. Location of the date/time. The date cannot contain a value for the time if it is located in the name of the file or in the header row.
- 5. If a column for the purchase price of call is found in a CDR file/table/url, the portal will use this when working out your profit and loss reports as explained in the Billing and Reports page.
- 6. Identify the strings that constitute a valid call that should be billed. Calls that do not include these flags will not be billed. In the wizard, identify the column that holds this information by selecting a column header for the marker called ‘SUCCESSFULLCALLFLAGFIELD’ and associate it with a column in the CDR format. It is also possible to indicate whether calls should be charged if the column contains no value or if value is greater than 0. The CDR will not be rated if the field contains a value or if the field holds 0’s.
- 7. If the CDR data does not have line returns, write the number of columns in the CDR data. Write ‘0’ if the data does have line returns.
- 8. Field where a note can be entered about the CDR format.
- 9. Define Regular Expressions (RegEx) that will be applied to each CDR line. This is useful for cases where certain operations need to be performed on CDR lines such as swapping or removing certain characters in your CDR data. More information about RegEx expressions here.
- 10. Select how the CDR data will be rated. If selecting the second or third options, the following need to be identified in the field mapping stage of the import wizard: a quantity, sales price or a purchase price and a margin multiplier. If one of these options is selected, one or more price lists of any kind can be associated with the customer’s SNs just as long as the CDR data holds that information so that the rating can be done correctly. A margin multiplier has to be identified if the 2nd option is selected.
- A purchase price column has been identified in 5 above or the CDR is rated using a purchase or sales price value:
- 11. Identify if all cost values are given as hundredths or not, i.e., as pence or pounds, cents or dollars.
- You did not identify a purchase/sales price column:
- 12. Determine how billing is to be carried out for this CDR format: on the customers’ service numbers, on the customers’ account codes and show their service numbers on invoices or on the customers’ account codes and show their account codes on invoices
- 13. Identify how calls are rated: via the call types only or using the number called only or a combination of number called and call types. Rating using the numbers called uses the dialling codes found in a price list; rating using only the call types uses the call types found in the CDR data matched against the call types found in a price list and call settings. To use the number called and call type as a combination, tick this option and then identify a call type column in the field mapping stage of the CDR format importation process. The call type countries have to match between the values found in a price list and the ones in the voice settings for this to work.
- 14. Identify the time format (e.g. hh:mm:ss, h:m:s, h.m.s,…)
- 15. Identify the separator that is used in the date and time strings if these appear in the same field. Select ‘>Not applicable<‘ if date and time are in separate fields. Select ‘No separator’ if the date and time is one block with no separator.
- 16. Specify if the duration of calls is given in seconds, minutes, a format hh:mm:ss, in second decimals or start and end times of the call are given. Note that if the field in the CDR data holds values that are numeric and do not follow the pattern that you gave here, these values will be deemed to be seconds. For durations that follow ISO-compliant date formats, see point #3 above for more on how to identify these formats.
- 17. Specify what is the CDR field for the call types, as was explained previously about the Voice settings. The algorithm that pulls out the cost of the calls made by your customers requires matching a call type field from your price lists and a matching field from your CDRs. The use of call types is not necessary and can be ignored if you are happy to rate calls using the number called only. Using call types is useful in the following cases:
- CDR data use dial classes If two or more operators make use of number portability and therefore need to be differentiated.
- When different operators exist in a country and operate with the same dialling codes. In Belgium, for instance, for a time there existed 2 phone-number-issuing operators that used the same established regional dialling codes. They each had their own rates when calls are placed to numbers that fall within their network. The only way to differentiate calls that were made to these same regional codes was to use the country field in the carriers’ CDRs and look for their company names, hence the need to use not only the dialling code but also the destination field (or any other field) to match a call and its cost. Select ‘Other – Select in wizard’ if you wish to directly identify this column in the wizard rather than use one of the default fields given in the drop-down box.
- If you selected the first option in point ’12’ above and do not use call types, select the format numbers called have (very important to ensure a correct match and to obtain the correct costing of your calls). This option essentially means the portal needs to know if numbers called start with the country codes or not. If national numbers have a fixed length, add all possible lengths in the drop-down menu. Leading zeros in front of a national number called do not count towards the total length of a number.
- 18. Select how IP addresses are formatted in the CDR files/tables/web pages.
- 19. Select if the operator masks numbers called.
- 20. Select if for calls of zero duration, certain costs have to be computed.
- 21. Tick this option if numbers called for this CDR are also SNs and to make calls to these SNs free.
- 22. Select if calls are split as calls outbound and inbound. Additionally, identify if these are on the same line or are split over 2 lines. If the former is the case, you will be taken to the wizard where inbound and outbound parts of the calls need to be identified. So for instance ‘Number called’ will be split into ‘Outbound number called’ and ‘Inbound number called’. If calls are on 2 lines, strings that identify the outbound and inbound parts are normally required and a column will have to be identified in the wizard with the flag ‘OUTBOUNDINBOUNDFLAGFIELD’. In this last case, calls will be split as 2 calls: one call for the outbound part of the call and one for the inbound part of the call. If no strings are identified then inbound and outbound parts of the calls are deemed to be contained in 2 columns: one column for ‘inbound originating number/outbound number called’ and one column that holds ‘inbound number called/outbound originating number’.
- Please note the concept of incoming/outgoing calls is used by the portal in a very broad way and can be used for cases where strictly no incoming and outgoing calls exist. This makes it possible to configure any type of billing model. For example in VoIP telephony, if you have a type of CDR that includes a column with the CLI (DDI, DID) and another with the IP address that made the call and you want the program to manage both, identify one column as the incoming number and another as the outgoing number. This will allow the program to switch from one column to the other according to the needs of the CDR, for example in the case where some of the lines in the CDR have a blank in place for the CLI in the first column and the IP address should be used from the second column.
- You have ticked parameter #22:
- 23. Determine whether incoming and outgoing parties will be billed separately, i.e. as two calls or one.
- You have checked the first option of parameter #23:
- 24. The portal will ask you to identify the fields that correspond to the incoming and outgoing parts of the calls later in the wizard. Identify here which party will be charged (incoming or outgoing) and which numbers should appear on the invoices as called and calling/originating numbers. For the 3rd radio button option, i.e. ‘Rate using the inbound number called and fall back on the outbound number called if the inbound number is empty’, the following fields are typically selected in the field mapping part of the wizard:
- Inbound/outbound originating number or inbound originating number and outbound originating number, and
- Inbound number called, and
- Outbound number called
- You did not tick parameter #22:
- 25. What recurrence do the files use.
- 26. How should the portal behave if no bandwidth consumption is found for a period of time for this CDR.
- 27. How is the bandwidth given: In bytes, MB or GB.
- 28. Identify how downloaded/uploaded bytes are displayed, ie, is there a single value for both or separate columns for downloads and anther column for uploaded traffic.
- 29. Select whether the CDR data is located is a text file, in a database or on a Web page (HTTP GET/POST).
For text file CDRs:
- Select the separator used in the CDR files;
- Select the number of lines TelecomBilling.Net should ignore as it opens the CDRs for analysis;
- Select a CDR file in order to identify what each column is and for fixed-width CDRs, to identify the width of each column.
For CDRs located in a database:
- Identify the database connection string;
- Click to test the connection and pick a table.
For Web pages:
- Select the separator used in the CDR files;
- Select the number of lines TelecomBilling.Net should ignore as it opens the CDRs for analysis;
- Select the HTTP address of the Web page. You may include parameters such as a user name and password in the URL.
Click ‘Next’.
- 30. Mapping of fields

TelecomBilling.Net needs to know what column is associated with what piece of information. For instance, the second column above is the outbound number calling. Select ‘Outbound number calling’ from the drop -down box and click on the header of the second column. Perform the same thing for all the other columns where relevant. When working with Voice/data CDR formats, the SN corresponds to the originating number (inbound or outbound if relevant) and in Service CDR formats, the words Service Numbers are used.
Click ‘Next’.
- 31. Quality-of-Service
Next form enables you to define the Quality-of-Service (QoS) parameters for the new format: Define the columns where such information as ‘Bid’, ‘Seizure’ or ‘Quantity of circuits available’,… are located and the values that the parameters have in the second part of this page. Click ‘Next’. You may also skip this part by clicking ‘Next’ directly.
Click ‘Finish’ button on the wizard form. CDR files if this is the source need to then be uploaded via the CDR Data page.
- 32. If database was ticked, click ‘Next’.
In the next page, select the database type and specify the connection string of the database TelecomBilling.Net needs to connect to. Click on the button to test the connection and finally select the table where the CDR records are located.
Click ‘Next’. The following steps are similar to the ones described for importing CDR files above.
Make sure you identify a column that holds the table’s primary numeric key as the portal requires such a field to keep track of the data it analyses.
- 33. If an HTTP POST/GET request was ticked, click ‘Next’.
Select the type of separator used in the files.
Select up to which line data should be ignored.
Type the URL to retrieve in the next box. Click OK. The content of the page called will show in the text box underneath.
Click ‘Next’. The following steps are similar to the ones described for importing CDR files above.
- 34. If a Webhook is selected, click ‘Next’.
Select the type of separator used in the files.
Identify a server query URI if the provider allows query Webhooks and click OK. Ensure the server URI has a parameter that holds the client URI (only the first 50 records will be displayed). Alternatively submit the Client URI to your provider and paste sample data in text box and click ‘Next’.
If your CDR data is held in a database, the table that stores this data needs to have a numeric unique primary key (NUMERICPRIMARYKEYFIELD) as TelecomBilling.Net uses its values to keep track of the rows already analysed as it scans the records in the selected table. Note that values held by this field are limited to 8 decimals.
See chapter 3.3.2 for more on the significance and on how to use call types. If you did not find a suitable field amongst those that TelecomBilling.Net offers by default under point ’16’ above, select CALLTYPEFIELD in the drop-down menu in the field mapping stage to indicate that the column holds the call types you wish to use.
The voice/data CDR system offered here is best used for items that show a duration like voice calls. For items that do not have duration like SMSs, import the CDR format as a service CDR (see below). TelecomBilling.Net also allows the user to identify the length of a call based on pulse-codes as opposed to its duration. For this and when in the import wizard, simply link the column where phone pulse codes are stored with the heading ‘Other measurement of call length’.
Dial classes
As seen previously, dialling codes in a price list do not have to be ITU-styled codes. These can be any string of characters in fact, including pin codes, UK dial classes (fm3 , ukgeo, fm6,…), price groups, ip addresses, NDIs … TelecomBilling.Net matches the dialling code part of the number called in a price list with the dialling code of the number called of a call. If the number called in the CDR data is not a real number but for instance a UK dial class, use the inbound/outbound option under step ’19’ of the import wizard for CDR formats to set the field that will be used as the numeric number called in the invoices. Here you would select to rate the call as one call in step ’20’ under a supplier account; in step ’21’, select to rate the call using the inbound number called and select ‘show the outbound number called on the invoices’. In the field mapping stage, use the dial classes column as the inbound number called and select the actual number called by the user as the outbound number called (to be displayed on the invoices).
An alternative to using the inbound/outbound model is to select ‘Rate calls using call types’ under option ’10. Determine the basis on which calls should be rated’. The dial classes need to exist in the CDR data and these need to be mapped as being the call type column. Ensure also that the price lists used against this CDR format have a call type column.
Note that if a call type column is identified in the CDR format, these must exist in the associated price lists if CDR rating is done using a price list.
Click ‘Next’.
Identify the parameters in the CDR format for Quality-of-Service analysis.
Click ‘Next’ then ‘Finish’.
Service CDRs
Service CDRs are used in cases where services need to be invoiced based on CDR data. One such example is LDRs or WLRs (Wholesale Line Rentals) in the UK.
To add a new type of service CDR, click the ‘Services’ tab, then the ‘Add’ button. You will be taken to a wizard. Simply complete the import process of your new format there.
Not all options are relevant to the format you want to import. Select ‘>Not applicable<‘ if you are faced with an option that does not apply.
Create your CDR format for data services by specifying the following information:
- 1. Name of the CDR format.
- 2 & 3. Format of the date and time fields: ISO or character-separated. Write a value for the masks: yyyy/mm/dd, hh:mm:ss,…. See points ‘3’ and ’11’ in the voice/data CDR section, above.
- 4. See point ’14’ in the voice/data CDR section, above.
- 5. Location of the date. The date cannot contain a value for the time if it is located in the name of the file or in the header row.
- 6. Purchase price column. See point ‘5’ in the voice/data CDR section, above.
- 7. See point ‘6’ in the voice/data CDR section, above.
- 8. See point ‘7’ in the voice/data CDR section, above.
- 9. Field where a note can be entered about the CDR format.
- 10. See point ‘9’ in the voice/data CDR section, above.
- 11. See point ’10’ in the voice/data CDR section, above.
- A purchase price column has been identified in 6 above or the CDR is rated using a purchase or sales price value:
- 12. Identify if all cost values are given as hundredths or not, i.e., as pence or pounds, cents or dollars.
- You did not identify a purchase/sales price column:
- 13. Determine how billing is to be carried out for this CDR format: on the customers’ service numbers, on the customers’ account codes and show their service numbers on invoices or on the customers’ account codes and show their account codes on invoices
- 14. Identify whether calls are rated based on service types or a a combination of service codes and service types or service codes alone. The first option requires the use of the service types table in the settings menu. This system is similar to British Telecom’s WLRs in the UK. If the service code option is selected, these same codes should be present in the CDRs for rating purposes.
- 15. See point ’18’ in the voice/data CDR section, above.
- 16. Recurrence of the files (daily, monthly…) or are the items listed single items that have to be billed individually with no pro-rated billing for a specific period. This is ideal for billing services like SMSs that do not have a duration but a fixed cost.
- 17. Select source type of the data.
A service start and end dates (and times) can be identified in the field mapping part of the wizard. The portal calculates the pro-rated price of the services based on these dates and those selected in the billing page during a billing session. Services are always pro-rated if a period smaller than the length of a cycle is billed. For this to work, ensure you use the first day of the period that needs to be billed as the service date in the CDR data. For instance, if a service needs to be pro-rated for 01/05 to 10/05/2023 for a billing cycle of 01/05/2023 to 31/05/2023, the service date in the CDR data needs to be 01/05/2023.
For rating under option 14 above to work, the types and codes identified within a service code column in the CDR format will have to match the exact types and/or codes identified in your price lists.
If the 2nd or 3rd choice is selected in option ’10’ in the import page for service CDRs or option ‘9’ in the import page for voice/data CDRs, the portal will not use any data from price lists, but only the data identified in the CDRs. Therefore, it is possible to not associate a price list with these CDR formats in the customers’ SN pages. Also under these two options, if no name or service package is associated with a column in the CDRs, the portal will attempt to retrieve them from the identified price list.
Cost columns such as a purchase cost column in the CDR data can show comma or dot as the decimal separator. Price lists on the other hand have to show the dot decimal separator expected by the windows settings (dot or comma).
See chapter 3.4.3 for a full overview of the UK billing model.
Notes about importing Voice/Data and Service CDR formats:
- It is best to go to the end when modifying a CDR format as the options selected during the steps where various options are identified will impact the fields that need to be identified in field mapping stage. For instance if you wish to modify a CDR format and tell it there is a purchase price, then you need to go to the field mapping to select the purchase price column.
3.4.2.3.5. Transactions
Access: Landing page > Home > Suppliers > Supplier account > Drop-down box under ‘Actions’ > Transactions
This page keeps track of all transactions and payments done by the supplier and of all monies by him/her owed to you. It is similar to the one used under customer accounts.
The model used here is similar to the Transactions pages that exist for customers and distributors. The only item that differs is what is called ‘Computed usage’. This refers to all the items that have been billed to a customer and for which a purchase price was available. This includes voice calls and subscriptions. Each entry will show the invoice number, customer number and date for easy reference. To reconcile the account, you hold with a supplier, simply enter the money that is paid to him/her, the invoices received from them and the portal will work out the cost of the voice calls and other items using the supplier’s purchase prices. Money invoiced by your supplier should be equal to what the ‘Computed usage’ items the portal adds in this table overtime.
The model used here is similar to the ‘Transactions’ pages used with the customers and distributors. The only element that differs is the transaction type called ‘Computed usage’. This refers to all the items that have been invoiced to a customer and for which a purchase price was available. This includes the voice calls and the subscriptions. Each one of these elements in the table indicates the invoice number, customer and a date for reference. This functionality is useful in order to make sure suppliers invoice your company correctly. The portal will determine the costs of these calls and subscriptions by using the purchase prices defined throughout the portal. The money invoiced by the supplier should be equal to the sums corresponding to the ‘Computed usage’ given in the table for a given period.
3.4.2.3.6. Invoices
Access: Landing page > Home > Suppliers > Supplier account > Drop-down box under ‘Actions’ > Invoices
The page is identical to the page for a customer. See customers for more.
3.4.2.3.7. Finances
Access: Landing page > Home > Suppliers > Supplier account > Drop-down box under ‘Actions’ > Finances
The page is identical to the page for a customer. See customers for more.
3.4.2.3.8. Extended notes
Access: Landing page > Home > Suppliers > Supplier account > Drop-down box under ‘Actions’ > Extended notes
The page is identical to the page for a customer. See customers for more.
3.4.3. WLR Model from BT (UK)
- Recurrent services
BT supplies WLR services operators can resell to their customers. TelecomBilling.Net supports this model. In order to use this functionality, follow these recommendations:
• Import wizard for service CDR formats (Home > Suppliers > CDR formats page):
o Select option ‘Rate services using service types’ under parameter 11
o Identify a column for ‘Service type’ when the field mapping part of the import wizard is reached
• Service price list (Data > Price list details page):
o Identify values for service code and service type fields
• Service types (Settings > Service settings):
o Populate the table with service types/values pairs
Example:
a. Line in a CDR file:
Fixed Line WLR only,0163558827,01/05/2023,31/05/2023,1,Monthly,0.09,0.09,WLR-Call Divert,,
b. Price list:
| ServiceName | Description | ServiceCode | SalesPrice | Recurrence | ProductCategory | AcccountCode | ServicePlan |
| Call Divert | CDV | 1.5 | M | UKBNR1 |
c. Service types:
| ServiceType | ServiceCode |
| WLR-Call | Divert CDV |
Column with value ‘WLR-Call Divert’ in the CDR file was identified as holding the service types during the importation of the CDR format. The portal will work from the CDR file, perform a look up for service number 0163558827 and search for a price list for that service type. It will look for a service code (‘CDV’) in the service type table that matches the one in the service price list and match the CDR’s service type with the type found in the service types table. The portal will use rate 1.5 in the above example.
- Voice services
Under the WLR model, BT service types are also used for voice. The table used is the call types table under the Settings menu.
- Default data to aid in the setting up of BT’s WLR model
We include database scripts and csv files, which contain complete data for UK WLR-type billing. These files are located in the Settings directory under Assets in the installation of your portal.
• Price lists with UK and international call types for voice: ‘VoicePriceLists_July2020.sql’.
• Price lists with service types for WLR services: ‘ServicesPriceLists_July2020.sql’.
• List of default voice call types: ‘IntlCallTypes_July2020.csv’ and ‘UKCallTypes_July2020.csv’.
• List of default service types and codes: ‘ServiceTypes_July2020.csv’.
The data contained in the files and database tables need to be maintained once imported to ensure they have the latest elements.
3.4.4. Billing
3.4.4.1. Actions
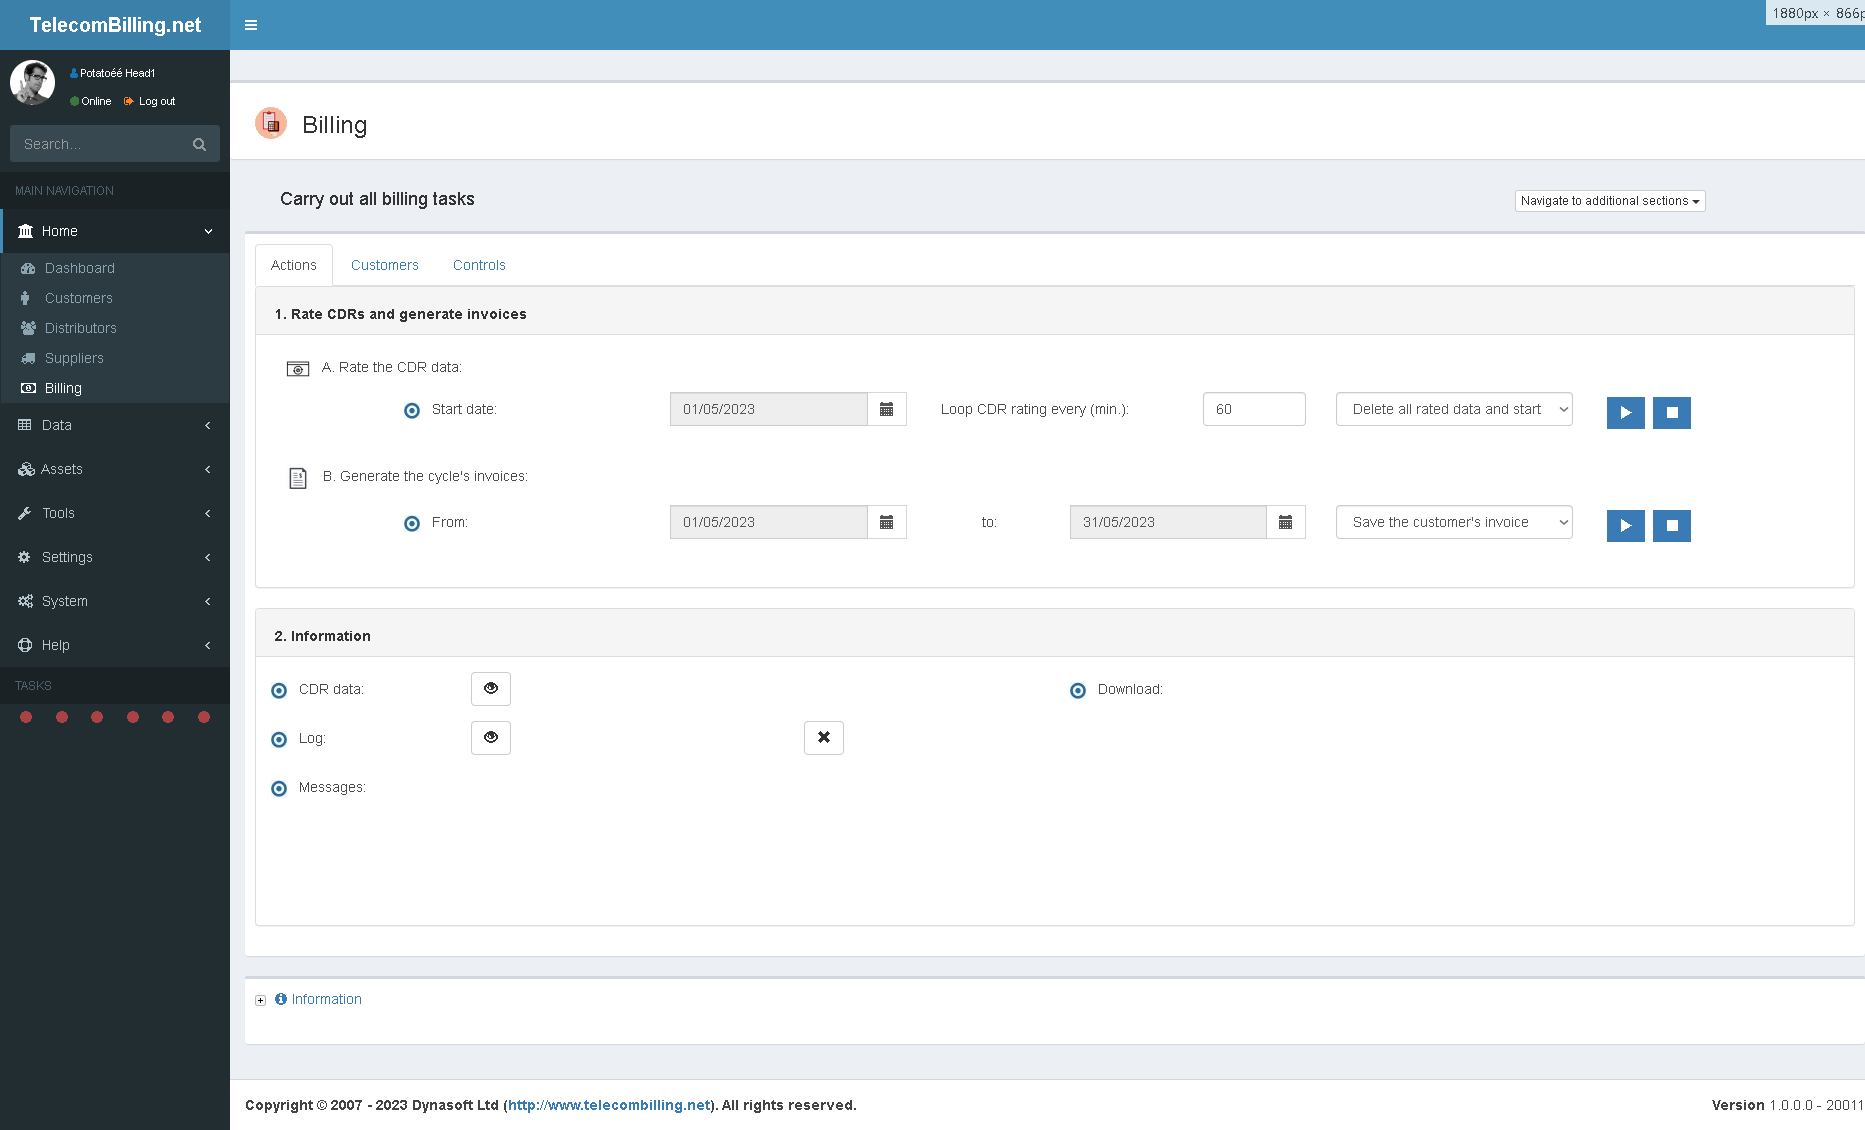
Access: Landing page > Home > Billing > Actions tab
This page is used to invoice your customers, save all customer service usage and publish it on the Web via the Web Access.
A bill run requires selecting two things:
- One or more customers, under the ‘Customers’ tab. Go to the next chapter for more.
- To work out what the usage has been for one or more of your customers and invoice them, simply follow the steps given detailed next.
1. Rate CDRs and generate invoices
Before using the controls here make sure you have selected customers in chapter 3.4.4.2 further down. Billing involves two processes: scan/rate the CDR data and create invoices.
1.A. Rate the CDR data
– ‘Start date’: Select an initial date for the calls/data entries that have to be searched.
– ‘Loop CDR rating every (min.)’: specify the iteration time when the portal will scan the directories/tables/web pages for new CDRs.
– ‘Select’ (the type of scan to perform): Select the scanning option required as stated in the drop-down box:
- The option ‘Resume from last CDR analysed’ will make the portal look for new CDRs and matching calls/data/service entries after all current calls/data/service entries have been picked out from the files/tables/web pages.
- The option ‘Re-rate selected CDR data and customers’ will re-open the CDR files/tables/web pages selected. It will preserve data already analysed.
- The last option deletes all CDRs that were read and starts the process all over again. Invoices that were previously created will not be affected.
Use the stop button to stop the normal running of the portal. This does not delete any previously rated CDR from files/tables/web pages. For text files, stopping rating will only delete the CDR data from the file the system was currently rating. By stopping the portal, you can modify the SNs of any existing customer, add new customers and upload new CDRs. The latter can also be safely done when the portal is running. When the portal is running, calls/data/service entries not only are read off the CDR files/tables/web pages but also processed at the same time (i.e., rates are applied). This way, the processed information is readily available for display locally but is also pushed in real time to the Web Access. When the analysis of CDRs has completed, your Telecom CDR SMDR billing software system will show ‘Waiting for new CDRs…’. You may stop the process once this shows. A similar entry with the same label is added to the log when CDRs have been analysed. You may restart the CDR analysis process when needed after.
1.B. Generate the cycle’s invoices
Using these controls and provided the rating of CDRs is paused, it is possible to issue the invoices. Specify the billing period (start and end dates) above the drop-down menu.
2. Information
CDR Data
Click to display the rated CDR data
Log
Under ‘Log’, press ‘View’ to check for any errors during the execution of your portal. A non-exhaustive list of possible errors is given below:
- Not specifying a price list for your customer.
- Not having specified the call type in your price lists for voice services.
- Using the wrong type of CDR file in a CDR directory.
- Not using the normal standard format in your voice price lists: dialling code and country code for all destinations in your price lists (national destinations have to have the national dialling code in front), followed by country, then the rates and call types.
- The customer’s phone number was not written in correctly in the customer details page.
- If the portal finds a call, data or service entry that does not belong to a known customer.
- If the portal finds a call, data or service entry that does not belong to a selected customer.
- If a CDR directory cannot be found.
- Erroneous configuration data (times for peak rates…)
- In data billing, if a date cannot be found in a CDR.
See the error codes detailed in point ‘B’ of chapter 3.13.
Click the ‘Delete’ button to delete all saved log entries related to the billing process.
Notes on billing
Only calls that have durations greater than zero are displayed and processed.
As stated before, stopping a billing run will make the portal delete the data currently being processed. This ensures that no duplicate data exist in the system if the user decides to redo that same CDR data.
The line for ‘Discount’ in an invoice’s line items (summary part) reprises the commissions earned by the customer along with any refund for the period billed if these have not been already marked as paid in the customer transactions page.
It is recommended to periodically check the logs for any errors that might arise during a bill run. If they get filled with too many errors it means your configuration is likely causing problems.
It is important to ensure that the date and time formats and the field mapping identified when CDR formats were imported are correct as this will ensure that errors are avoided and that these are changed in the portal if they have changed in the CDR data. The language can be modified from within the configuration and the customer pages.
Invoices created are in zipped files. if the billing was set to create more than one file (e.g. you set the system to create one file per invoice section…) then the zip file will hold all the files the system created.
The name of the invoice files is made of the following syntax:
Customer number + ‘-‘ + Invoice number + ‘-‘ + Date + ‘_’ + Time + Milliseconds + ‘.’ + file extension (zip)
Example: Cust_0-Inv_0-20052023_190027_498.zip is an invoice for Cust_0, number Inv_0 and created on 20th May 2023 at 19:00:27 and 498 milliseconds.
According to our benchmark tests, TelecomBilling.Net can handle up to 9,000,000 calls/CDRs (lines in a CDR file/table) an hour. This is for CDRs that have just the required columns (SN, date and time of call…) and price lists with few regional codes for each country, no saving of any orphaned CDRs, for a single customer with one service number and where 10% of CDRs in the data belong to the customer.
You might get the following message when billing: “Another user has started another billing session using this option”. This means that another active billing run is being done probably by another user. To avoid deleting any data use preferably the option to resume from last CDR analysed. If you wish to go ahead with the bill run, go to ‘System’, click ‘Reset the locking of records’ and then ‘OK’.
Below is an example of an invoice that was generated using Dynasoft TelecomBilling.Net.
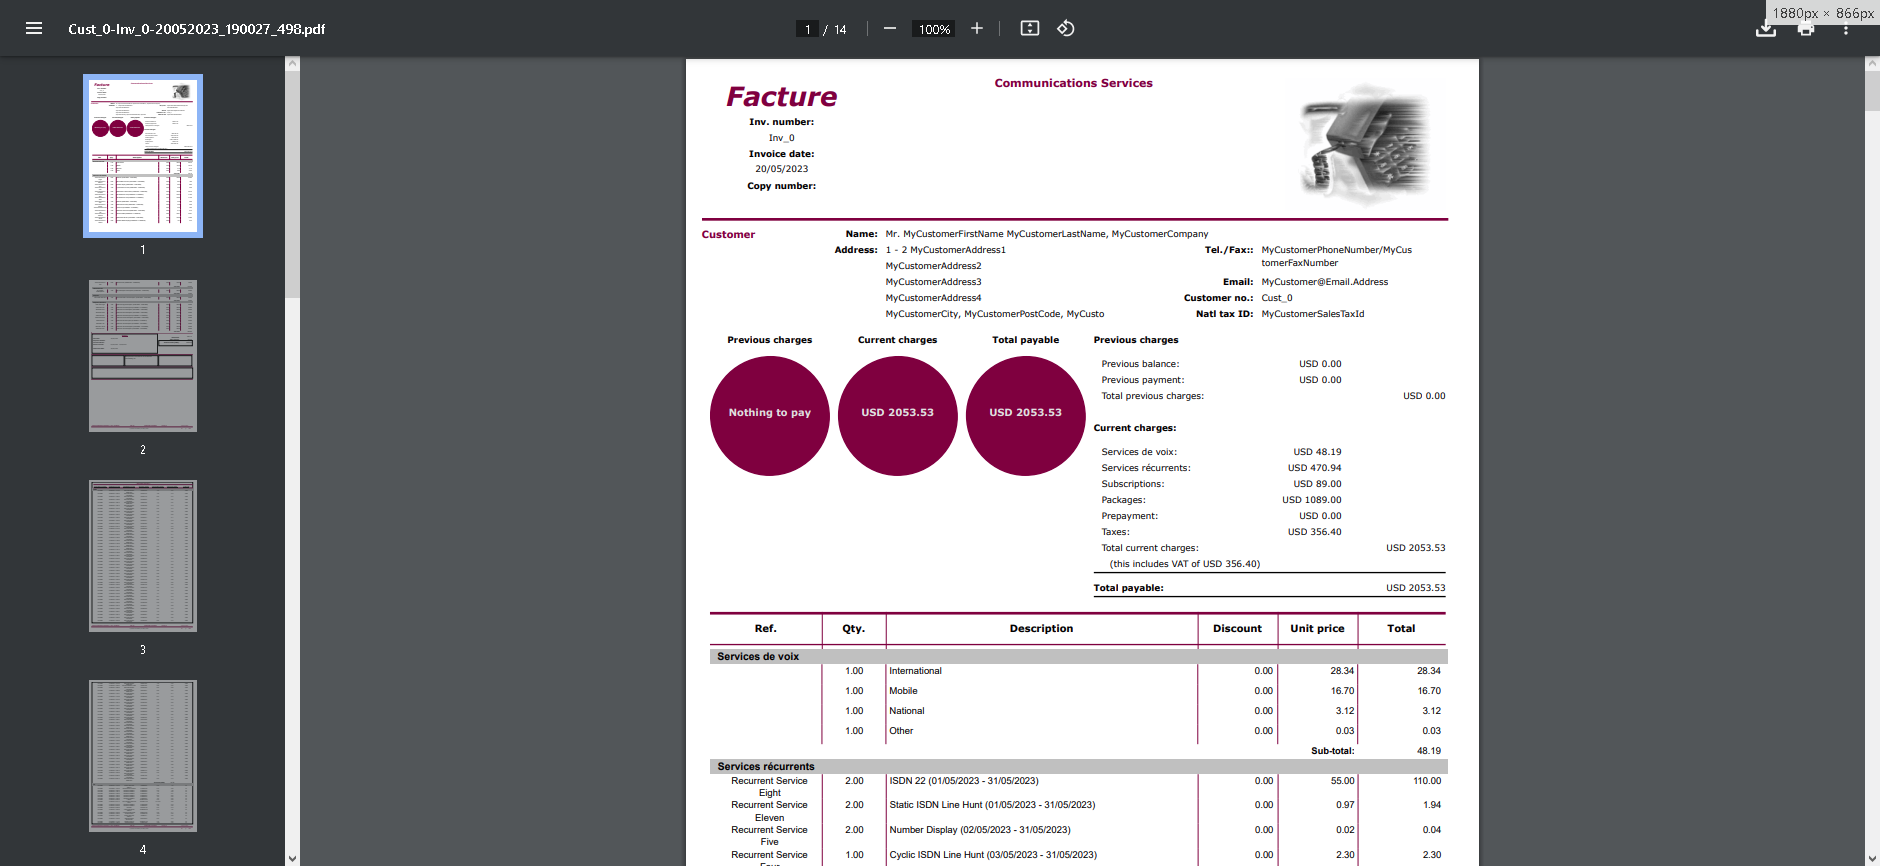
3.4.4.2. Customers
Access: Landing page > Home > Billing > Customers tab
1. Customer table
Select one or more customers to work with under the ‘Customers’ tab. The portal will run only using those customers that have been selected in the list on that tab. This is the case when scanning CDRs and or creating invoices.
2. Billing options
These options are provided to give the user more control over billing and fine tune the process.

a. Make the invoice an official one. Unticking this option will make billing run in draft mode. Ticking it will get the programme to do the following which the draft mode does not do:
- Perform allocation of commissions for your distributors and referring customers. To make sure all commissions that are owed to your customers are taken into account when invoices are issued, ensure that you click this button. Make sure referring and referred customers are correctly identified in the customers’ account pages. Commissions that are owed will be taken for the billing period specified under the main Billing tab. Discounts for customers will appear on their invoice in the totals column (see below). Any discounts currently owed to them that appear in their billing, will be deleted and will be included in the invoices being issued. The invoices are sent to the customer’s billing and commissions are computed each time the play button is pressed under ‘B. Generate the cycle’s invoices’. Make sure you only tick this box and run the tasks using the controls to the right once only as each session will be official. If the selected customers have subscriptions or packages and this option is not selected, these items will always show on the customer’s bills for the relevant periods. It is only if the option is ticked that billing periods will be scrupulously implemented as explained in chapter 3.4.2.1.
- This option will cause the portal to increment the invoice count (see Configuration page)
- Finally, TelecomBilling.Net keeps a history of all billed items in certain tables. Invoices and their line items will be saved in the system, whether ticking this option or not will.
- Invoices are emailed only in official mode, not in draft mode.
- The same goes for Accounting if you took out the add-on: in draft mode nothing is sent to Accounting.
- Automatic payments are not inserted in draft mode.
- Billing option ‘Delete all rated data and start again’ deletes all CDR data created under draft and official modes if the option is selected. If draft mode is selected only draft mode CDR data is deleted. This does not affect the actual transactions which are always kept in either modes in each customer’s transactions page (see chapter 3.4.2.1, above).
b. Click on the next option to log all those calls/data entries/service that show in the CDRs but that can’t be associated with any of the customer’s SNs
c. To ignore any numeric errors that might occur during an analysis and prevent the portal from exiting, check the fourth box in these options. This is useful if you have non numeric values in certain columns of the CDR data where numeric values are expected
d. Tick this box to let the portal remove duplicate entries for data CDRs
e. Click on the next option to make the portal retrieve all the latest CDRs from your operators before the billing is computed. See chapter 3.4.3.
f. Clicking on the next option will create a file with all the data of a billing session. This is the billing file, configurable from ‘Settings > Billing files’ and can be downloaded from the ‘Exported data’ page. The file is generated when using the controls under ‘B. Generate the cycle’s invoices’.
g. The next option will integrate the cost analysis for each call. This procedure adds some overhead in terms of the time the portal takes to perform the overall analysis.
h. The next option is useful if you wish to include calls that predate the billing period selected, that were part of CDRs that were not analysed and if you wish to include these in the next analysis
i. Apply the distributors’ branded billing option to the next bill run. Tick configuration option ‘4.c’ under Options 8 tab if required
j. The option to send customers their invoices by email will ensure these are sent at the end of the overall analysis provided they have been marked in their individual pages (see chapter 3.4.2.1)
k Financial reports include the ability to list data by country called. Tick this option if you wish that each call be associated with its country. This will add additional routines to the rating routine and will slightly slow the process down
l. If the portal finds a call, data or service entry that does not belong to a known customer or if a call does not have a matching rate in the price lists, TelecomBilling.Net can save the CDR in a separate file. This file is called ‘UnratedItems.txt’ and can be viewed in the CDR data page. If the source of the CDR data is a database, TelecomBilling.Net will also store the rated items in a text file under the CDR format in your CDR Data page.
m. Click on the following option to show in the display tab the items that are being rated. Clicking on this display tab will also make the portal show these items but only those that are being rated as the user clicks the tab. Clicking this option slows the portal down and should be used sparingly.
n. This option will only display in the invoices the subscriptions and packages
o. Tick the next option to get TelecomBilling.Net to check the integrity of the voice price lists. Ticking this will add some overhead to the billing process.
p. Tick this box to let the portal remove duplicate entries for voice CDRs
q. Tick this box to let the portal remove duplicate entries for services CDRs
r. Download links will be provided with each creation of an invoice. These will appear on the main billing page under ‘2. Information > Downloads’
s. Emails advising the CDR rating and invoice creation stages are done will be sent to the logged user
3.4.4.3. Controls
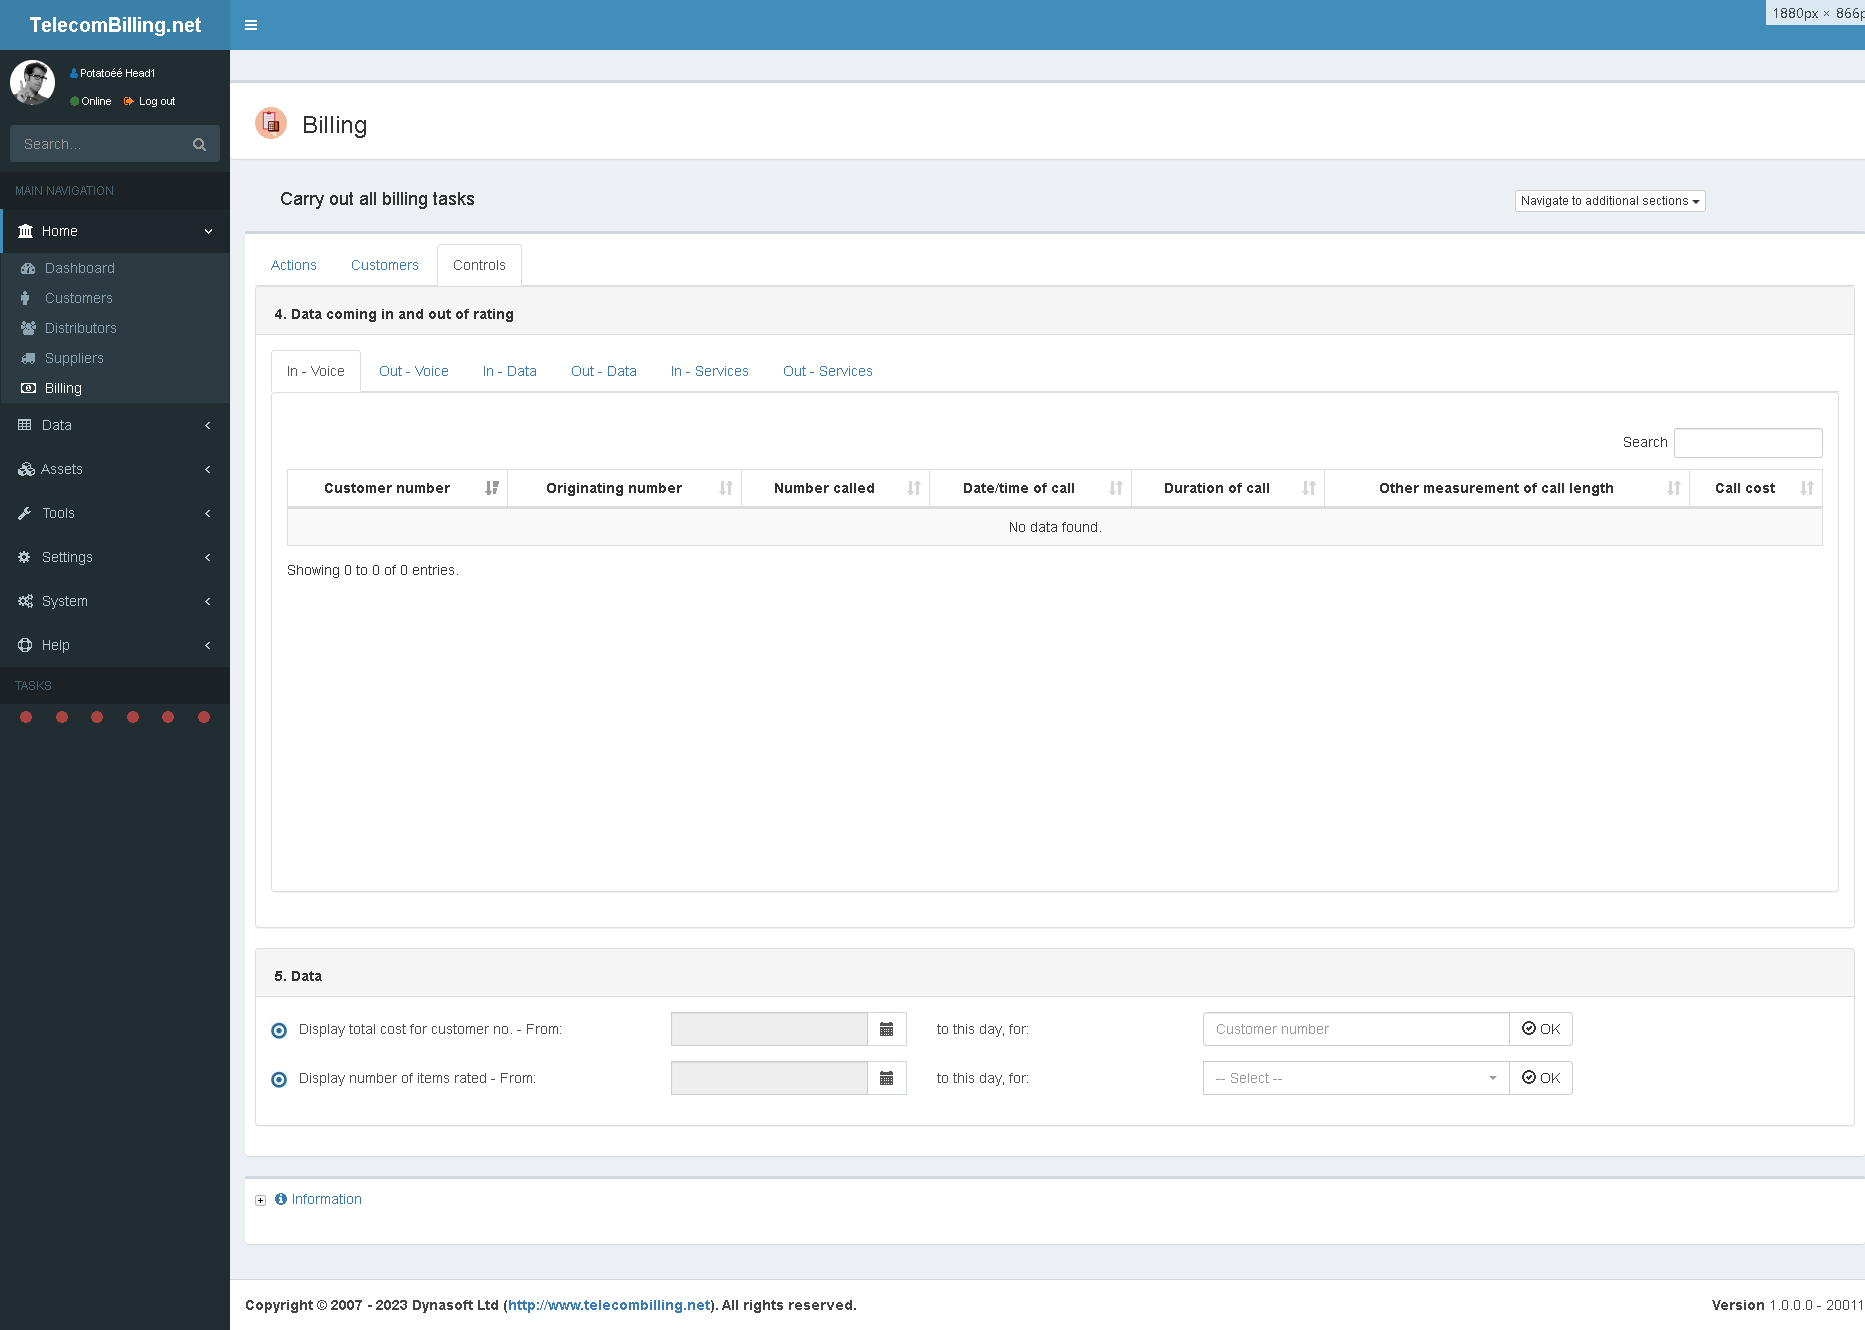
Access: Landing page > Home > Billing > Controls tab
Data coming in and out of rating
The data displayed on all of the tabs in here display the raw data as it goes into the system (CDR are found) and then as the data goes out (CDR are rated).
- First Tab of Second set of Tabs
Display of all voice calls as they are picked out from the CDR files/tables/web pages.
- Second Tab of Second set of Tabs
Display of all calls as they are processed after the rates are applied to these from the first tab above.
- Third Tab of Second set of Tabs
Display of all data entries as they are picked out from the CDR files/tables/web pages.
- Fourth Tab of Second set of Tabs
Display of all data entries as they are processed after the rates are applied to these from the third tab above.
- Fifth Tab of Second set of Tabs
Display of all service entries as they are picked out from the CDR files/tables/web pages.
- Sixth Tab of Second set of Tabs
Display of all service entries as they are processed after the rates are applied to these from the third tab above.
- Seventh Tab of Second set of Tabs
When stopping the portal as it is running, it will delete all references in the system to the last CDR table or file that it was reading, so that it will read it again fully when you resume the scanning of CDRs.
Data
Under the set of tabs, it is possible to search for the totals owed or the number of entries found for a particular customer as the system rates its CDRs.
3.5. Data
3.5.1. Price lists
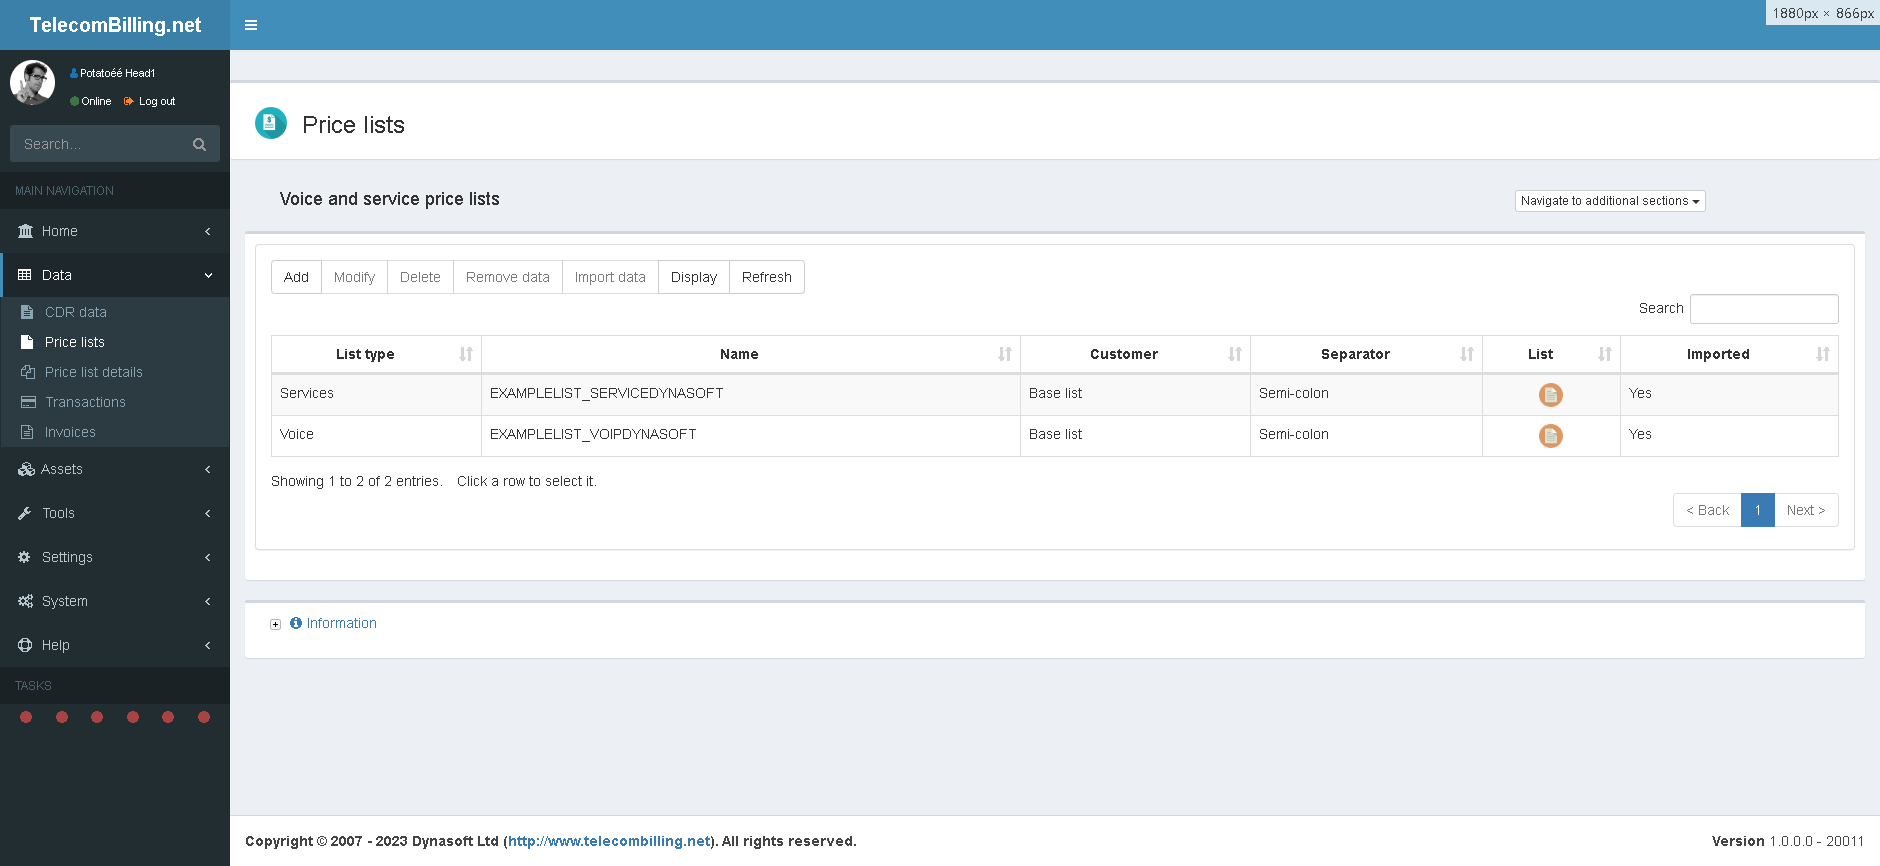
Access: Landing page > Data > Price lists
This is where price lists for voice and recurrent services are imported into Dynasoft TelecomBilling.Net. These lists are then accessed using the page detailed in the following chapter 3.5.2.
Click ‘Add’ to open a new form:
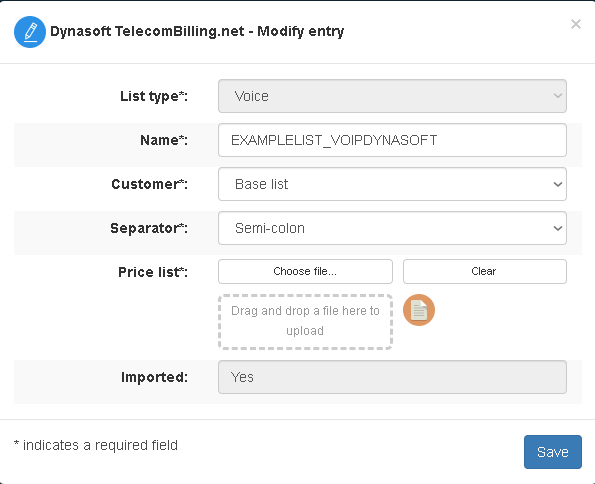
From top to bottom:
- List type: Select if the list is for voice or services
- Write the name of the list. Names need to be unique.
- Customer: determine of the list is specific to a customer to a base list available to all
- The column separator
- Select a price list from your local computer to upload it
- Click ‘Save’
The list will be added to the main table.
The allowed characters for price list names are all alphanumeric characters along with ‘_’ and ‘ ‘.
3.5.2. Price Lists Details

Access: Landing page > Data > Price list details
This is where the A-Z destinations are stored along with all their component rates.
3.5.2.1. Voice price lists
Click ‘Add’ to open a new form:
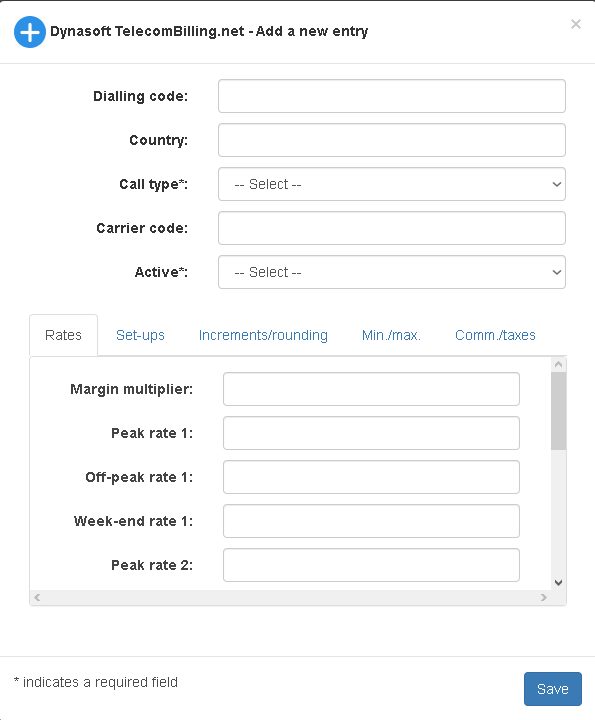
From top to bottom:
- Enter a dialling code (34, 3491, …)
- Enter a country
- Select a call type as defined in the voice settings page
- Enter a carrier code. This is typically the code used to dial into the carrier’s services (CPS). This is sometimes also called dial string.
- Select if the destination is active. Non active lines will be ignored by the system.
- Fill in all the other fields where required
- Click ‘Save’
The list will be added to the main table.
TelecomBilling.Net works on four levels when working with price lists during the billing process: it will try and rate a call by looking for a rate using the following:
- First it will use the price list associated with a customer sub-group, then
- Its customer group, then
- The customer-specific price list, and finally
- The base lists. This is useful as base lists can be designed as catch-all lists to ensure calls are always rated. See chapter 3.3.5 for more on customer groups and sub-groups.
An additional safety level to ensure calls are rated can be added when billing is being done. See last paragraph under chapter 3.5.2.1 below.
You need to have at least a peak, off-peak and weekend column in your lists and if relevant, matching minimum charges, set-up costs and calling fees. If you work with just one rate no matter the time of day, simply copy this single column and paste a copy of it next to it twice using a spreadsheet portal so that you end up with the 3 required columns. You can then import the three columns via a csv file into TelecomBilling.Net. As a failsafe measure, this is also done automatically by the portal: if the off peak and weekend rates columns are omitted on import, the portal will replicate the peak column twice to fill in the missing columns.
Dialling codes should not have any leading zeros or spaces.
All dialling codes have to start with matching country codes. For example, if you are based in France, all dialling codes for all sub-destinations in France have to have 33 at the start of the sub-dialling code.
All destinations in the list have to have a call type as defined in the ‘Voice settings’ page or in your supplier’s call type page.
For destinations to be taken into account, rates have to be active.
Make sure that no single or double quotes are present in the text values in all price lists.
Ensure that no non-numeric characters exist in columns of price lists where numeric values are expected.
All rates and costs have to use the decimal separator that is set in your Windows settings (dot or comma).
The prices entered have to be free of any sales tax.
A percentage margin (see column named ‘Margin multiplier’) can be used instead of the traditional time-dependent rates (peak, off-peak rates…). This percentage will be applied to any cost field that appears in the CDR files/tables/web pages when these files/tables/web pages are rated using our price list. TelecomBilling.Net will apply this percentage system over the application of time-dependent rates as soon as values appear in the relevant price list and values also exist in the cost field of a CDR file/table. Dynasoft has introduced this system to enable the billing of calls in a market where numerous operators exist and where they appear and disappear quickly, essentially where service provision is volatile and keeping up-to-date price lists is arduous work. The same thing holds true for recurrent services (see below). If a percentage margin is set for these lists and a carrier cost figure is found in a CDR, then the portal will use the margin multiplier over the minute rates and will multiply the first figure by the second one to work out the cost of a call when running a billing session.
It is possible not to use numbers in the dialling code column if your CDRs do not use digits but text for the numbers called. You still would need to identify the initial characters of these pieces of text and place them in the price lists’ dialling code column just as you would with normal dialling codes.
TelecomBilling.Net makes it possible to modify the entries of a price list for a specific customer by extending a base price list and creating a list specific to an individual customer. This avoids having to re-import a whole new list from the Price lists page and link it to a customer. To do so, go to the customers’ accounts, go to their SN page and ‘right click over a SN and select the price list to be modified for this customer ‘Extend a base list’ tab. When it is time to do some billing, TelecomBilling.Net will first use the rates that were modified for individual customers via this method. If no individual destination prices were modified, the main price list as associated in the SN page will be used.
It is strongly recommended to limit the number of lines in all price lists as a large number of lines may slow down the optimal running of the program when billing.
Ability to add your own costs not already present by default in Dynasoft TelecomBilling.Net (voice services only): To add costs of your own, add them as you create the lists by writing an alphanumeric name with no spaces for this cost directly into the drop-down menus of the wizard you get when pressing the button for importing lists into the database. Once this is done and to make the portal use these costs in the calculations of the costs billable to your customers, go to the configuration page (option 3.C) and select the non-standards cost items you wish to take into account. Send us an email to support@dynasoft.net if you have a field you would like to integrate and don’t see how to do it with the current version.
Check the example list provided and accessible in chapter 3.5.2 for an illustration of how price lists should be formatted.
Explanation of all default fields included with Dynasoft TelecomBilling.Net:
- Voice Services
As a general rule in TelecomBilling.Net, rates are time-dependent and fees are applied to each call.
- Margin multiplier: Margin added to the cost of a call instead of using the rates listed above. A column for the cost of a call has to have been identified in the CDRs for this margin to be used. See chapter on importing CDRs for this. A margin of 30% would be written 1.30. Calls that use this system will be then be rated through the use of this value will which will be multiplied by the cost of the call that exists in the CDR being analysed. You may specify any numeric value. If nothing or 0 is specified, the timed rates will be used to rate the call.
- Peak rate 1: Main peak rate.
- Off-peak rate 1: Main off-peak rate.
- Weekend rate 1: Main weekend rate.
- Peak rate 2: Additional peak rate. This cost is added to the peak cost PeakRate1 when calculating the cost of a call and multiplied by the duration.
- Off-peak rate 2: Additional off-peak rate. This cost is added to the off-peak cost Off-peak rate 1 when calculating the cost of a call and multiplied by the duration.
- Weekend rate 2: Additional weekend rate. This cost is added to the weekend cost Weekend rate 1 when calculating the cost of a call and multiplied by the duration.
- Peak rate 3: Additional peak rate. This cost is added to the peak costs Peak-rate 1 and Peak-rate 2 when calculating the cost of a call and multiplied by the duration.
- Off-peak rate 3: Additional off-peak rate. This cost is added to the off-peak costs Off-peak rate 1 and Off-peak rate 2 when calculating the cost of a call and multiplied by the duration.
- Weekend rate 3: Additional weekend rate. This cost is added to the weekend costs Weekend peak rate 1 and Weekend peak rate 2 when calculating the cost of a call and multiplied by the duration.
- Other peak rate: TelecomBilling.Net makes it possible to measure the length of a call as a time-dependent variable and the fields above apply to this. Under his scenario and when CDRs are imported, the heading to use in the import wizard would be ‘Call duration’. However, it is also possible to measure the length of a call-in terms of any other criteria (pulse-code modulation…). When importing a CDR, the heading of the column to use for this would be ‘Other measurement of call length’. The field in the price lists ‘OtherPeakRate’ is the rate that has to be used against this CDR heading in order to successfully rate a call. See chapter about voice/data CDR for more on this.
- Other off peak rate: Off-peak rate to apply to calls that make use of the CDR field name ‘Other measurement of call length’.
- Other weekend rate: Weekend rate to apply to calls that make use of the CDR field name ‘Other measurement of call length’.
- Set-up peak fee 1: Setup fee for placing a call during peak times.
- Set-up off-peak fee 1: Setup fee for placing a call during off-peak times.
- Set-up weekend fee 1: Setup fee for placing a call during weekend times.
- Set-up peak fee 2: Additional setup fee for placing a call during peak times. This cost is added to Set-up peak fee 1.
- Set-up off-peak fee 2: Additional setup fee for placing a call during off-peak times. This cost is added to Set-up off-peak fee 1.
- Set-up weekend fee 2: Additional setup fee for placing a call during weekend times. This cost is added to Set-up weekend fee 1.
- Set-up peak fee 3: Additional setup fee for placing a call during peak times. This cost is added to Set-up peak fee 1 and Set-up peak fee 2.
- Set-up off-peak fee 3: Additional setup fee for placing a call during off-peak times. This cost is added to Set-up off-peak fee 1 and Set-up off-peak fee 2.
- Set-up weekend fee 3: Additional setup fee for placing a call during weekend times. This cost is added to Set-up weekend fee 1 and Set-up weekend fee 1.
- Set-up peak duration 1: Duration of the initial stage of the call that is covered by the setup peak cost ‘Set-up peak fee 1’ (in seconds). The per-minute PeakRate1 will then only be come into play after this number of seconds has passed. In the case of a billing model where calls are rated to the nearest 6 seconds after the first 30 seconds, a value of 30 would be written under this column. Write 6 in the ChargeRoundingPeak column.
- Set-up off-peak duration 1: Duration of the initial stage of the call that is covered by the setup off-peak cost ‘Set-up off-peak fee 1’ (in seconds).
- Set-up weekend duration 1: Duration of the initial stage of the call that is covered by the setup weekend cost ‘Set-up weekend fee 1’ (in seconds).
- Set-up peak duration 2: Duration of the initial stage of the call that is covered by the setup peak cost ‘Set-up peak fee 2’ (in seconds).
- Set-up off-peak duration 2: Duration of the initial stage of the call that is covered by the setup off-peak cost ‘Set-up off-peak fee 2’ (in seconds).
- Set-up weekend duration 2: Duration of the initial stage of the call that is covered by the setup weekend cost ‘Set-up weekend fee 2’ (in seconds).
- Set-up peak duration 3: Duration of the initial stage of the call that is covered by the setup peak cost ‘Set-up peak fee 3’ (in seconds).
- Set-up off-peak duration 3: Duration of the initial stage of the call that is covered by the setup off-peak cost ‘Set-up off-peak fee 3’ (in seconds).
- Set-up weekend duration 3: Duration of the initial stage of the call that is covered by the setup weekend cost ‘Set-up weekend fee 3’ (in seconds).
- Rate increment peak: The time increment that the peak rates apply to, in seconds. If the rates shown in the Peak rate 1, 2, 3… columns are in currency units (i.e., in GBP rather than pence, USD rather than cents…), the values should be 60. If the rates are given in pence rather than pounds, cents rather than dollars, write 6000.
- Rate increment off-peak: The time increment that the off-peak rates apply to, in seconds.
- Rate increment weekend: The time increment that the weekend rates apply to, in seconds.
- Charge rounding peak: The nearest value that is used for rounding the duration of the calls and working out the total cost of these for peak times. Write 1 if the calls are billed per second, write 5 for a rounding of the cost up to the nearest 5 seconds, etc…
- Charge rounding off-peak: The nearest value that is used for rounding the duration of the calls and working out the total cost of these for off-peak times.
- Charge rounding weekend: The nearest value that is used for rounding the duration of the calls and working out the total cost of these for weekend times.
- Minimum charge peak: Minimum billable charge as soon the caller successfully places a call during peak times.
- Minimum charge off-peak: Minimum billable charge as soon the caller successfully places a call during off-peak times.
- Minimum charge weekend: Minimum billable charge as soon the caller successfully places a call during weekend times.
- Maximum charge peak: Maximum charge levied on a call during peak times.
- Maximum charge off-peak: Maximum charge levied on a call during off-peak times.
- Maximum charge weekend: Maximum charge levied on a call during weekend times.
- Sales tax type: Specify if amounts for sales taxes are in money terms (0) or a percentage (1)
- Sales tax 1 name: Label for sales tax #1.
- Sales tax 1 value: Value of sales tax #1
- Sales tax 2 name: Label for sales tax #2
- Sales tax 2 name: Label for sales tax #2
- Sales tax 3 value: Value of sales tax #3
- Sales tax 3 value: Value of sales tax #3
- Distributor commission type: Specify if amounts for sales taxes are in money terms (0) or a percentage (1)
- Distributor commission value: Value of distributor commission
Set up duration fields (Set-up peak duration , Set-up off-peak duration …) are useful if you need to rate with a fixed rate the initial minutes of a call. The set-up fees (Set-up peak fee 1, Set-up off-peak fee 1…) work in conjunction with these fields and are added up if more than one (Set-up peak fee 1, Set-up peak fee 2…) field is defined. The fields work together based on their number. For instance, Set-up peak fee 1 is the setup fee for PeakRate1…
Sales taxes defined here will not be listed in the sales tax summary section on invoices but will simply be added to the sale tax amount that make up the total of an invoice and that is shown on invoices.
For distributor commissions to be tallied and allocated to distributors, ensure their commission settings are set up in the distributors’ commissions settings page
3.5.2.2. Service price lists
Click ‘Add’ to open a new form:
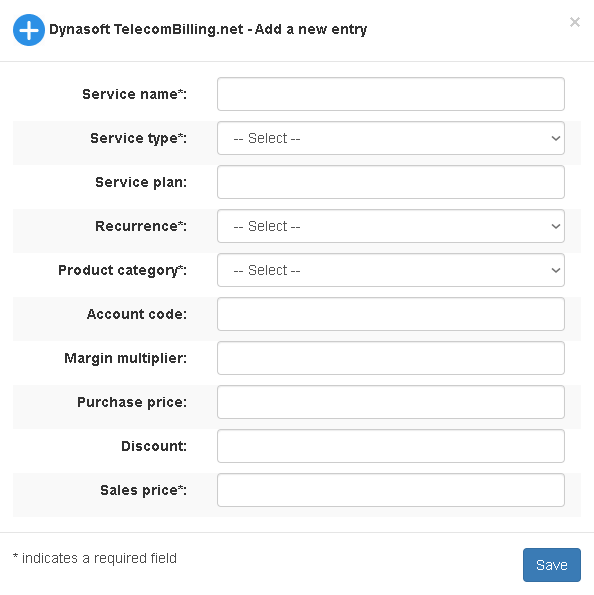
From top to bottom:
- Service name: The name of the service. It is this name that will show on the invoices.
- Service type: This is the type of the service that appears in the CDRs and that is used to link a CDR with an item in a price list (like ‘ISDN 30 Access’ in the service CDR supplied by default with TelecomBilling.Net). This type is a set of characters that have to exist in both the price list and the CDR so this service can be billed successfully. Service types can sometimes be called service codes and is part of the types as defined in the service settings page
- The service plan
- Description of the service
- Recurrence. You can have a recurrence in the CDR format different from the one in your price lists. The portal will work out costs based on all information available to it (see below)
- Product category
- Account code used to in your accounting (Accounting add-on only)
- Margin multiplier: Margin added to the cost of the service instead of using the Purchase price above. A column for the cost of a service has to have been identified in the CDRs for this margin to be used. You may specify any value: 30% margin would be written 1.30. This value will then be used and be multiplied by the cost item that exists in the CDR being analysed
- Purchase price: Purchase price of the service. This field is used to work out the profit of each service
- Discount: Discount given to the service. This amount shows on the invoices and is deducted from the service price. In the customer’s accounts, under the ‘Service numbers’ page, another discount field is given for each SN the amount of which is added to this price list-based discount when billing is carried out
- Sales price: Sales price of service, i.e. the monthly fee usually levied for a service (e.g., Internet service…)
Use this option to create price lists to use when rating recurrent services located in CDR data. These lists must be associated with customers in the customers’ individual pages (SNs).
If a margin multiplier is used to determine the sale price of the services, leave the field ‘Sales Price’ empty or equal to zero. Similarly, if the sales price of a service is not arrived at using a purchase price in the CDR data and a margin multiplier, leave the margin multiplier field empty or equal to zero in the price list. The portal will then use the sales price from the price list. Margin multiplier will be used over rates whenever these are defined in a price list, in a similar way to how this is done for rating voice services.
TelecomBilling.Net will always calculate the sales and purchase prices to use based on the way CDR formats are defined. For instance, if a price is defined in a price list and is set to apply to the period of a month and a CDR format was defined to represent daily CDRs, then TelecomBilling.Net will work out a daily price from the price list and use this to rate the CDRs. Conversely, if a price list holds daily prices and a CDR format was defined as holding monthly CDRs, then TelecomBilling.Net will work out monthly rates based on these daily prices.
Services are pro-rated based on the dates start and end dates identified in the CDR data unless the service was marked with a no recurrence.
Make sure that no single or double quotes are present in the text values in all price lists.
Ensure that no non-numeric characters exist in columns of price lists where numeric values are expected.
All rates and costs have to use the decimal separator that is set in your Windows settings (dot or comma).
The prices entered have to be free of any sales tax.
It is recommended to streamline the lists to only the destinations you need as lists of hundreds of thousands of destinations will take a lot longer o be processed when billing than reduced lists.
3.5.3. Invoices
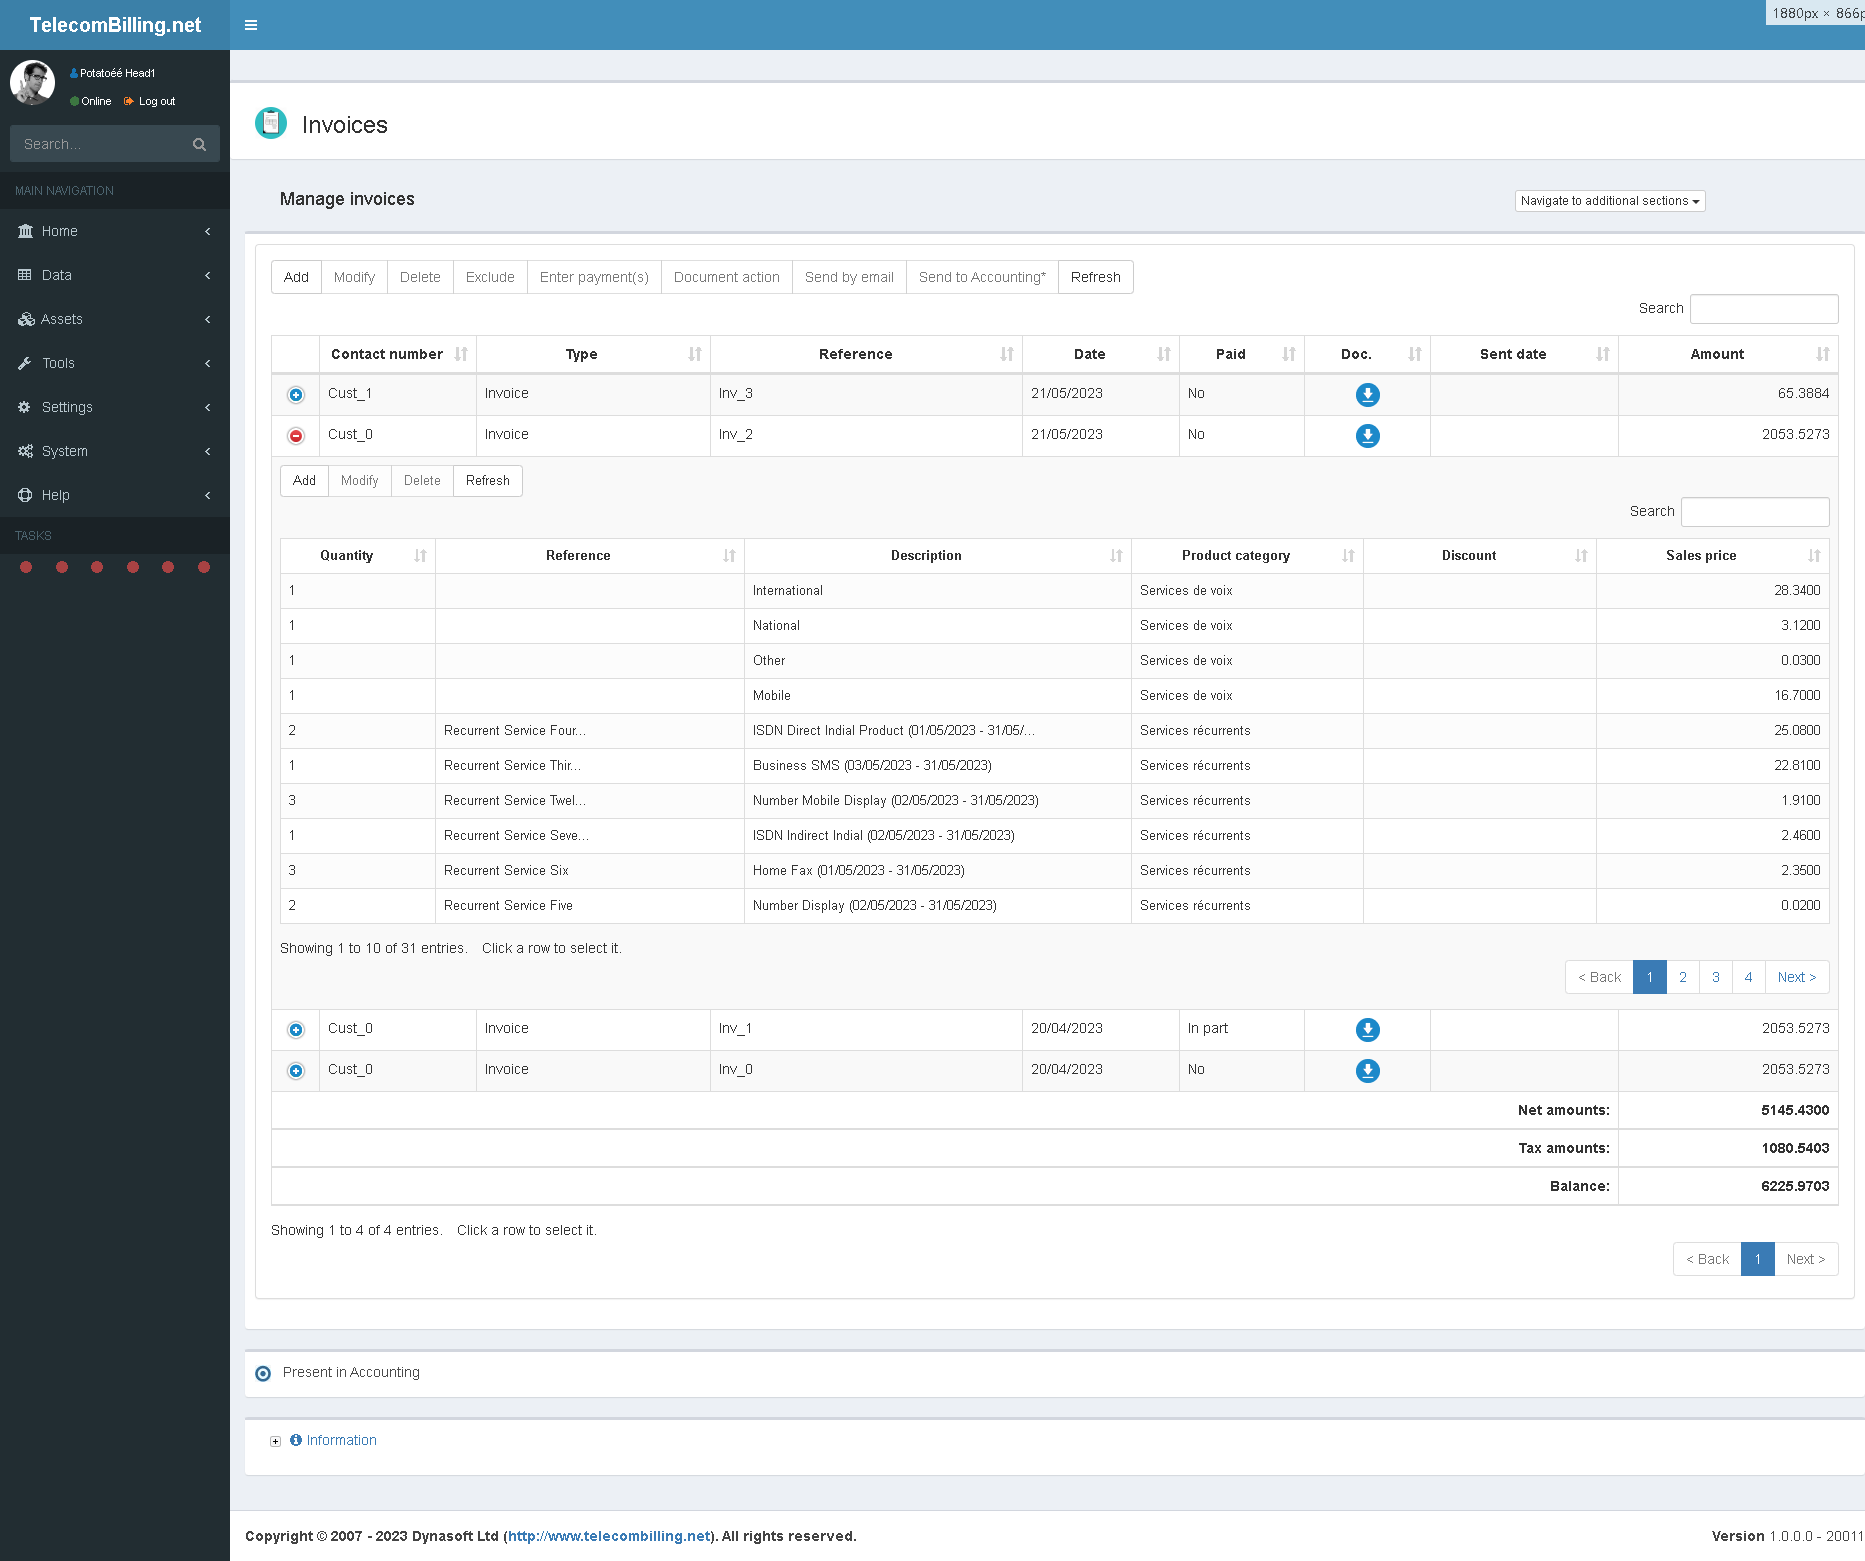
Access: Landing page > Data > Invoices
Create invoices on the fly or view invoices created by the portal during a billing session. Delete invoices and their corresponding data from here or click a line to download the invoice. If the accounting add-on is used, deleting an invoice will delete it in either Xero or Sage Accounts. The way invoices are added, modified or deleted is the same as in the ‘Transactions’ page seen before.
3.5.4. CDR Data
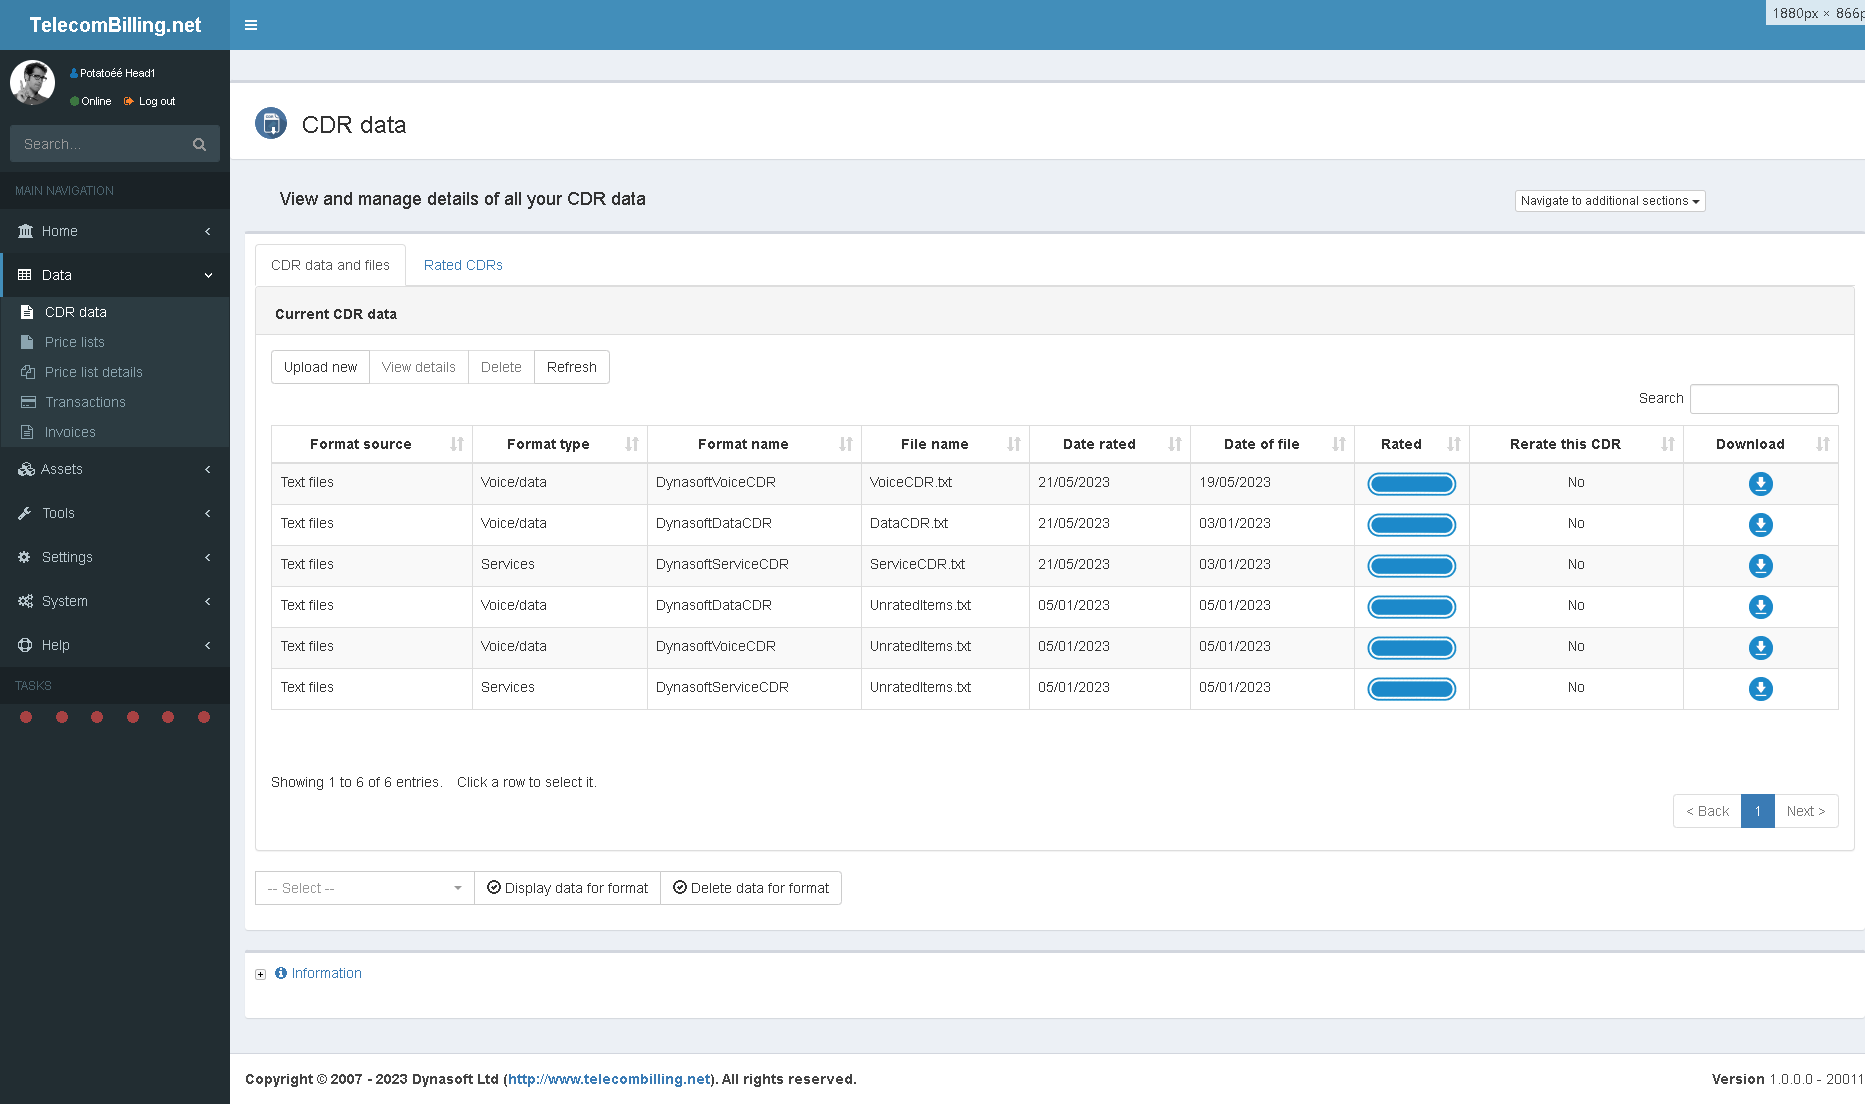
Access: Landing page > Data > CDR data
View or export as CSV all the voice/data or recurrent services CDR data the portal has rated under the billing’s ‘Rate the CDR data’ stage in the Actions tab. Note that files uploaded need to be rated and billed before calls or services in them are shown on your customers’ invoices. This holds true for files that were uploaded before, than rated at a later stage. The data already rated will still be in the system until you run the new files in billing.
3.5.4.1. CDR data and files
Upload a new CDR file or delete a file. If deleted a file will not be available anymore for billing. You will need to upload it again in order for the system to rate it.
Click ‘Add’ to open a new form:
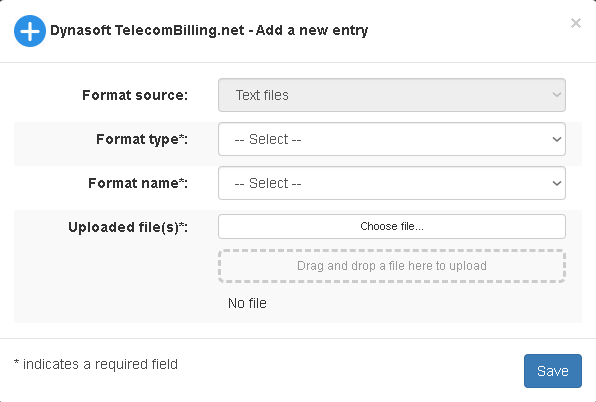
From top to bottom:
- Format source: Text file. In order to add another source such as a database, Webhook or Web page, please do this via the CDR format pages
- Format type: Select voice/data or services
- Format name: The names given here correspond to the CDR formats that were identified
- Uploaded file: Upload one or more CDR files the system needs to analyse
Rating CDRs will be faster if many small CDR files are used if text files is the source of your CDR data rather than one big file as your portal creates one computer CPU thread per file.
3.5.4.2. Rated CDRs
Perform a search of rated CDR data (i.e., lines in a CDR file/table). Identify a format type, from and to dates, tick if you wish to save this data in the Exported data page and click ‘OK’. A table with the result CDRs will show at bottom of page.
3.6. Tools
3.6.1. Web Access
Coming soon.
3.6.2. CRM
Coming soon.
3.6.3. FTP Tool
Coming soon. Define the FTP servers the system needs to work with via the ‘Settings’ menu > ‘FTP’.
3.6.4. Back-up
Coming soon.
3.6.5. Retrieval of CDR via FTP

Access: Landing page > Tools > Retrieval of CDR via FTP
If you wish that TelecomBilling.Net download CDR files automatically from an FTP server, a number of parameters have to be linked with the desired CDR formats.
Select the tab wanted (Voice/data or Services CDR formats) a line and click ‘Modify’ to open a form:
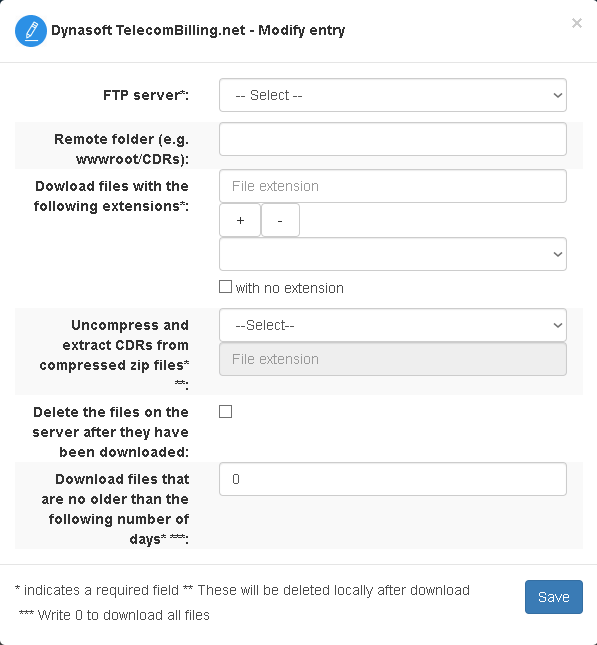
From top to bottom:
- An ftp server
- A remote directory path
- A set of extensions for the files to be retrieved
- Whether the files should be unzipped
- If the portal should delete the zipped files after they have been downloaded
- How many days old should the files be for download
You may either set the retrieval to operate automatically at each interval specified in the drop-down menu or manually using the ‘Retrieve now’ button underneath.
Files already on your local directories will not be overwritten by files on the ftp servers. Only new files will be saved in your portal for the individual CDR formats. This is also valid for zipped files as the portal compares files in a zipped file with those that exists locally, before it saves them.
File extensions are case sensitive.
3.6.6. Exported data
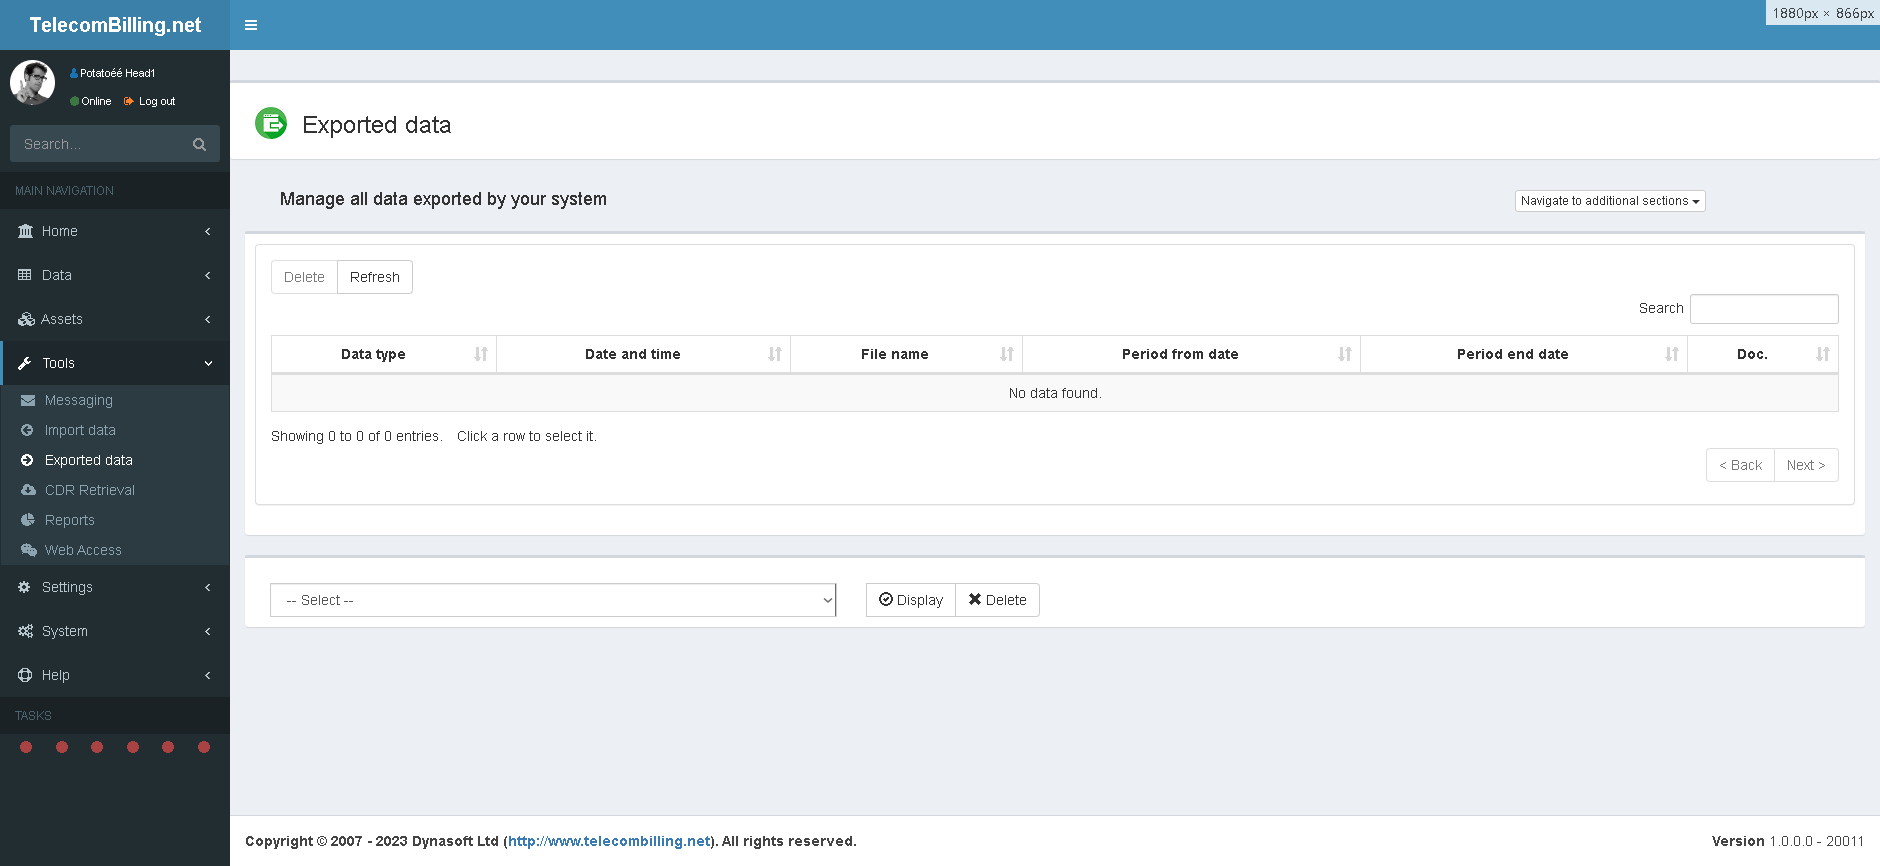
Access: Landing page > Tools > Exported data
This is the repository of all the files that the portal or the user has exported usually for download. The types of files that can be exported to this page are:
- Standard billing files during a billing session
- Advanced billing files during a billing session
- SEPA files during a billing session
- Exported CDR data during a billing session
- A financial report exported as a CSV file
- Exported price list
- LCR list
- Other
The drop-down menu at bottom of page is to display all the files linked to a specific type or delete them.
3.6.7. CDR file Mediation
Coming soon.
3.6.8. Messaging Tool
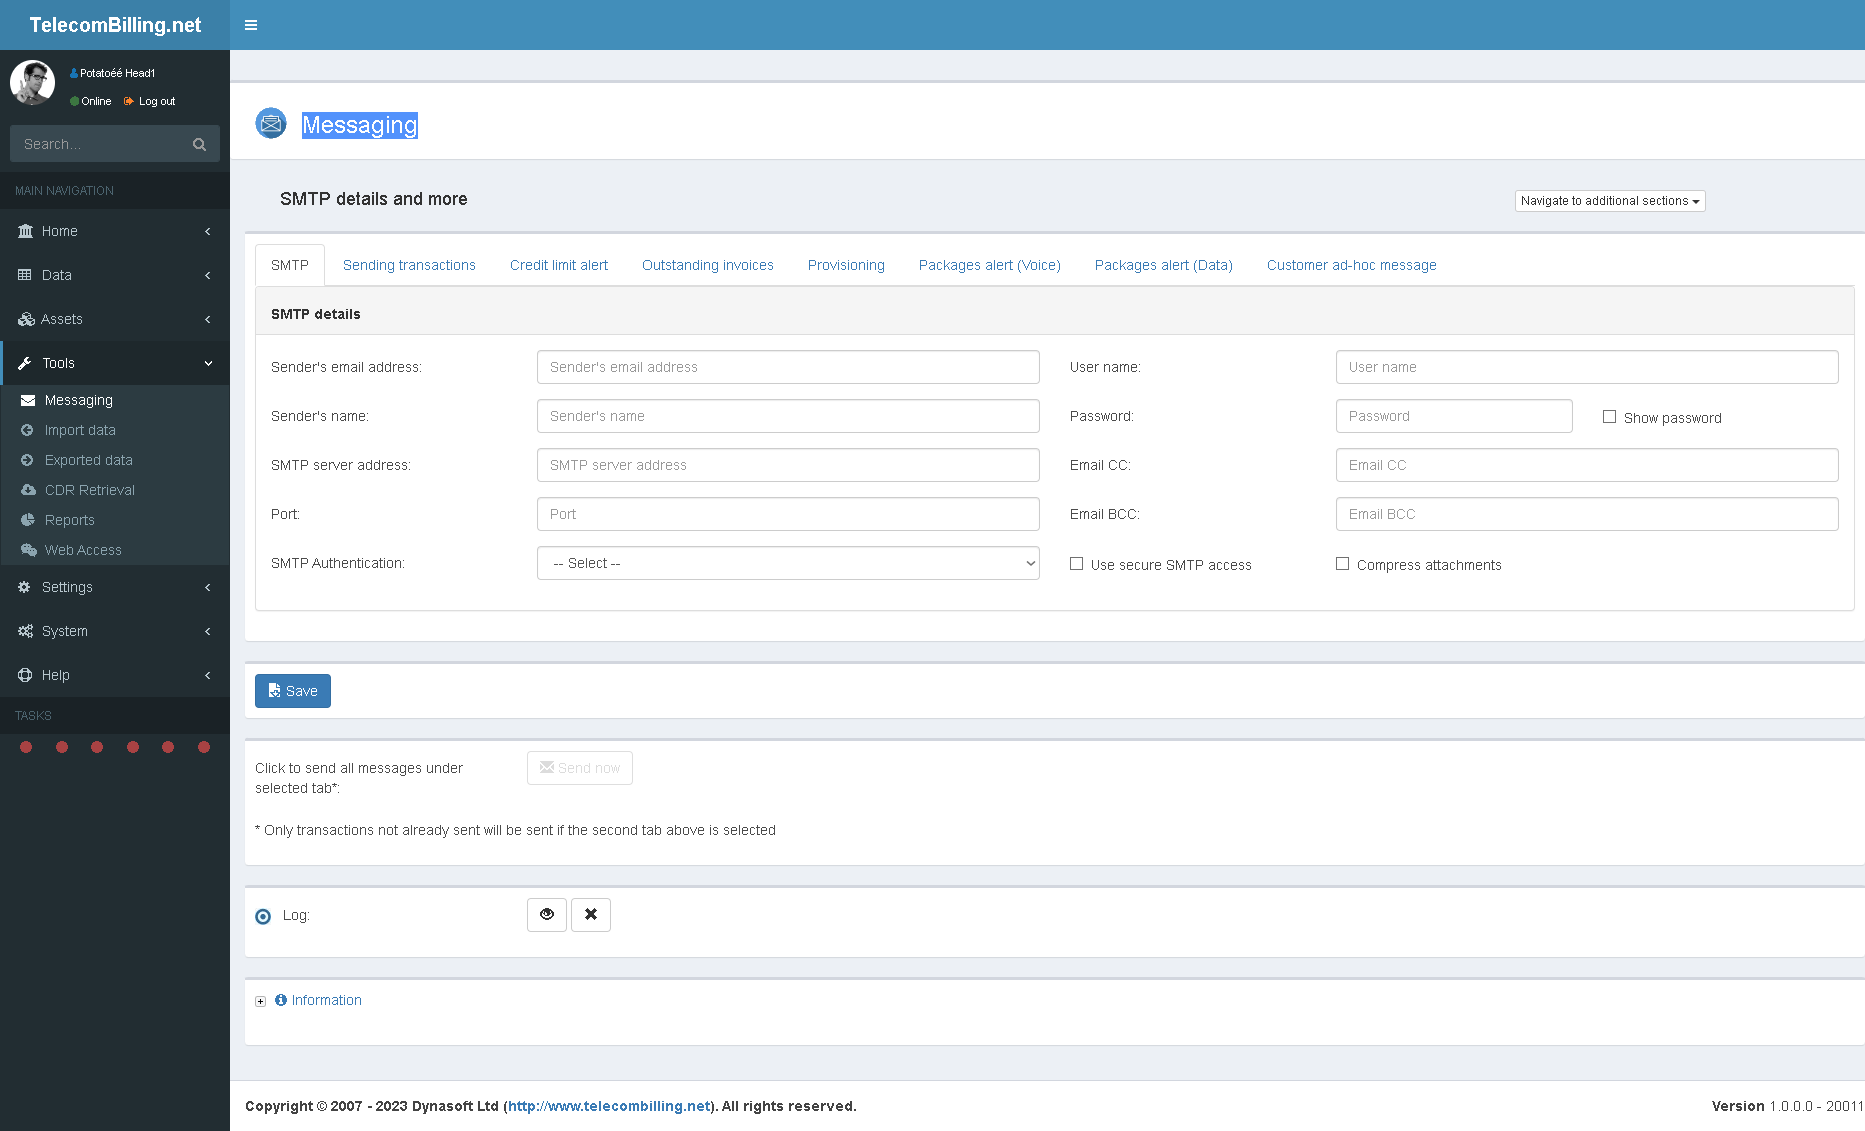
Access: Landing page > Tools > Messaging
This page is used to configure the messaging functionality of TelecomBilling.Net. This is useful if the invoices of the customers have to be sent in bulk at the end of a customer’s billing run or manually for each customer’s invoice from this page, the invoices page or from within the customers’ accounts. See chapters 3.4.3, 3.5.3 and 3.4.2.1 respectively. If you wish to write a series of email addresses in the field for the email address in each customer’s page, separate these by a single comma with no blank spaces.
Use the tabs to identify the subject line and message body of the messages for sending out the invoices, generating files using the SQL Builder, sending out email alerts if customers go over their credit limit, sending out email alerts if customers go over their allowance for their voice or data packages, sending out outstanding invoices by customers, sending the emails for the provisioning and ad-hoc messages to customers.
The option ‘Use secure SMTP access’ will encrypt the connection to the SMTP server by establishing a TLS-type connection.
The size of the message body for all types of messaging is limited to 5100 characters.
All email address fields in TelecomBilling.Net can hold comma-separated lists of email addresses (myname1@mydomain.com, myname2@mydomain.com,..).
Please note that some servers require that the ‘Sent to’ email address be the same as the user name if you authenticate to your server using an email address.
The customer’s own first, last and company names, email address and invoice and customer numbers can be placed in the body of email messages using the following tags:
‘<LASTNAME>’ for the customer’s last name
‘<FIRSTNAME>’ for the customer’s last name
‘<COMPANYNAME>’ for the customer’s company name
‘<EMAILADDRESS>’ for the customer’s email address
‘<INVOICENUMBER>’ for the invoice number
‘<CUSTOMERNUMBER>’ for the customer number
3.6.9. Import Data
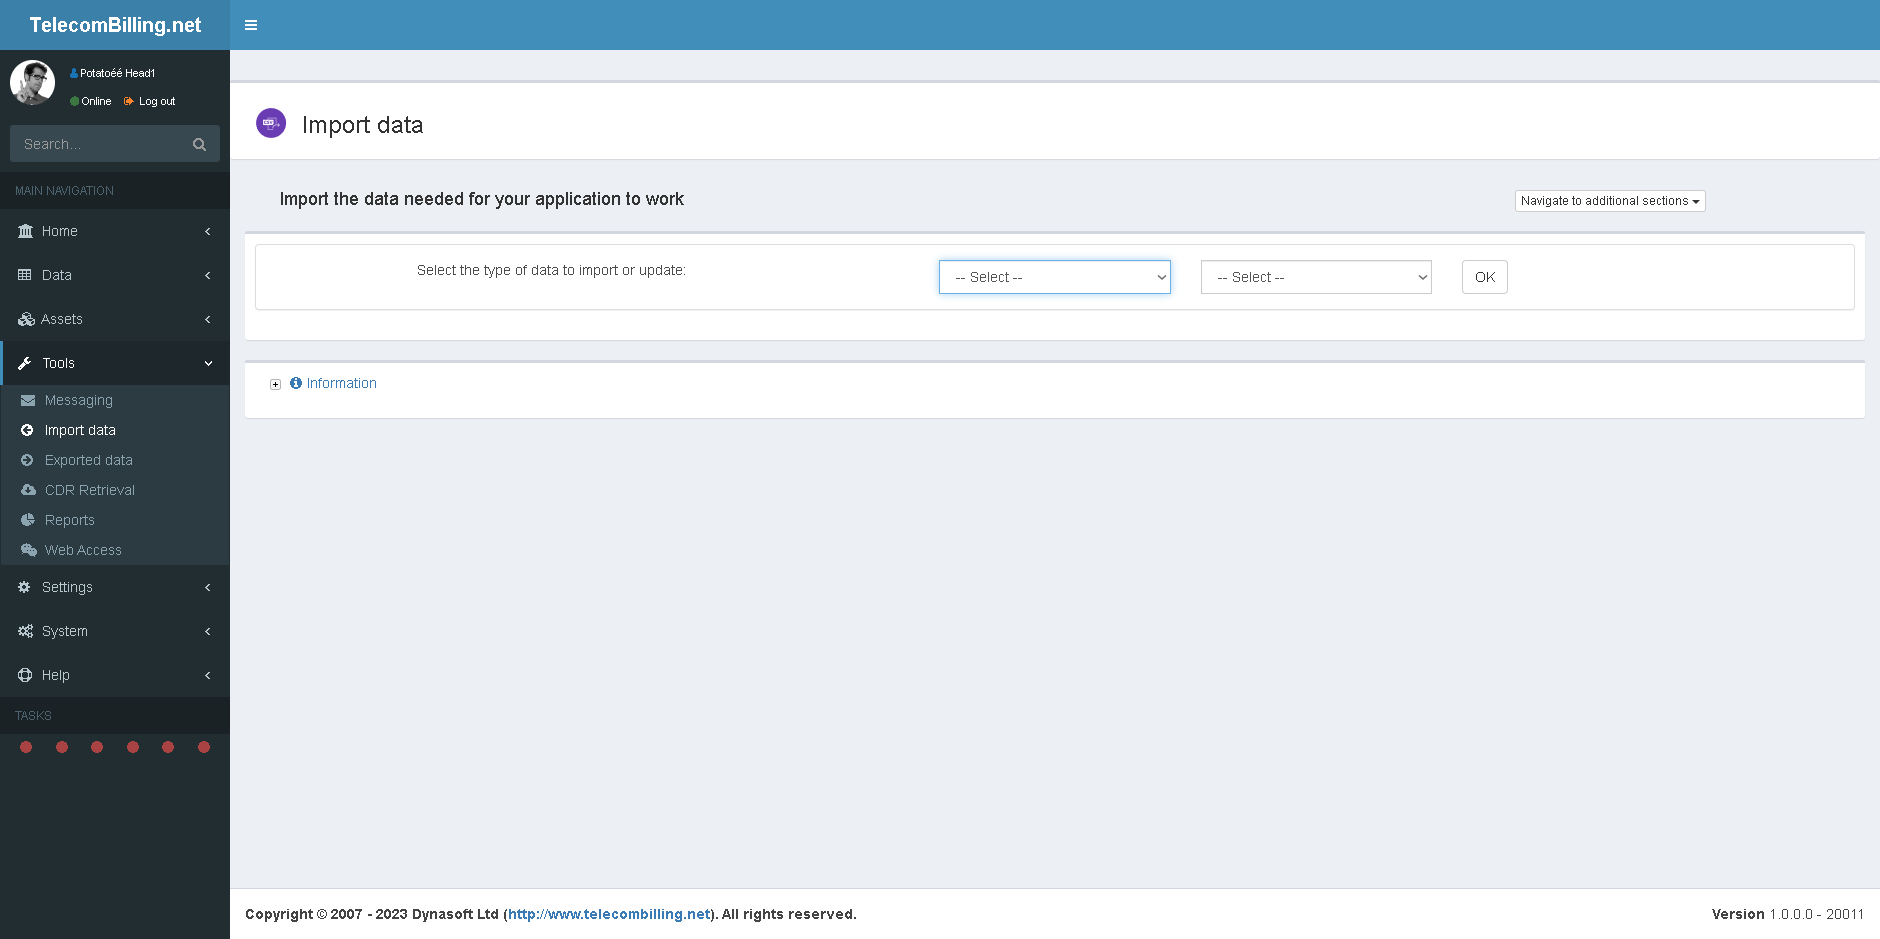
Access: Landing page > Tools > Import Data
It is possible to import a file to add or update customers, distributors or suppliers; import new SNs; import new customer or general subscriptions and packages and more. This is useful if you wish to avoid having to painstakingly type the content of data lists from another system. Most import types enable the user to update existing data, import new data or delete previous data and import new data.
1. Import new or update existing customer, distributor and supplier accounts
There is no formal format to follow when importing contacts. Simply import any csv that holds any contact data you need. The system will auto generate contact numbers if none are identified on import. Ensure that the import list holds the contact numbers if a list has to be imported to update the contacts in the system.
2. Import new customer SNs
When importing SNs and their associated price lists, CDR format(s), start and end dates, write their names as one string with each name separated by ‘space+vertical bar+space’. An example for importing UK SN 3493456 for customer Cust_01 would be:
Cust_01;3493456;44;MySalesPriceList1 | MySalesPriceList2 | MySalesPriceList3;MyPurchasePriceList1 | MyPurchasePriceList2 | MyPurchasePriceList3;MyCDRFormat1 | MyCDRFormat2 | MyCDRFormat3;01/05/2023;30/09/2023
To associate customer SNs with base lists or customer-specific price lists, write the lines as in the example that follows:
Cust_01;3493456;44;MySalesPriceList1 – Base list | MySalesPriceList2 – Cust_01 | MySalesPriceList3 – Cust_01;MyPurchasePriceList1 – Cust_01 | MyPurchasePriceList2 – Base list | MyPurchasePriceList3 – Cust_01;MyCDRFormat1 | MyCDRFormat2 | MyCDRFormat3;01/05/2023;30/09/2023
The above means we are linking SN 3493456 with three sales price lists: a base list called MySalesPriceList1, a list specific to Cust_01 called MySalesPriceList2 and another list specific to this customer called MySalesPriceList3. Service start date is 01/05/2023 and end date set here is 30/09/2023. Leave the end date blank if the service will always run.
It’s also possible to write single price lists or CDR format names like so:
Cust_01;3493456;44;MySalesPriceList1;MyPurchasePriceList1;MyCDRFormat1;01/05/2023;30/09/2023
Write 1 against column ‘Is DDI/SIM’ if this number is a DDI/SIM from an existing pool of DDI/SIM (See Assets > DDI/SIMs). If this is the case, then the portal will allocate the DDI/SIM with the customer account whose SNs are being imported. If the DDI/SIM does not exist in the DDI/SIM page, the portal will import it into the list of available DDI/SIMs.
A subscription made up of the DDI or SIM will be added to the customers’ whose SN are being imported here if the SN is a DDI or SIM.
For the field called ‘Service number type’, write as follows:
- ‘0’ for a number
- ‘1’ for a regular expression
- ‘2’ for a range of numbers
- ‘3’ for an IP address
- ‘4’ for a DDI/DID
- ‘5’ for a SIM, and
- ‘6’ for a CLI
3. Import new customer and general subscriptions
For subscriptions, the import file should follow the format below. Not all columns are needed when importing but the portal will require the following fields: customer number (if importing lists for more than one customer), a sales price, a recurrence and an item name.
The columns of a general subscription are given below:
Item activation date;Item purchase price;Item deactivation date;Item description;Item discount;Item name;Item quantity;Item sales price;Next bill date;Product category;Recurrence
The columns of a customer subscription are given below:
Branch/Department;Customer number;Item activation date;Item purchase price;Item deactivation date;Item description;Item discount;Item name;Item quantity;Item sales price;Next bill date;Product category;Recurrence;Service numbers
The items’ recurrence needs to be one of the following letters: D (daily), W (weekly), M (monthly), Q (quarterly), Y (yearly), N (no recurrence) or O (one time).
If the file does not have any SNs, then the portal will associate the items with every SN already in the system present for a particular customer. If the list has SNs, there should be separated by ‘space+hyphen+space’, as per the following example: ‘12345 | 67890 | 54321 | etc…’. The portal will only associate a subscription with the SNs in that string if SNs are specified. It will not use these SNs to associate any previously existing charge with these SNs. Newly added SNs are linked to all price lists (voice and services) and CDR formats (voice/data and services) in the system.
4. Import new customer and general packages
The portal needs to have the data about general packages before one can import the associations of customers and their packages. Therefore, import the general packages first. Columns are:
Name;Description;Recurrence;Customer type;Product category;Call types (voice);Number of minutes/calls or cost of calls (voice);Definition of package (minutes, calls or cost) (voice);Package code (data);Maximum usage allowed (data);Excess usage increments (data);Excess usage cost (data);Download/upload ratio (data);Quantity (subscriptions);Name (subscriptions);Quantity (inventory assets);Name (inventory assets);Purchase price;Discount;Sales price
For the field ‘Definition of package (minutes, calls or cost) (voice)’, write M for minutes, C for calls and S for cost. Call types within the package have to be separated by a vertical bar. Separate the quantities for subscriptions and inventory assets with ‘space+vertical bar+space’. The same goes for subscription names and inventory assets names.
The items’ recurrence needs to be one of the following letters: D (daily), W (weekly), M (monthly), Q (quarterly), Y (yearly), N (no recurrence) or O (one time).
An example of general package is given below:
MyPackageName;MyPackageDescription;M;ALL;MyProductCategory;GSM | NTL;500;M;MyDataCode;5000000000;1000000;5;3:1;1 | 3;MyInventoryAsset1 | MyInventoryAsset2;2 | 4;MySubscription1 | MySubscription2;4.99;2;9.99
This package, called MyPackageName, associates a voice part, a data part and inventory assets as well as subscriptions and inventory assets. The voice part cover call types GSM and NTL, includes 500 minutes and is valid to all customer types (‘ALL’). It also includes a data part which the user can use up to 5 GB, with a download to upload ratio of 3:1. If his usage goes over this, they will be billed 5 monetary units for every MB used. Finally, this package includes the use of 1 inventory asset MyInventoryAsset1 and 2 MyInventoryAsset2, as well as 2 subscriptions MySubscription1 and 4 MySubscription2. Purchase price of package is 4.99, discount is 2 and sales price is 9.99.
When importing a customer subscription or package, it will be required to identify the general subscription or package that it matches to: for the field called ‘Associated general item name’ you may specify the general subscription or package name or database id.
If DDI’s or SIMs are identified in the importation of a subscription or package and if these are not present in the system , the portal will create and add them for you as new DDI or SIM.
Statuses are as follows:
- ‘0’ for Order received
- ‘1’ for Pending configuration
- ‘2’ for Pending installation
- ‘3’ for Pending shipping
- ‘4’ for Pending activation
- ‘5’ for Order completed
- ‘6’ for Order cancelled
- ‘7’ for Order closed
Recurrence are as follows:
- ‘D’ for daily
- ‘W’ for weekly
- ‘M’ for monthly
- ‘Q’ for quarterly
- ‘Y’ for yearly
- ‘N’ for no recurrence
- ‘O’ for one time
5. Import general inventory items and DDI/SIMs
Set Add asset back to 0 to mean the asset should not be added back to the inventory or pool of DDI/SIMs when an item’s deactactivation date has been reached with a customer. Write 1 if the item should be added back. If DDI/SIMs are associated with customers, after importing DDI/SIMs, the corresponding service numbers should be imported and marked as DDI/SIMs (Is DDI/SIM = 1). See point ‘2’ above.
6. Call types
Import call types along with a description field, its call group, times of the day and days of the week when peak periods occur in your system. Set the day of the week as a number: 0 for Monday, 1 for Tuesday, etc…
7. Service types
Import service types along with a description field, its code, and type.
8. Notes
- The system will add any data that it finds in the list but that does not exist in the system. For instance, if one imports SNs and a customer is set that does not exist then the system will add a customer and link these SNs to it. The same goes for bank details… If the portal finds a new SN in an import file for instance for the import called ‘Customer departments/branches and service numbers associations’, it will enter it in that customer’s list of SNs.
- Make sure that the import files contain only the data to be imported and not things such as column headers, for example
- Make sure that the fields that must contain numeric values such as quantity, sales price, etc … contain only numeric values as they will be ignored otherwise
- The vertical bars ‘|’ and the hyphens ‘ – ‘ have cannot be preceded by any character such as blank spaces
- The fields in the files can follow any order and not necessarily the order given in the examples above
- The field separator can be: tabulator, semi-colon, comma, or space
- The columns in your file can be in any order, as you will be asked to map the fields when importing the file.
- Only use the countries as they are labelled in your portal when identifying any country field during the field mapping stage. See drop-down menus with countries in various places in the portal such as in the Configuration page, point ‘1.A. Identification’.
- When importing countries in the system via the importation of customers, distributors, call types, service types, ensure only the acronyms listed here are used as much as possible. This is especially true for call and service types. Using any other acronyms will result in billing errors.
3.6.10. SQL Builder
Coming soon.
3.6.11. Financial, Data and Quality-of-Service (QoS) Reports
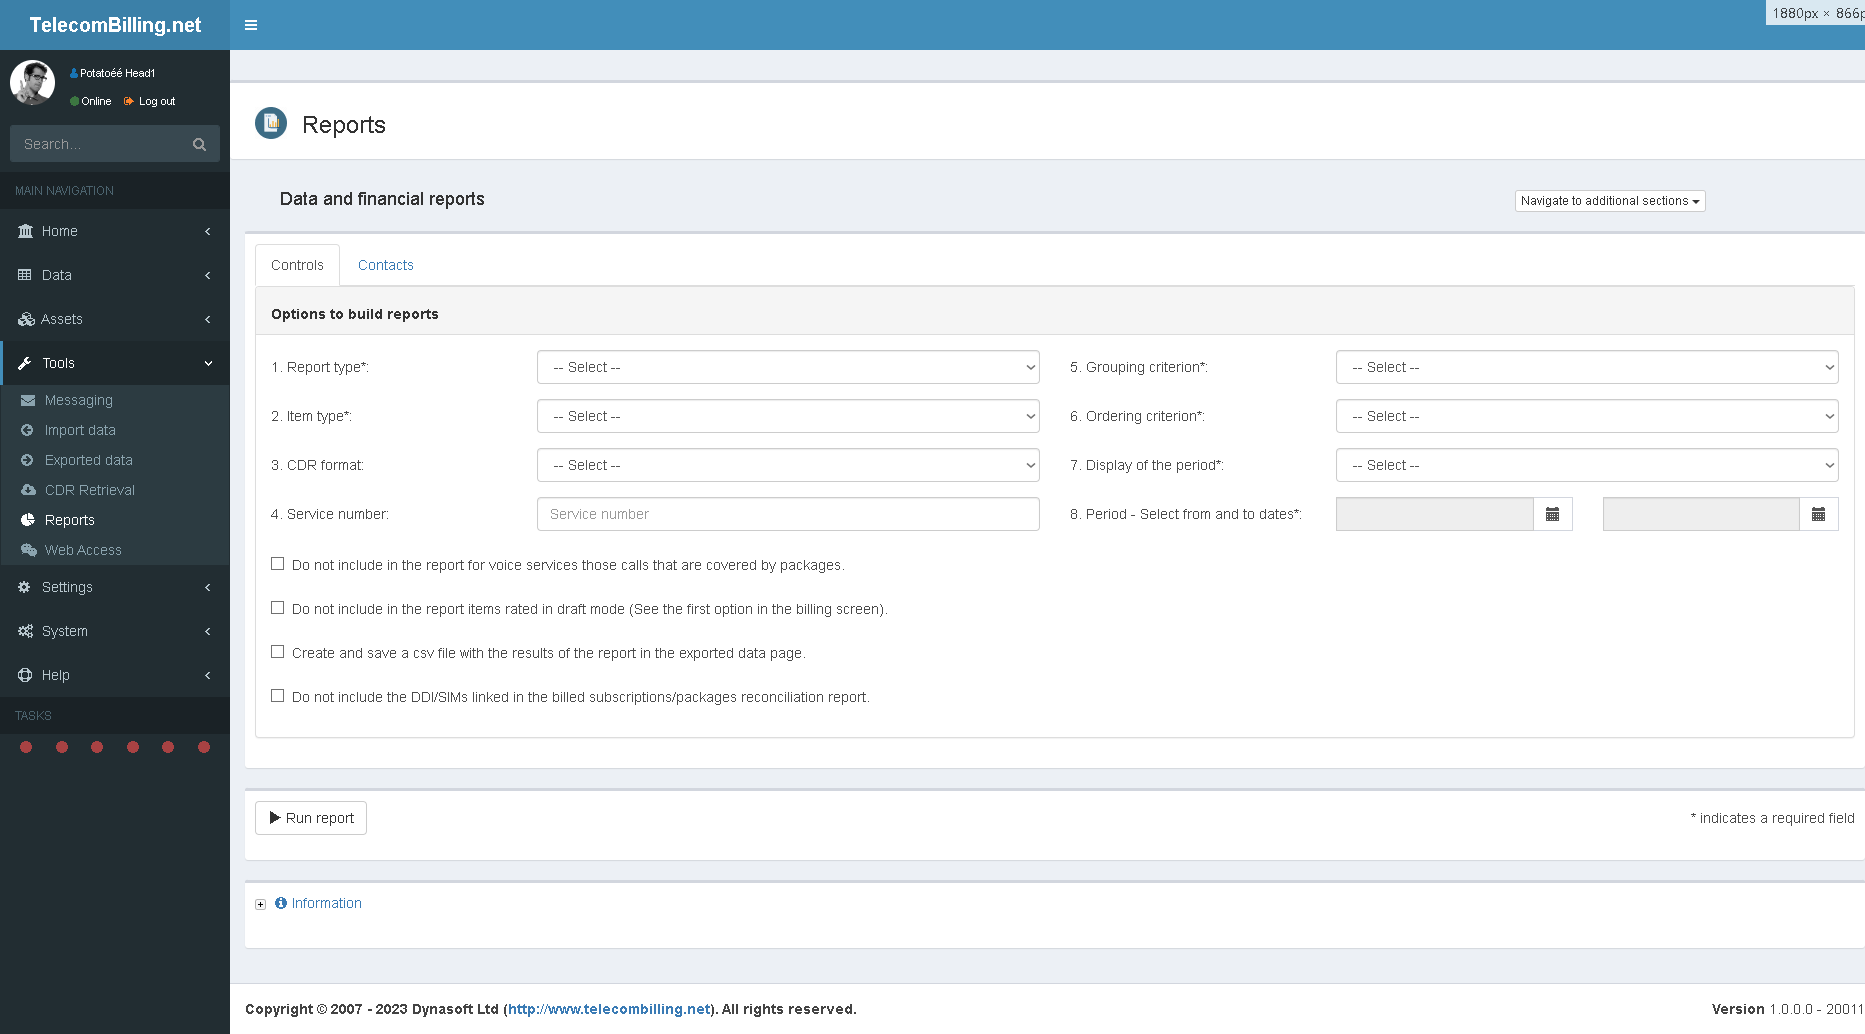
Access: Landing page > Tools > Reports > Financial reports
Select the type of report required using the first drop-down menu and select the parameters needed to build the report from 1 to 8. The grouping criterion enables the report to work out sub-totals for specific groups of data as given in the drop-down menu. The ordering criteria will list the items in the report within each group of data as indicated. Click the tick boxes at bottom of page required. Click ‘Run report’ to save the report in the ‘Exported data’ page.
Individual items mean individual calls in the case of voice services, individual recurrent services or the individual itemisation of a package, subscription or inventory asset as it appeared in an invoice.
The subscriptions billed reconciliation report only gives results for scenarios where the option to let the portal handle the resetting of the subscriptions is not ticked. (option ‘3.s’ in the configuration page, point ‘8.A’).
The program distinguishes two types of dates: the date associated with the elements of an invoice (i.e., the sections in the summary section of an invoice) and the date of the invoice itself. For example, if voice services were billed on 01/06/2023 for the period from 01/05/2023 to 30/05/2023, the date associated with the invoice will be the 01/06/2023 while the items that make up the bill will have as date the upper date of the billing period that was selected when the billing was made, i.e., 30/05/2023 in the example here.
This will impact how reports can be viewed and which dates to select to view them as follows:
- The following reports use a date that corresponds to the upper date of the period that was billed:
- Subscriptions billed reconciliation report
- Revenue and profit report
- Billed SNs reconciliation report
- Usage report
- Quality-of-Service (QoS) report
- All other reports use the date of the day the transaction was created.
QoS parameters
Here are the Quality-of-Service parameters TelecomBilling.Net is able to display and what they mean:
• Answer Bid Ratio – ABR
Add up all the bids resulting in answer signal, divide by all the bids and multiply by 100. It is similar to ASR except that it includes bids that do not result in a seizure.
• Percentage Overflow – OFL
Overflow bids (to another circuit group or to a circuit busy signal) x 100 / Total bids for the circuit group (or all circuit groups to a destination). % OFL indicates the relationship between the total bids offered to a route or destination, in a specified period of time and the quantity of bids not finding a free circuit. It will therefore, give an indication of the overflow from one route to another or the bids that fail because all routes to a destination are busy.
• Bids per Circuit per Hour – BCH
BCH is an indication of the average number of bids per circuit in a specified time interval. It will therefore identify the demand and, when measured at each end of a both-way-operated route, will identify the direction of greater demand. Bids per hour / Quantity of circuits available for service.
• Answer Seizure Ratio – ASR
Add up all seizure resulting in answer signal, divide by all the seizures and multiply by 100.
• Seizures per Circuit per Hour – SCH
Seizures per Hour divided by Quantity of circuits available for service. SCH is an indication of the average number of times each circuit in a route is seized in a specified time interval. When related to the expected values of average call holding times and effective call/seizure rate for the route, it will give an indication of the effectiveness of the service being offered.
• Network Effectiveness Ratio – NER
Add up all the seizures resulting in answer signal, add user busy, add ring no answer, add terminal rejects, add unavailability, divide by all the seizures and multiply by 100.
• Congestion Ratio – CR
All seizures / All bids and multiply by 100.
• Greatest Occupancy – GO
Occupancy can be represented in units, for examples, erlangs, hundred calls-seconds (CCS) or as a percentage. It can be measured as a total for a destination or for a route and as an average per circuit on a route. This parameter will show usage and identify unusual traffic levels. The detection of the occupancy of a telephone line is carried out by identifying the actual speech signals from amongst all the signals sampled or those of a telecommunication channel. TelecomBilling.Net measures it as the total for the dates selected by the user for all calls made.
• Average Holding Time – AHT
Traffic / Call attempts, in seconds. AHT is defined as the duration of a call from receipt of a 200 OK and an associated BYE message indicating call completion.
• Mean Holding Time per Seizure – MHTS
This is the total holding time divided by the total number of seizures and can be calculated on a route basis or for switching equipment. Holding Time (HT) is the period of time a server is busy on a call. The holding time includes the channel request and seize time, the message length and the hang and the squelch time.
• Average Conversation Time – ACT
Average holding time * (All Seizures/Seizures with Answer Signal), in seconds.
• Revenue Generated – RG
Average Conversation Time * All Seizures * (Charge/60), in money.
• Average Call Duration – ACD
Duration of calls added up / Number of calls, multiply by 100.
• Average Post Invite Delay -APID
This is the average of Time of Status Indicative Response – Time of INVITE. In a successful request attempt, PID is defined as the time interval from the moment the INVITE message containing the necessary information is passed by the originating agent or user to the intended mediation or destination agent until a response is received indicating an audible or visual status of the INVITE request.
• Average Post Dial Delay – APDD
This is the time between punching in the last digit of a telephone number and receiving a ring or busy signal.
• False Answer Supervision – FAS
FAS flags potential false billing by detecting problematic communication between a public switched telephone network (PSTN) and the gateways that manage a call to proper termination. In a common problem scenario, a telephone call is mishandled by the gateways of a Wide Area Network, so that the calling party is billed for an incomplete call to a busy signal.
• Busy Hour Call Attempts BHCA, Busy Hour Call Completion BHCC
BHCA is the number of telephone calls attempted at the busiest hour of the day (peak hour) and the higher the BHCA, the higher the stress on the network processors. BHCA is not to be confused with busy hour call completion (BHCC) that measures the throughput capacity of the network. If a bottleneck in the network exists with a capacity lower than the estimated BHCA, then congestion will occur resulting in many failed calls and customer dissatisfaction.
• Average Answer Time Response – AATR
• Call Completion Ratio – CCR
Volume of release cause OK / Volume of release causes. It expresses the ability of the system to successfully assign and also connect, without problems, a radio circuit for use by subscribers when they wish to receive or place a wireless call.
• Call Failure Ratio – CFR
Volume of release cause failure / Volume of release causes.
• Switch Call Completion Ratio – SCCR
It expresses the ability of the system to successfully deliver a call to not only the radio environment but also to the PSTN. An unsuccessful call would be a case in which the party receiving the call -whether the PSTN or the wireless network- does not answer the call or is blocked due to facilities not being available.
• Billing Call Completion Ratio – BCCR
It expresses the number of calls that are successfully completed and that can be billed, in comparison to all the other attempts to complete a call, which could also mean calls that are not billed.
• Most Costly Numbers – MCN
Ten numbers most costly to ring.
• Most Frequently Dialled Numbers – MFDN
Ten most frequently dialled numbers.
When specifying the location of each parameter value on importing a new CDR, the following fields have to contain only numeric values:
Quantity of circuits available
Occupancy
Holding time
Post dial delay
Post invite delay
Answer time response
3.6.12. Supplier Provisioning
Coming soon.
3.6.13. LCR
Coming soon.
3.6.14 Web Access
Coming soon.
3.7. Assets
3.7.1. DDIs
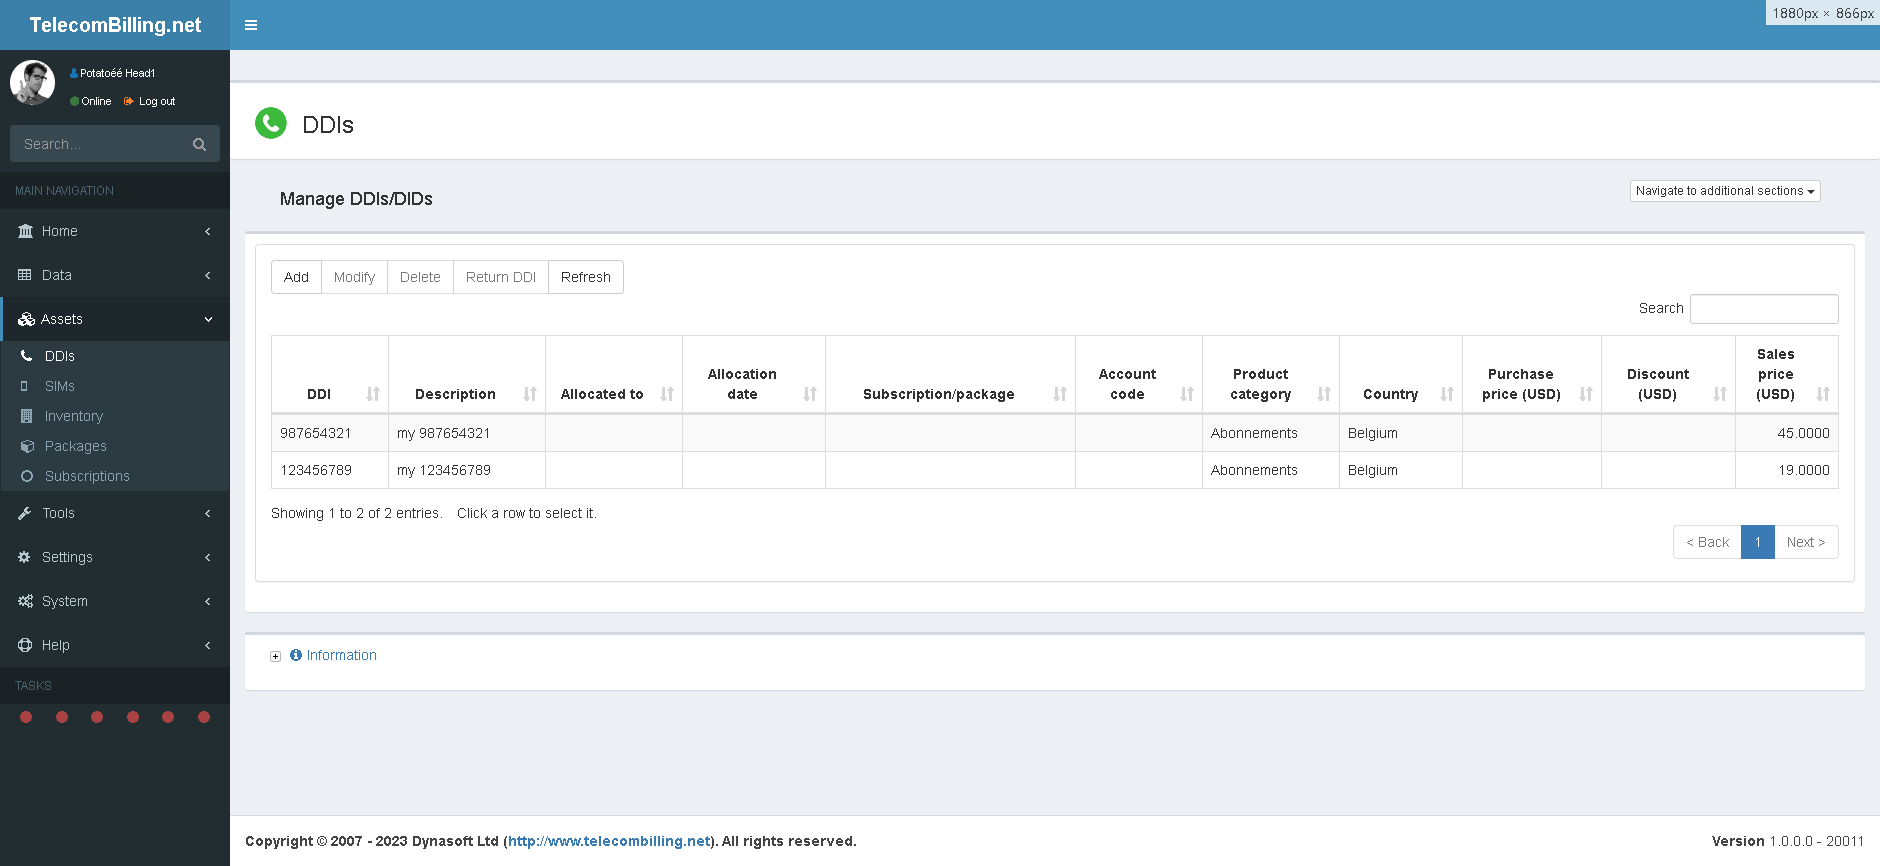
Access: Landing page > Assets > DDIs
Use this page to enter DDI/DID numbers.
DDI/DIDs numbers can be entered via this page along with a dozen parameters for each one of these numbers. The numbers entered here are accessible directly from the SN page inside in each customer’s page so that they can be assigned to the customer or these can be added to a general packages.
Click ‘Add’ to open a new form:
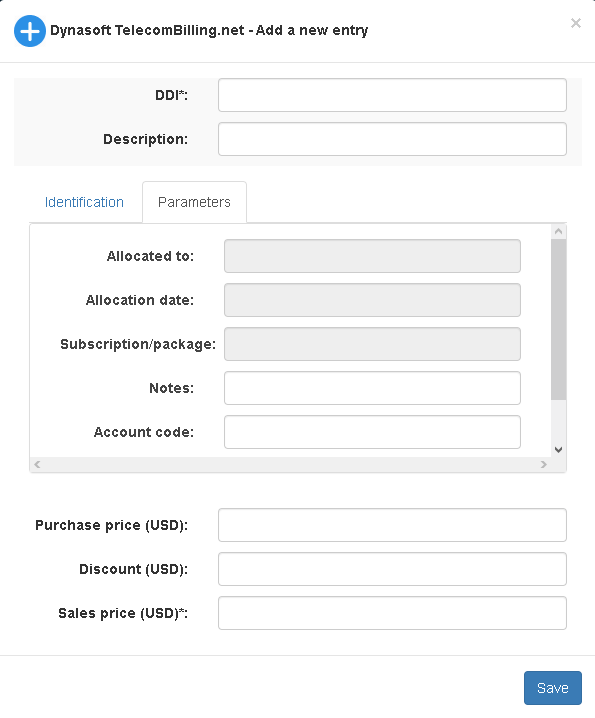
From top to bottom:
- Enter a number
- A description
- Link it with a supplier account
- Date when the DDI was acquired
- Product category
- Country
- Customer the DDI was allocated to
- Allocation date when this was made
- Subscription/package linked to the number
- Notes
- Account code used to set the item in Accounts (Accounting add-on only)
- Select if the DDI should be returned when the end date of its package is reached
- Purchase price
- Discount
- Sales price
The transfer of ownership of a DDI from one customer to another is done via their SN pages or by removing a DDI from an allocated subscription/package of one customer to another. Provided the DDI can be returned to the pool of DDIs, clicking ‘Return DDI’ here will remove this association and return the DDI to the pool of available DDIs.
3.7.2. Inventory
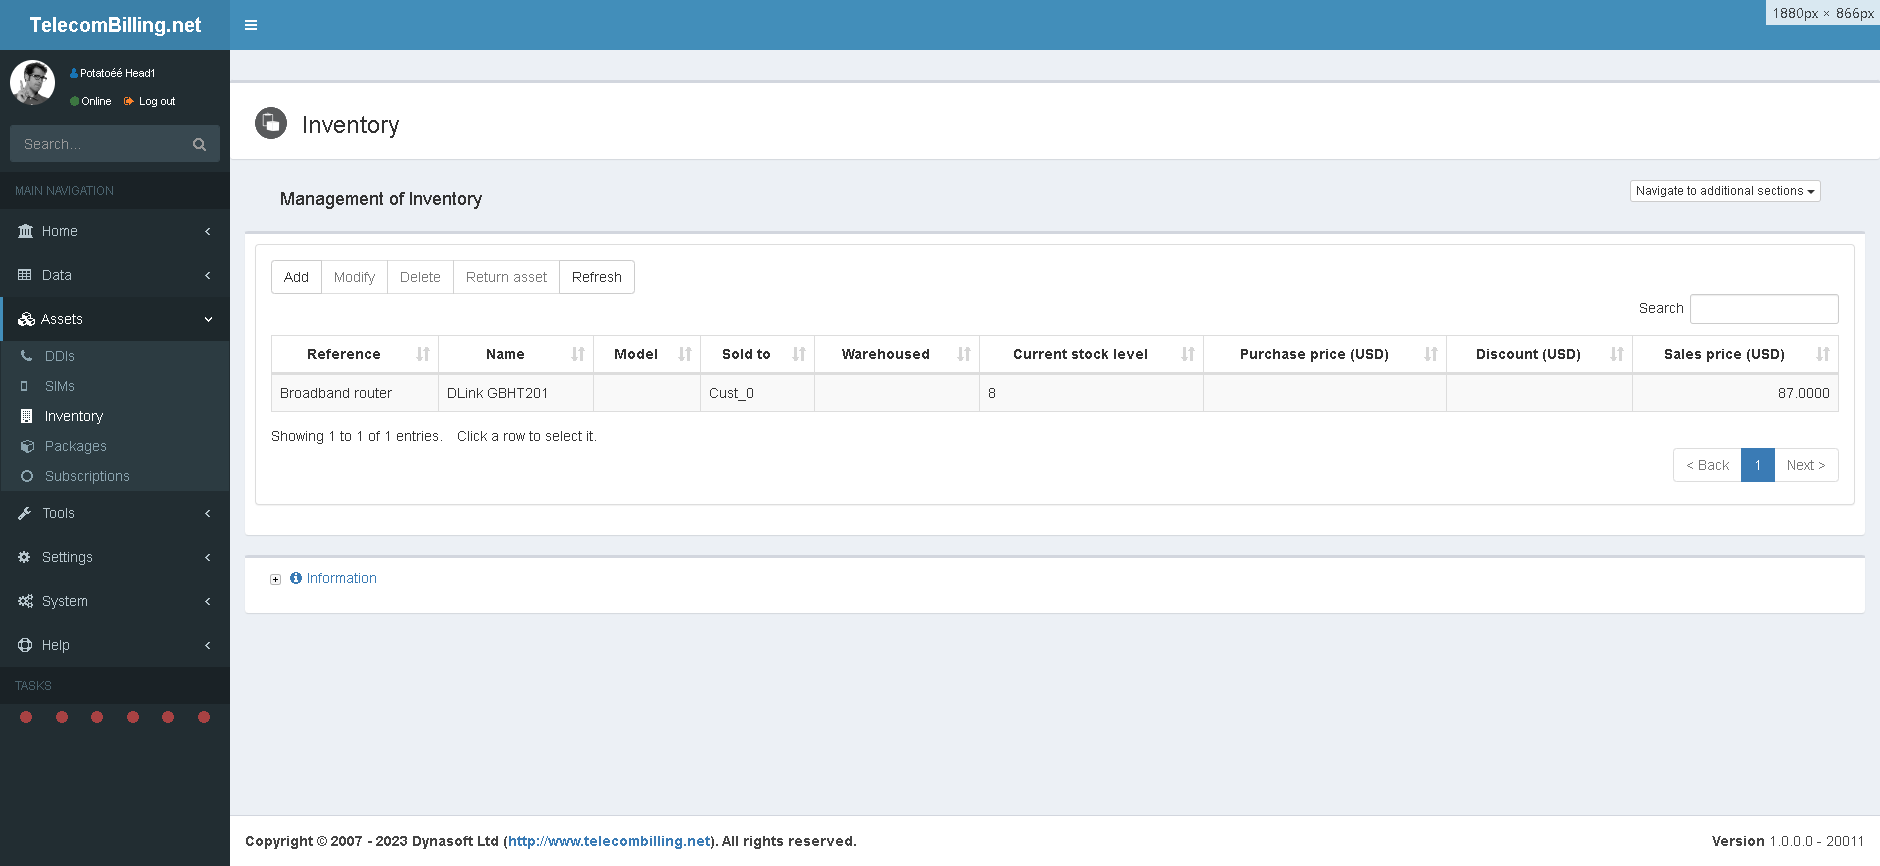
Access: Landing page > Assets > Inventory
Inventory assets can be entered via this page along with 22 parameters for each one of these assets. The status, warehoused and categories parameters are configured in the settings menu of the portal. Furthermore, the assets entered here are accessible directly from the ‘packages and subscriptions’ page in each customer’s page so that they can be sold to the customers.
Click ‘Add’ to open a new form:
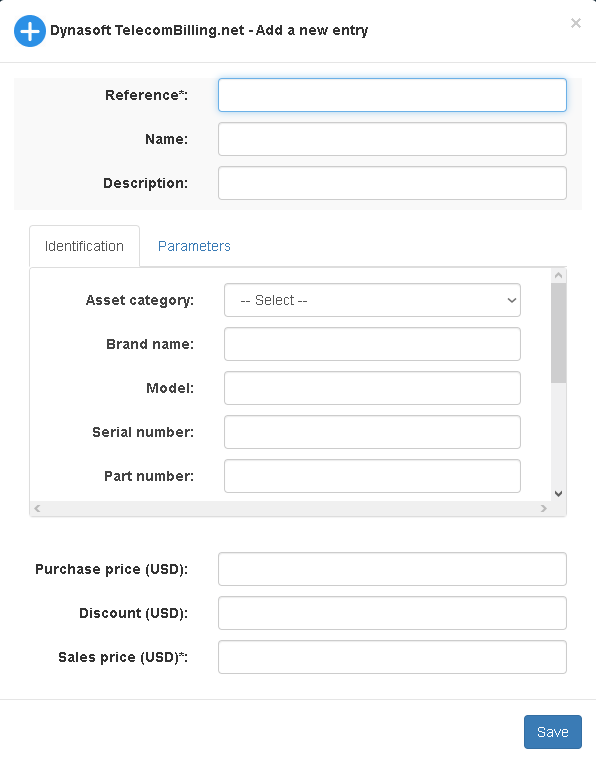
From top to bottom:
- Reference to give to the item
- Name
- Description
- Asset category
- Brand name
- Model
- Serial number
- Part number
- Product category
- Date when the item was acquired
- Supplier
- Supplier reference
- Supplier invoice
- Customer the item was sold to
- Date it was sold
- Notes
- Account code used in Accounting (Accounting add-on only)
- Return asset if the item is allocated to a customer as part of a subscription or package and should be returned when the end date has been reached
- Status
- Warehoused
- Re-order level
- Quantity on order
- Current stock level
- Purchase price
- Discount
- Sales price
3.7.3. Packages

Access: Landing page > Assets > Packages
Packages are also called bundles and are items sold to customers that include various components. Virtually everything that is available for sale in your company can be included in a package from voice to data, other subscriptions, items from inventory, DDIs and SIMs.
Add as many packages as are required using the controls provided.
Click ‘Add’ to open a new form:
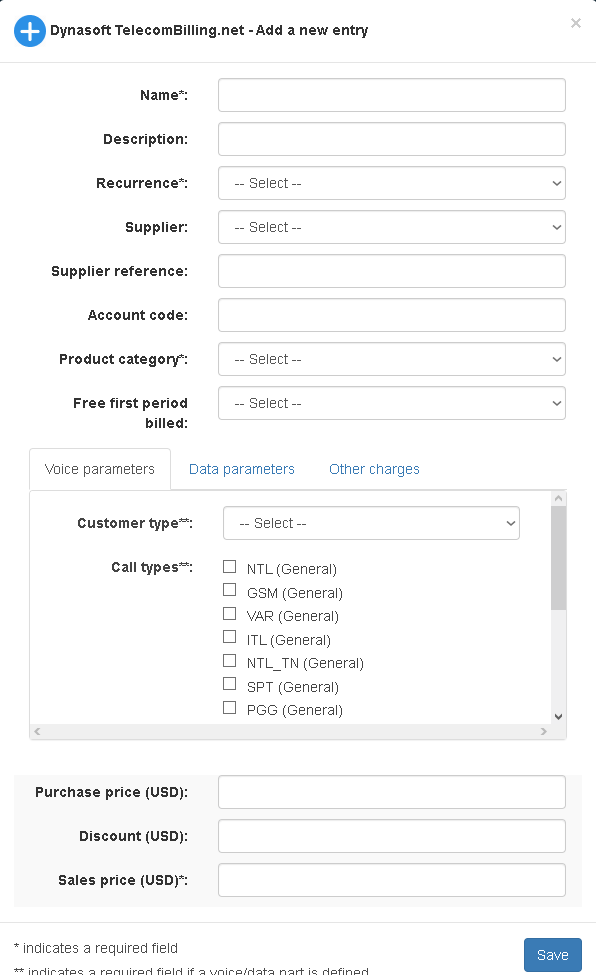
From top to bottom:
- Name: name will show on the customers’ invoices where relevant
- Description: description will show on the customers’ invoices where relevant
- Recurrence
- Supplier
- Supplier reference
- Account code used in Accounting (Accounting add-on only)
- Product category
- Customers who are allocated this package will get their first period billed free
- Voice paramters:
- Customer type: The type of the customer receiving the calls (important: not the customer making the calls. Select ‘All’ if a package applies to all customer types)
- Call types: the call types that should be linked to each package. Use the controls under heading ‘Identify the call types’ to add or remove call types to and from each package. Care should be taken not to add packages that are likely to clash or overlap each other. For instance, call types should be used once per package and per customer to avoid any conflict when the customer’s calls are finally billed.
- Package is defined as: write 0 in the number of minutes of a package to signify that there is no such limit to the package.
- Number of minutes/calls or cost of calls: This is the number of minutes/calls or cost of calls depending on whether the package provided “free” minutes, calls or a set cost
- Data parameters
- Customer type: same as for voice parameters
- Package code
- Download/upload ratio
- Package allowance in Bytes
- Excess usage increments in Bytes
- Excess usage cost (USD)
- Other charges
- Subscriptions
- Inventory
- DDIs
- SIMs
- Purchase price
- Discount
- Sales price
The subscriptions added to a package will always appear on the invoices no matter the last date billed or the subscription’s recurrence.
Modifying the price of a package will modify the price of any such package that has been added to a customer’s account.
‘No recurrence’ is similar to ‘One time’ but here the entire period is billed as one period from the activation date to the item’s deactivation date. The difference is terms of invoicing will be that no-recurrence items have an end date on the customers’ invoices whereas one-time items have a single date.
By default, all costs of subscriptions are not pro-rated when billed. In order to pro-rate subscriptions, ensure option ‘2.c’ is ticked in point ‘8.A’ of the configuration page.
The way that the excess fee is worked out is the portal will apply the ratio to the totals of bytes downloaded and uploaded and the fee is then applied to whichever one is over the limit.
Here is how it does it:
From a price list:
Maximum usage allowed (bytes): 107374182400
Excess usage increment (bytes): 1073741824
Excess usage cost: 1.3
Download/upload ratio: 3:1
Usage was:
Total bytes downloaded: 117211803541
Total bytes uploaded: 41551825396
TelecomBilling.Net will work out the excess fee as follows:
x = 107374182400 * 3
y = 107374182400 * 1
a = 117211803541 – x
b = 41551825396 – y
The highest value between a and b will be used to work out the fee as follows:
Assuming a > b, then k = 1.3 * (a / 1073741824) where k will be the fee for excess usage.
Write 0 for the fields Package allowance, Excess usage increments, Excess usage cost, Download/upload ratio if a package is unlimited.
For a recurrence ‘One time’, the elements Package allowance, Excess usage increments, Excess usage cost, Download/upload ratio will be ignored.
Whenever billing work is done, TelecomBilling.Net marks those calls that fall within a package and makes them unavailable either to another subsequent billing period for the package or to a bill run that goes back in time to a period that predates the last correct bill run that was done where the package appeared. This is to ensure that calls are not given away with a package more than once and to enforce packages scrupulously. The reasoning is that one billed period is supposed to follow another chronologically and calls that were given away with a package should not be expected to be given more than once.
So, for instance if you ran a creation of an invoice in from 01 May 2023 to 31 May 2023 and got a package previously to show up with an end date of the 30 April 2023, the package will appear for the month of May as intended and the calls that fall within this package won’t be included in the totals of the summary part of the Voice services section. This is how we expect it. However, if you then tried to bill the same period again, the package will not show and the calls that had been marked as belonging to the May period will not be billed individually and will not increase the totals under the Voice services section in invoices. For the package to carry on showing, you will have to bill the period that follows the last full period where the package appeared, in this case the month of June.
In order to reset a package and get the calls that were included with a package to show again, reset the start date for a package in the customers page (click on ‘Reset the subscriptions and packages’ -This will reset all your subscriptions.) or the customer’s account (packages and subscriptions pages, click on the subscription or package and select ‘Reset dates only’, then ‘OK’ to confirm). Note resetting a package will only reset the dates and the voice and data parameters of a package.
If the package has a DDI or SIM and it is being deleted, then the DDI or SIM will be returned to the pool of DDIs or SIMs and the corresponding SN will also be deleted from whatever customer that had this DDI/SIM as a SN. The same goes for transferring a DDI or SIM from one package to another: the original general package will be deleted if it only holds that one DDI or SIM. If the package holds other items than the DDI or SIM than it will be simply removed from the package and transferred across to the other package. The corresponding SN will be deleted from the customer that was holding the DDI/SIM and transferred to the customer
The prices entered have to be free of any sales tax.
3.7.4. Subscriptions
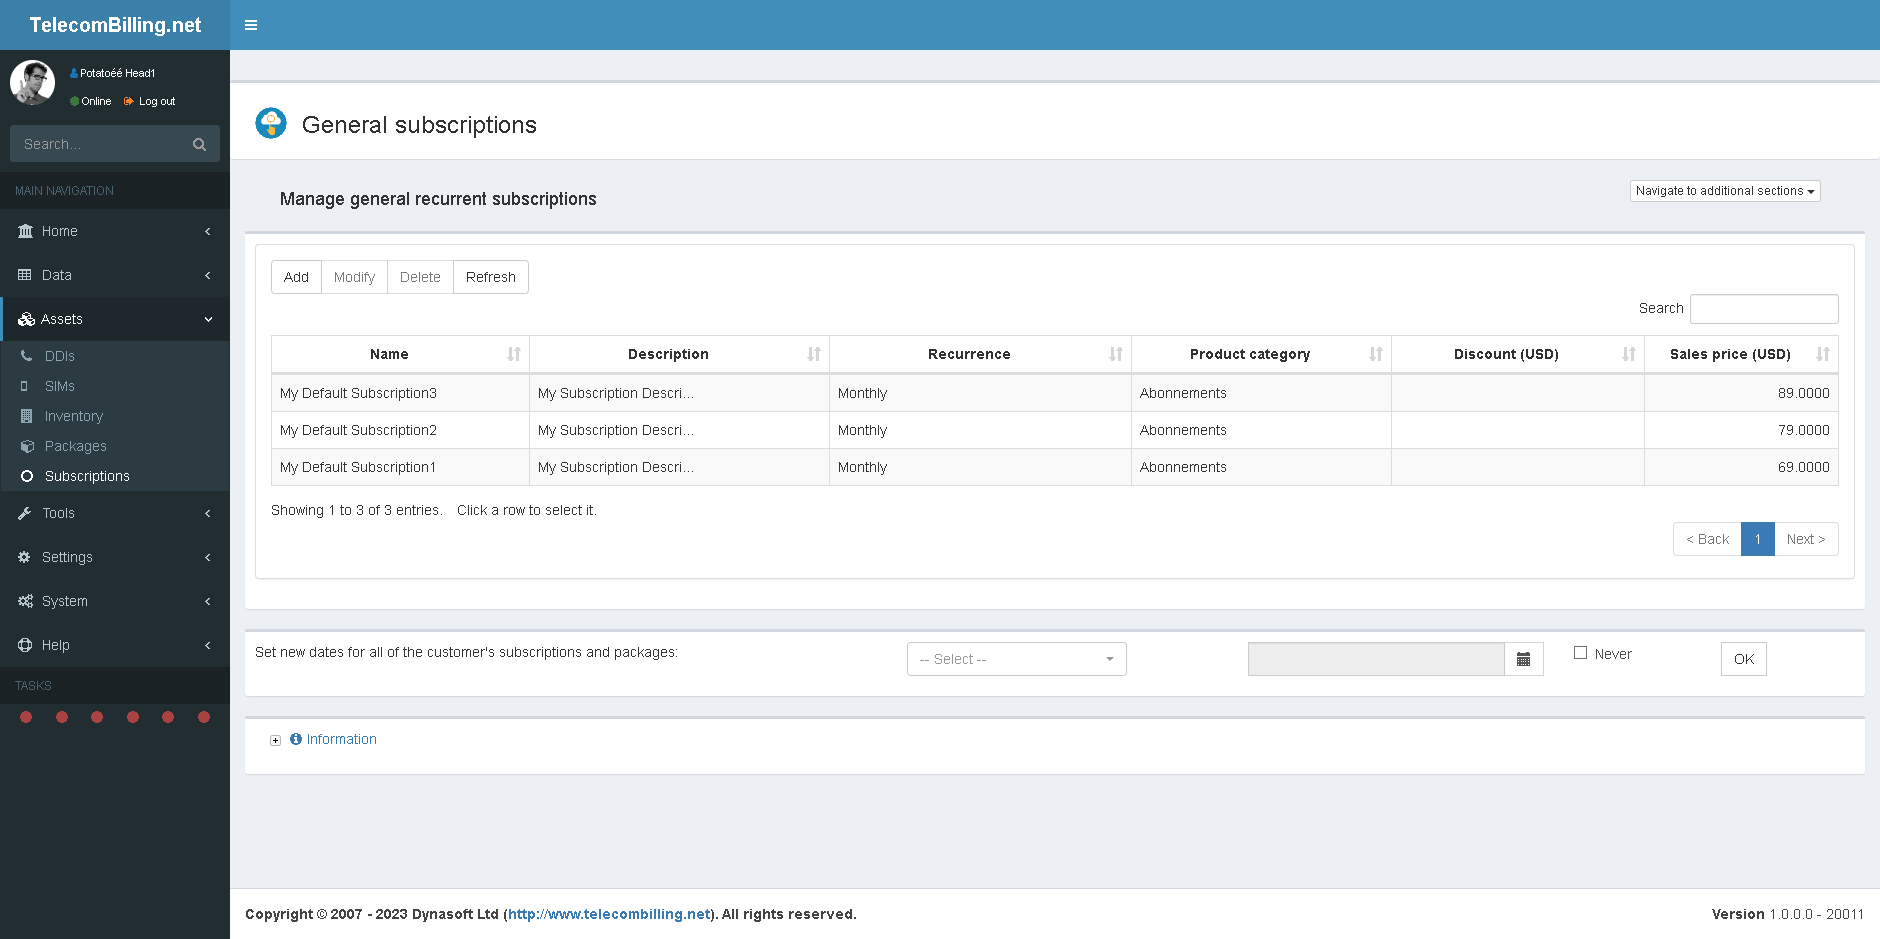
Access: Landing page > Assets > Subscriptions
It is possible to add items with TelecomBilling.Net that are not related to phone calls, data or recurrent service items such as: Internet subscriptions, phone cards, etc… Use this interface for this purpose. Items in this table are available to all your customers, via the customer’s subscriptions page. To add an item, use the controls above the table.
Click ‘Add’ to open a new form:

From top to bottom:
- Name
- Description
- Recurrence
- Supplier
- Supplier reference
- Account code used in Accounting (Accounting add-on only)
- Product category
- Customers who are allocated this package will get their first period billed free
- Purchase price
- Discount
- Sales price
‘No recurrence’ is similar to ‘One time’ but here the entire period is billed as one period from the activation date to the item’s deactivation date. The difference is terms of invoicing will be that no-recurrence items have an end date on the customers’ invoices whereas one-time items have a single date.
By default, all costs of subscriptions are not pro-rated when billed. In order to pro-rate subscriptions, ensure option ‘1.a’ is ticked in point ‘8.A’ of the configuration page.
If the subscription is a DDI or SIM and it is being deleted, then the DDI or SIM will be returned to the pool of DDIs or SIMs and the corresponding SN will also be deleted. The same goes for transferring a DDI or SIM from one subscription to another. The original general subscription will be deleted.
The prices entered have to be free of any sales tax.
3.7.5. SIMs
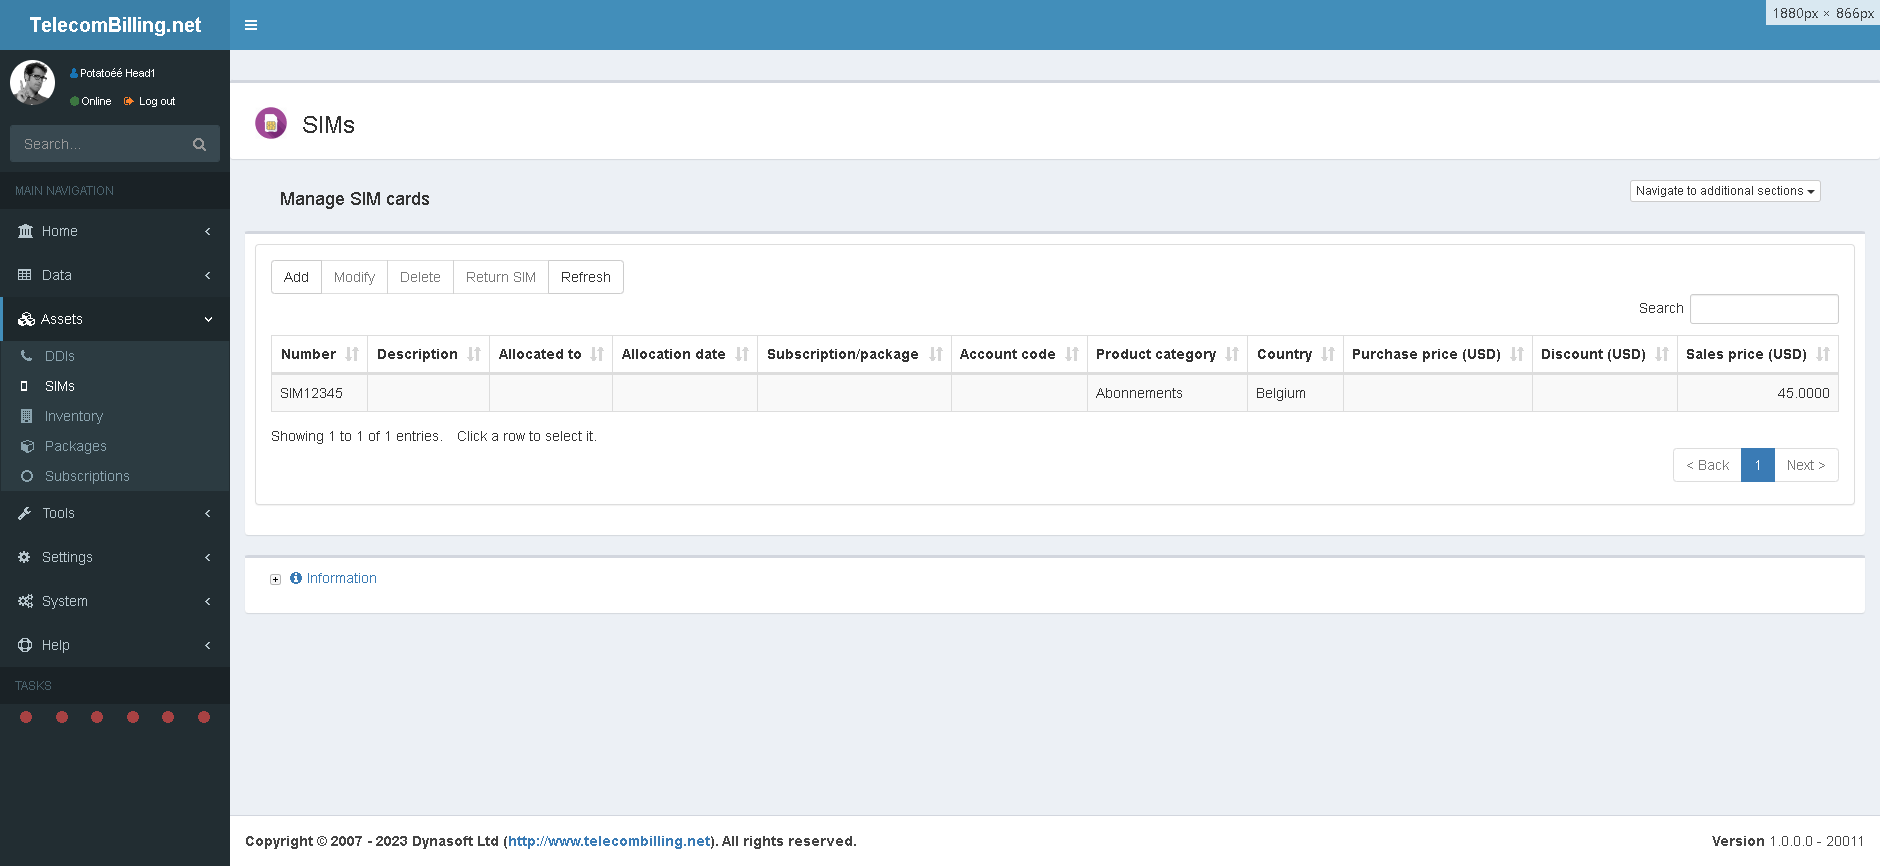
Access: Landing page > Assets > SIMs
Use this page to enter SIM numbers.
SIMs numbers can be entered via this page along with a dozen parameters for each one of these numbers. The numbers entered here are accessible directly from the SN page inside in each customer’s page so that they can be assigned to the customer or these can be added to a general packages.
Click ‘Add’ to open a new form:
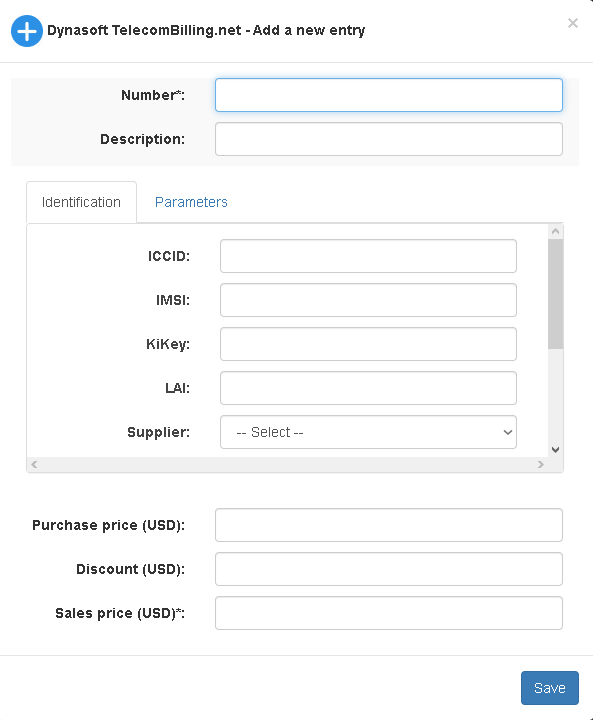
From top to bottom:
- Enter a number
- A description
- ICCID
- IMSI
- KiKey
- LAI
- Link it with a supplier account
- Reference that was given by the supplier
- Date when the SIM was acquired
- Product category
- Country
- Customer the SIM was allocated to
- Allocation date when this was made
- Subscription/package linked to the number
- Notes
- Account code used to set the item in Accounts (Accounting add-on only)
- Other field #1
- Other field #2
- Other field #3
- Select if the SIM should be returned when the end date of its package is reached
- Purchase price
- Discount
- Sales price
The transfer of ownership of a SIM from one customer to another is done via their SN pages or by removing a SIM from an allocated subscription/package of one customer to another. Provided the SIM can be returned to the pool of SIMs, clicking ‘Return SIM’ here will remove this association and return the SIM to the pool of available SIMs.
3.8. System
3.8.1. User accounts
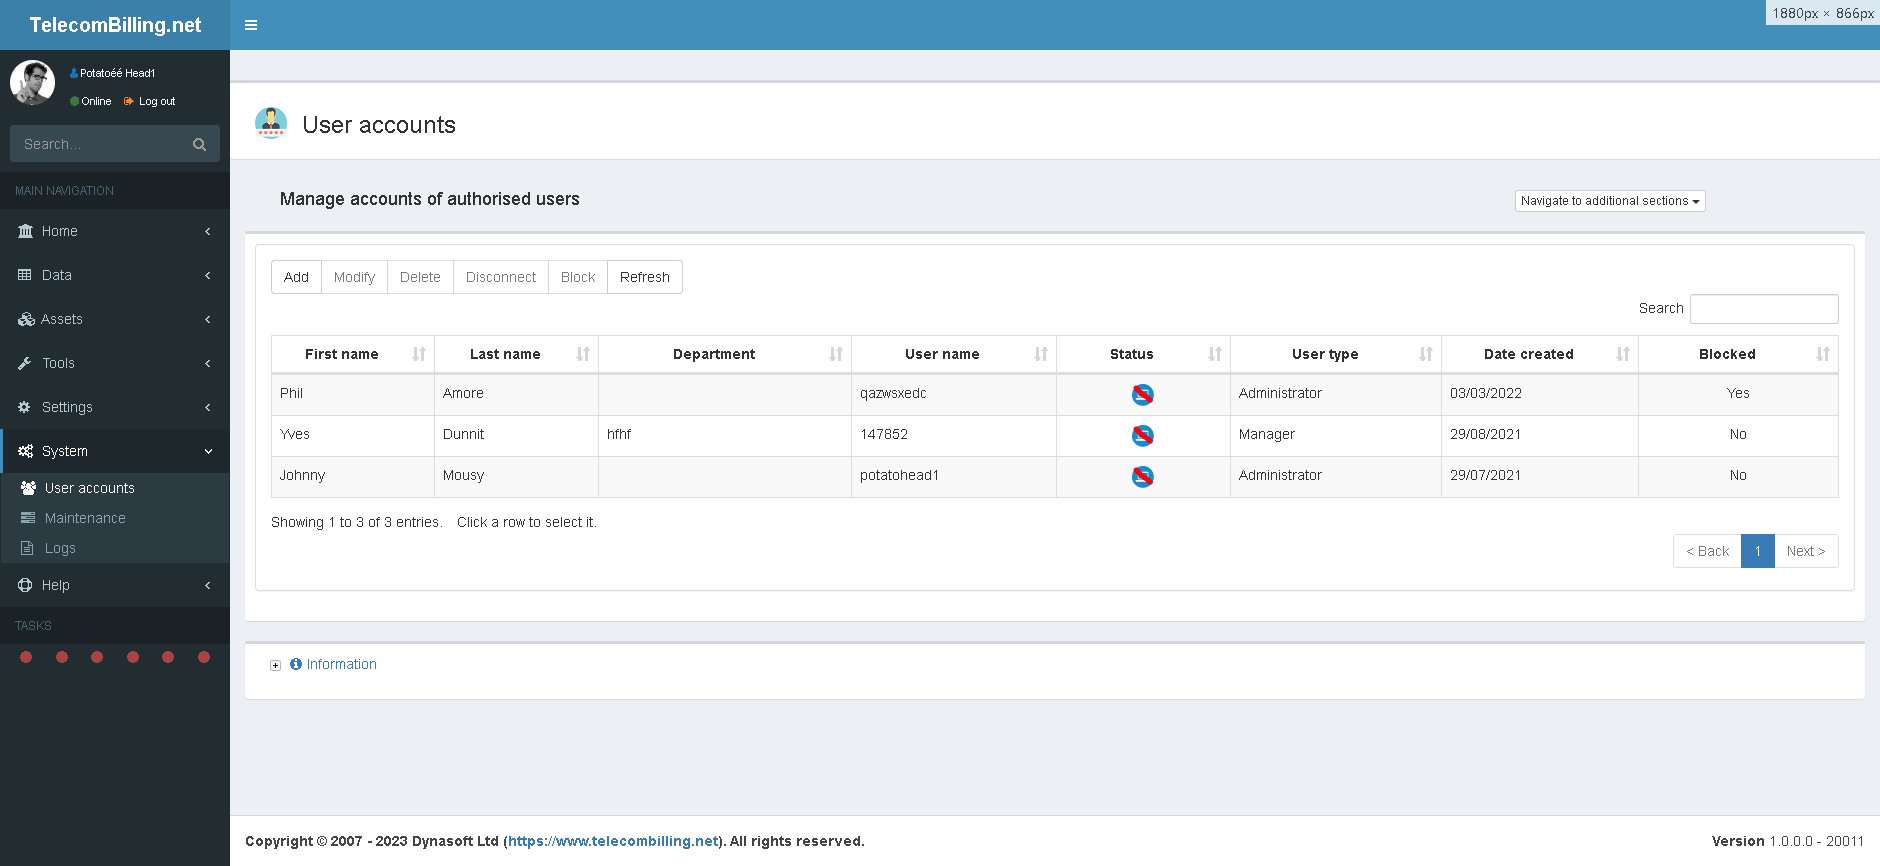
Access: Landing page > System > User accounts
Use this page to create user accounts and allocate access rights to them via the third tab on the details form of an account.
Click ‘Add’ to open a new form:
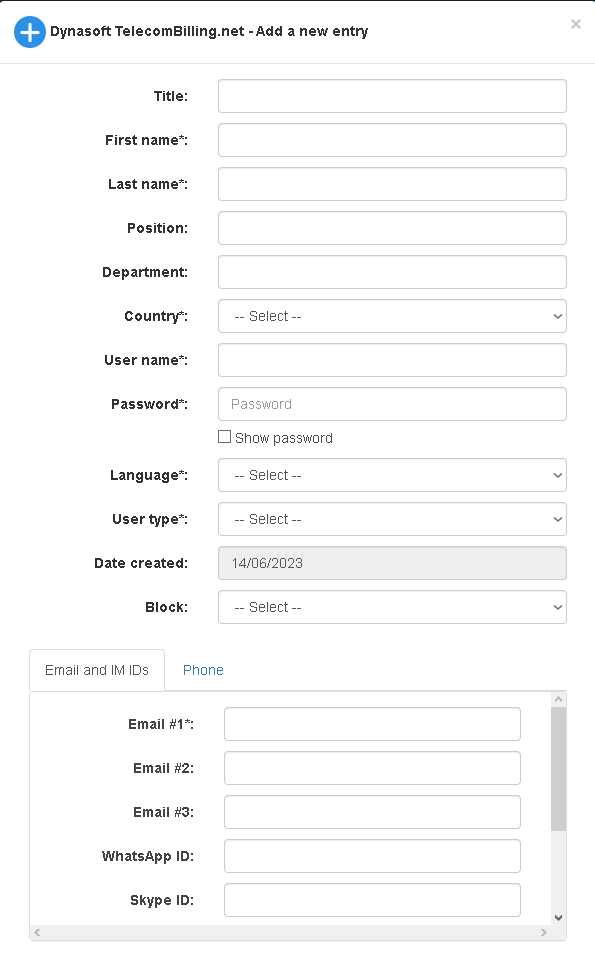
From top to bottom:
- Title
- First name
- Last name
- Position
- Department
- Country
- User name
- Password
- Language: this will be the language of the captions when they log in
- User type: setting this will pre-tick certain rights under the ‘Rights’ tab but only when creating new accounts
- Date created
- Block the user so they cannot log in
- Email and IM IDs
- Email #1
- Email #2
- Email #3
- WhatsApp ID
- Skype ID
- Other ID #1
- Other ID #2
- Other ID #3
- Phone
- Work phone
- Home phone
- Mobile
- Other phone #1
- Other phone #2
- Other phone #3
- Access rights
- Lock down this user account with what they can and cannot do in the portal
Use the ‘Disconnect’ button to force a user to log out. Use the ‘Block/Unblock’ button to allow a user to log in or not.
3.8.2. Maintenance
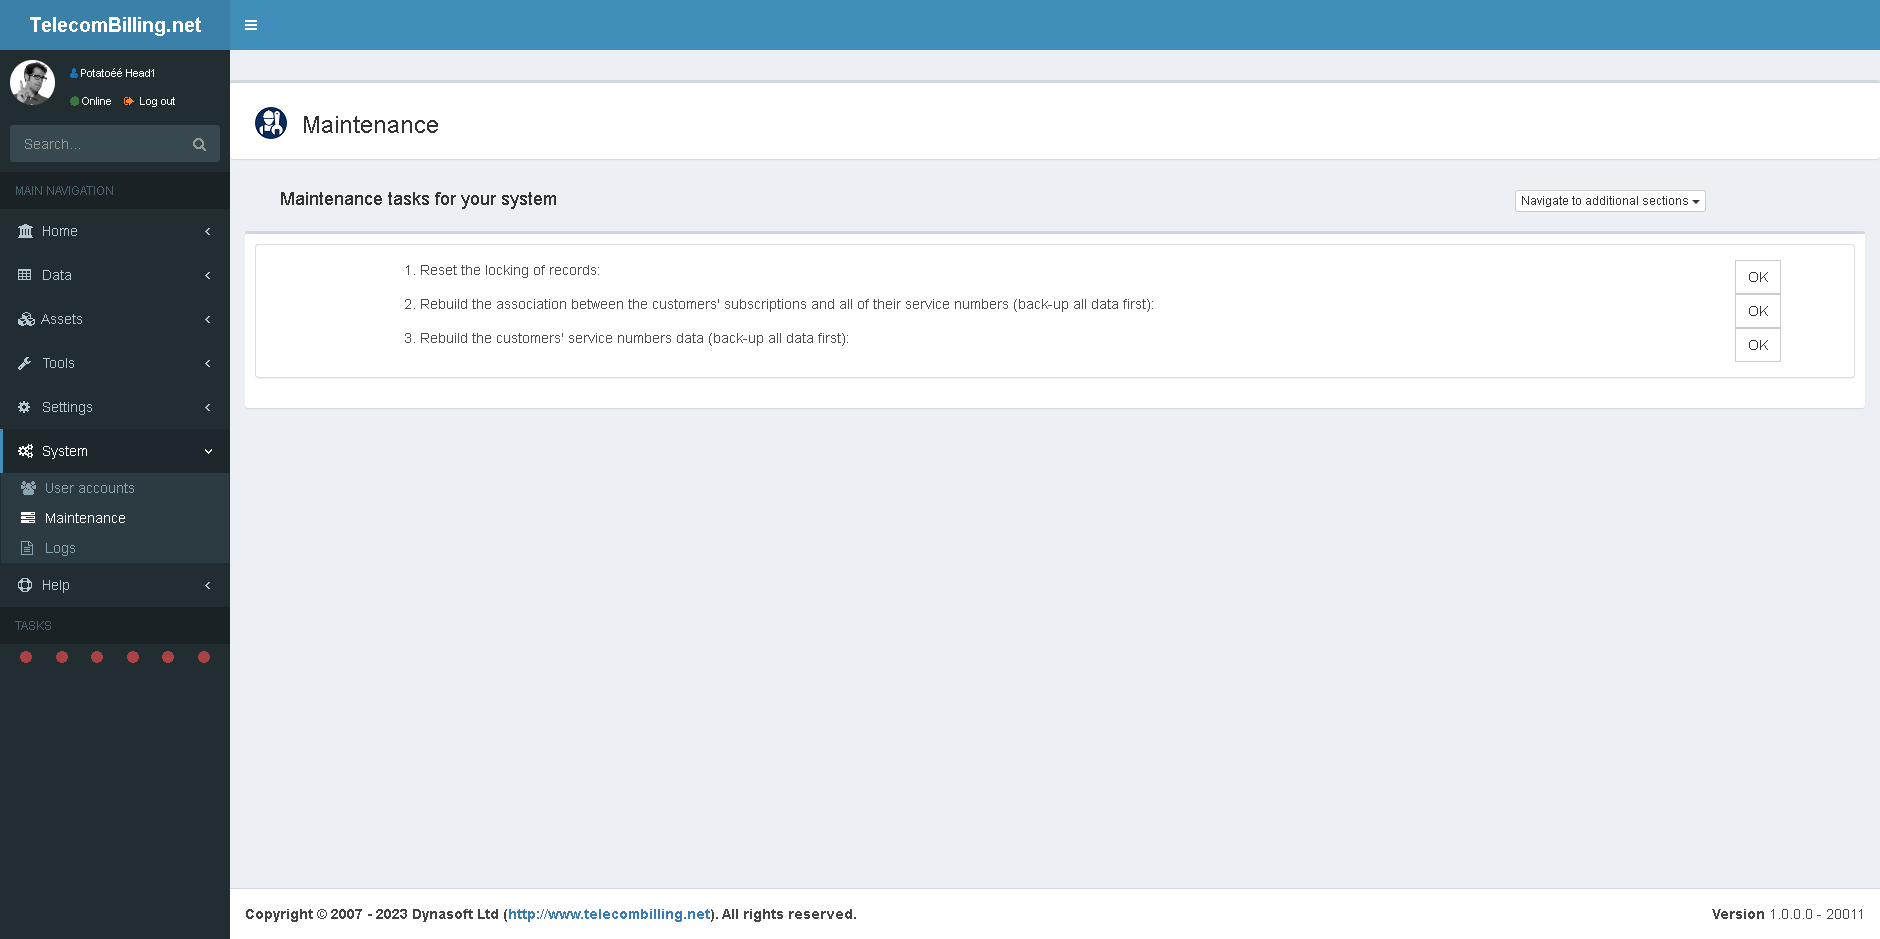
Access: Landing page > System > Maintenance
- Reset the system variables that are used for managing user record locks.
- Reset and rebuild the association between a customer’s subscriptions/packages and all their SNs.
- Reset and rebuild the customer SNs in case these fail to bill.
3.9. Help
3.9.1. Manual
Link to your manual.
3.9.2. Guide
Link to your guide with help on how to use the default data provided with the portal and create your first invoice
3.9.3. Support
Get help from us via email or live chat.
3.9.1. About…
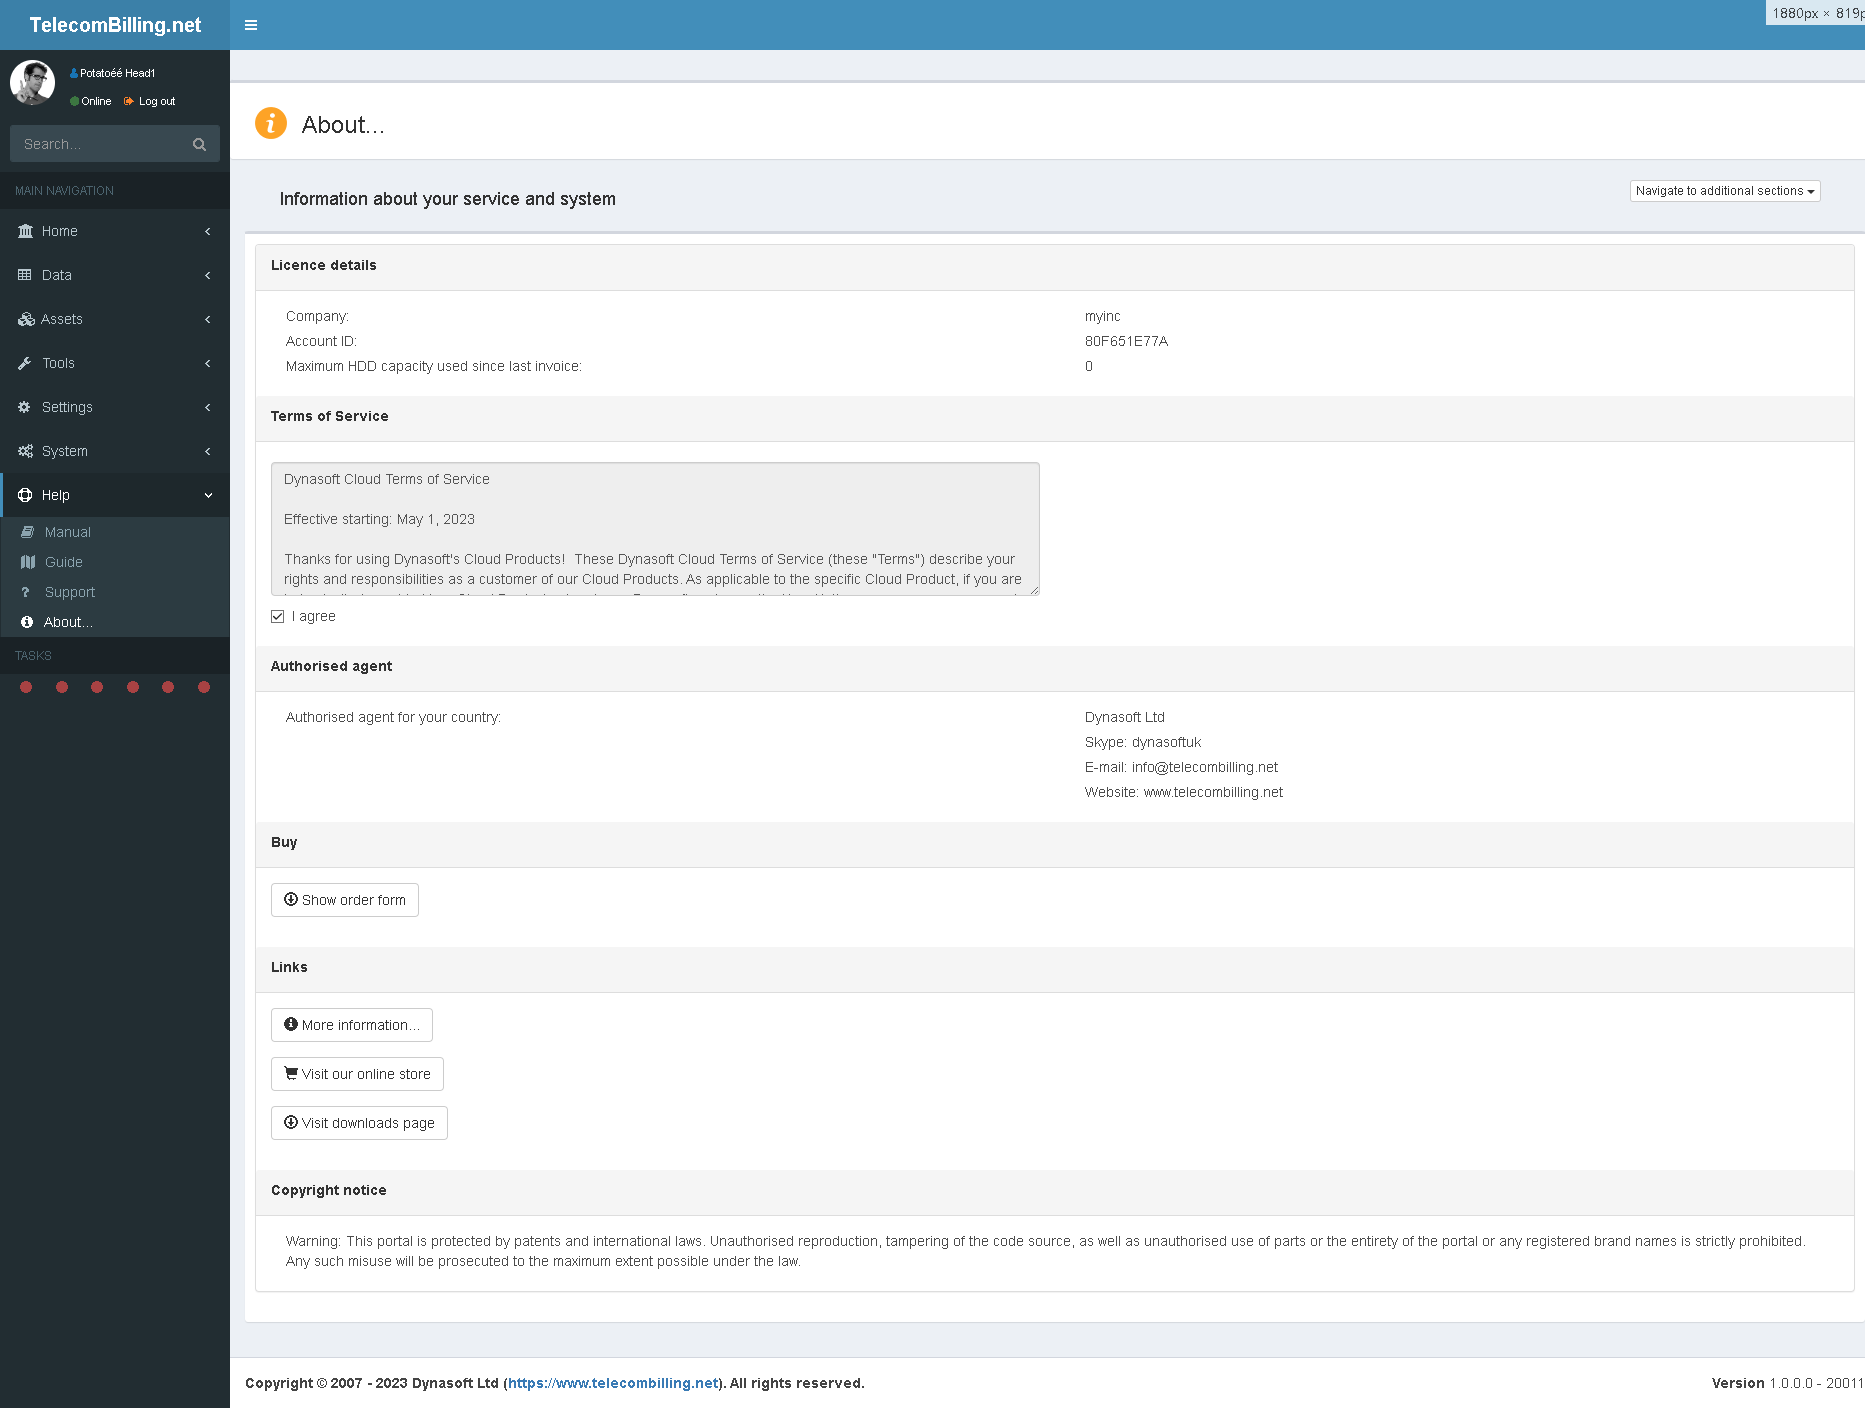
Access: Landing page > Help > About
Access more information about your portal and our services and to purchase products linked to TelecomBilling.Net from our Website.
3.10. Help
3.11. Troubleshooting
A. Problems found when billing and their solutions:
- “The voice calls tab under the Billing page’s controls tab gets filled with calls for only some of the SNs or none at all”. The possible solutions to this are as follows:
- Click option ‘7.A.6’ in the configuration page. This should rebuild all SNs.Ensure you identified correctly how numbers calling and called are displayed in the CDR format import wizard.
- Ensure the SNs’ dialling codes are not included in the SNs that are written in the customers’ accounts as dialling codes need to appear in their own boxes under the SN.
- Ensure the SN are active by ticking the tick box at top of a SN’s modify form.
- “Calls are found in my CDRs, but these are not rated.” Possible resolutions include:
- A call type column has been identified in the CDR format but these have not been defined in the price lists associated with the customer(s) that is being billed and/or in the configuration or in a supplier account.
- Ensure that all destinations in your price lists have a country code. This includes national destination.
- Check that all SNs are associated with one or more price lists and one or more CDR formats in the customers’ accounts (SN page).
- “Sending invoices to accounting from the billing page does not work.” Ensure that a number of options have been selected:
- The billing option “Make the session an official one and save all its data” under the billing page. Option ‘5.b’ and ‘5.c’ in point ‘8.A’ of the configuration has been selected. Uncheck option ‘j’, under point ‘4.B’ in customer accounts. Ensure that the program is connected to accounting in settings page.
- Ensure that the customer is in accounting.
- “The rated data and the reference the last CDR file the portal is working on, get deleted from the system in the billing page when I click to stop rating CDR data”. This is by design. If the user clicks to stop the rating of CDR data, the portal will delete all data associated with the last CDR file it was working on so only fully scanned files are kept in the system. To avoid this, stop the rating process when the portal shows “Waiting for new CDRs…” on the user interface. This will not make the portal delete anything.
- “Packages don’t show”:
- Check the call types you used to define the package exist in the configuration.
- Check the customer type to which the package applies is correct. Customer type here is the type of the callee not the caller.
- Make sure the package has been ticked in the customer’s account.
- Make sure the packages (and subscriptions) are reset. Check chapter 3.4.2.1 for more.
- “Package do show but the allowances are not applied to the user’s calls”:
- Check the items in previous point are correct.
- Delete the package and enter it again and associate it with the customer again.
- “What are the allowed characters in passwords and user names” The allowed characters are all alphanumeric characters along with ‘!’, ‘#’, ‘$’, ‘%’, ‘&’, ‘?’, ‘_’.
- “Some of my national calls are being billed as international calls”. The possible solutions to this are as follows:
- Your price list does not have the country code for all destinations, including national codes
- In the definition of the CDR format, if you defined national calls using the lengths of possible numbers, there might be a length missing.
If you use call types, you might need to review these in your price lists to ensure they match call types found in your CDR data.
B. TelecomBilling.Net error codes:
- 1001: The file is empty; the wrong separator was selected or the CDR data does not have the same number of columns that were defined in its format.
- 1002: General error found. Check your configuration data.
- 1003: There seems to be a CDR file that is using an unidentified format. Check the file as not all calls might have been rated correctly.
- 1004: A directory seems to be missing or the path to a CDR can’t be found on your remote server.
- 1005: Unmatched items have been found. Only a limited subset of these is given in the log. To gather a list of all such items in a separate text file, click billing options ‘b’ and/or ‘l’. The text file is called ‘unrateditems.txt’ and is found under each CDR format in the CDR Data page.
- 1006: One or more numbers calling have a format which is not consistent with parameter c identified in the CDR’s configuration. It is recommended to log or save the unmatched call using billing options ‘b’ and ‘l’ to save all the lines involved.
- 1007: Check the configuration of the format of dates. The CDR shown under column EntryCaption3 has an unexpected date format. Make sure you are using the right case when it comes to defining the month and hour parts of the string (mm vs MM, hh vs HH,…). See this link for more information: https://docs.microsoft.com/en-us/dotnet/standard/base-types/custom-date-and-time-format-strings.
- 1008: A general directory could not be found on the remote server.
- 1009: A voice call was not picked up because it is not associated with a known customer.
- 1010: A file that should have contained the date in its file name does not.
- 1011: Check that the customer’s purchase price list has the following: A dialling code for the number called, destinations are marked as active, all destinations have a call type that match those identified in the configuration, if a call type field was identified in the CDR format that these call types exist in the configuration, all dialling codes start with the country code including national dialling codes.
- 1012: Same as error #1011 but for a customer’s sales price list rather than a customer purchase price list.
- 1013: The following line contains a SN with no associated price list.
- 1014: There is a risk that calls can’t be found for the following SN. The reason might be that you identified SNs incorrectly as some have shown to start with the user’s dialling code. Ensure none of the SNs identified in the Customers page show the country dialling codes.
- 1015: The following series of character has an incorrect date format.
- 1016: No data found.
- 1017: No flag for inbound/outbound calls was found in the following CDR line.
- 1018: Number called is empty (Customer cost analysis).
- 1019: Number called is empty (Carrier cost analysis).
- 1020: Certain pieces of data are missing from the CDR data: the number called, calling or no value was found for the date field.
- 1021: The following CDR file has a number of columns different from the number that was identified when the format for it was imported.
- 1022: Error found during the processing of the retrieval of CDRs.
- 1023: Loading the price lists in memory for the customers that were selected has caused an out of memory error. The programme will now try to rate by querying the database directly instead. Note that this will impact the programme’s performance. Check the price lists for the customers selected to try to reduce the number of lists associated with each customer and the number of destinations in each list.
- 1024: Problems accessing the database in cases where the CDR source is a remote database.
- 1025: No voice items could be found for the customer, a sales price list is missing or not defined or no voice/data CDR format is associated with the customer.
- 1026: No data items could be found for the customer or no data CDR format is associated with the customer.
- 1027: No service items could be found for this customer; no services CDR format is associated with the customer or his price list does not contain the right code and description for the services found.
- 1028: Connection to the database to manage unmatched CDRs failed. The database connection string should be reviewed.
- 1029: Error found during the processing of unmatched CDRs.
- 1030: Wrong price list entered for this customer SN, or this code is not included in customer’s price list.
C. How can I make TelecomBilling.Net run faster? Here are a few pointers:
- Make sure your CDR data only holds the minimum information required for billing. Having redundant data will slow rating speeds.
- Clean up your database: Delete all entries from ProgrammeEvents and ProgrammeLogs tables from your product’s database.
D. Error from Crystal Reports “Page Header plus Page Footer is too large for the page”
This error is due to Crystal Reports which is used to render the programme’s invoices and reports. More information about the nature of this error can be found here.
3.12. Important Notes
A. Your portal uses Crystal Reports files for the invoice templates. Get in touch with us if you need to modify these to best suit your needs or you may ask us to modify them for you for a fee. However, care needs to be used so that the changes you make do not break anything in the Telecom CDR SMDR billing software system and to ensure the reports run fine. We have found that the best way to modify the files is from inside Microsoft’s Visual Studio and not from inside the Crystal Reports IDE. The reports can be modified using Visual Studio 2010 or more recent. It will be necessary to install SAP Crystal Reports for Visual Studio (http://downloads.businessobjects.com/akdlm/cr4vs2010/CRforVS_13_0.exe).
To save the modified file in Visual studio, select save as in the File menu and click no if you are asked if file should be upgraded to a later version of Crystal Reports.
Once you decide to run the modified files with TelecomBilling.Net and if you get any error that relate to this file in the Log page which seemingly cannot be fixed, then send the files to us with written comments on the changes you tried to apply and we can send you the files correctly formatted by return. Note this is only available to customers who have contracted our annual support service.
B. If you wish to modify some of the captions on the portal, you may do so by going to the option ‘4.B.3’ in the Configuration page, download the base file called ‘BaseLanguageFile.txt’, modify what is required and upload the file back to the portal.
Also, never use an old version of the caption file as important errors will arise. Always use the latest one available on TelecomBilling.Net.
C. How to report bugs: Note that in order for bugs to be fixed Dynasoft needs as comprehensive a bug report as possible. Below is the information we will need:
- The exact steps that lead to a bug appearing: what buttons are clicked, in what order, what settings were entered, time of day, date, screenshots of the problems and browser type and version…
- The exact piece of data that is giving problems (i.e., the exact CDR records, customer number and SNs)
- The detailed scenario that was used and that we can use to reproduce the problem and also know the exact outcome that was expected but that was thwarted because of the bug
- A copy of the problem CDR files if necessary
- Zip all files and send all bug reports to support@dynasoft.net or send a download link for the files
- Dynasoft might require to have access to your computer via a remote access programme such as Teamviewer or Anydesk to see what you did that lead to the problem. An alternative would be to send us a video of the problem using software such as VLC.
- Do not send us any sensitive information contained in your files such as customer credit card details, smtp details …
More detailed coverage is given to this topic on this page.
Dynasoft LTD
Copyright © 2007 – 2024